Enduro V5

Enduro V5

DO-IT-ALL PERFORMANCE… RE-BOOSTED

The Enduro returns, designed to perfectly meet the needs of any kiter who wants to rock up at a spot and ride freely, without compromise, whatever the conditions.

Find a dealer
Estimated current manufacturing time: 42 days

ENDURO V5

DO-IT-ALL PERFORMANCE… RE-BOOSTED

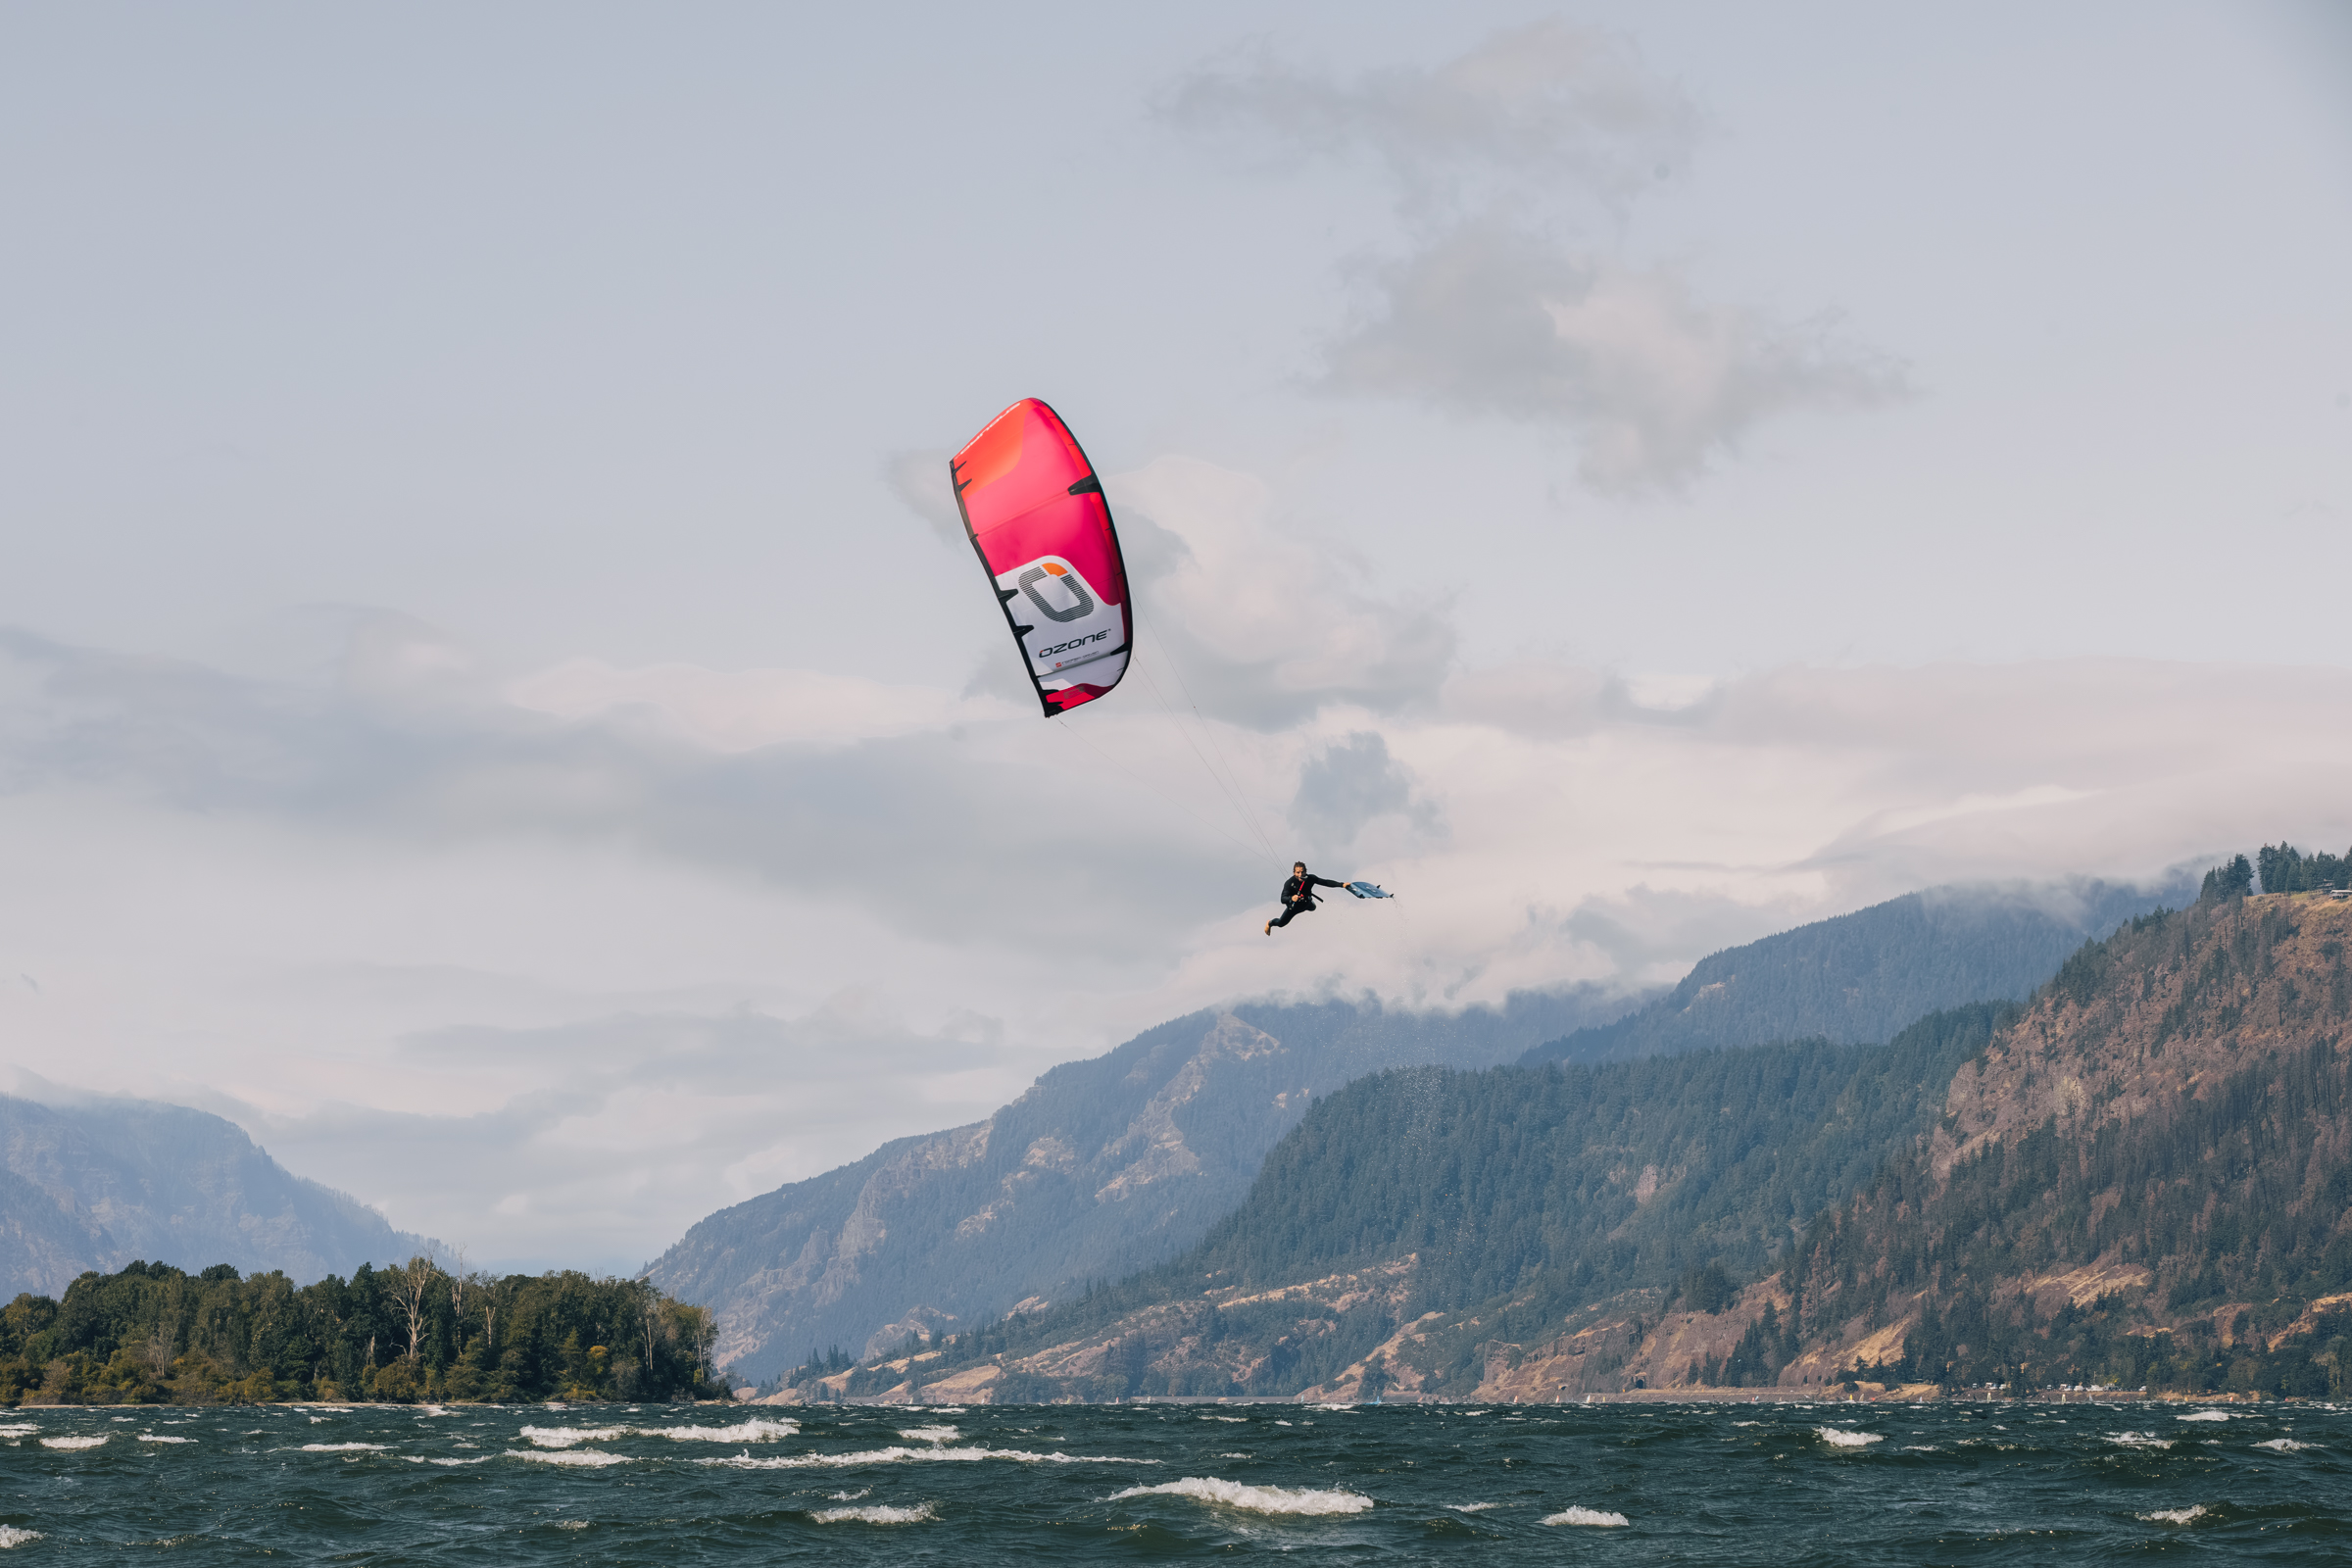
The V5 is still an ‘Enduro’. It’s capable of anything, but the balance in its performance is now further tuned to deliver on the main priority for most freeriders, which is easy access to exciting big air riding.

  • Do-it-all performance, now with extra lift and hangtime
  • THE go-to kite for all styles of shredding
  • Easily accessible for riders of intermediate level and upwards

TUNED UP

  • Vortex inspired features for enhanced rider feedback
  • 16-point bridle connection and Ozone’s typically clean canopy profile
  • Super stable airframe, reduced bar pressure, rapid upwind pull
  • Adjustable settings for freestyle / freeride & big air / wave & foil

READY FOR ANYTHING

  • The most reliable materials
  • Total confidence to send it every session
  • Built with the most reliable materials and meticulous in-house production methods

 GET IN TOUCH TO DEMO ONE

[email protected]

DO-IT-ALL…


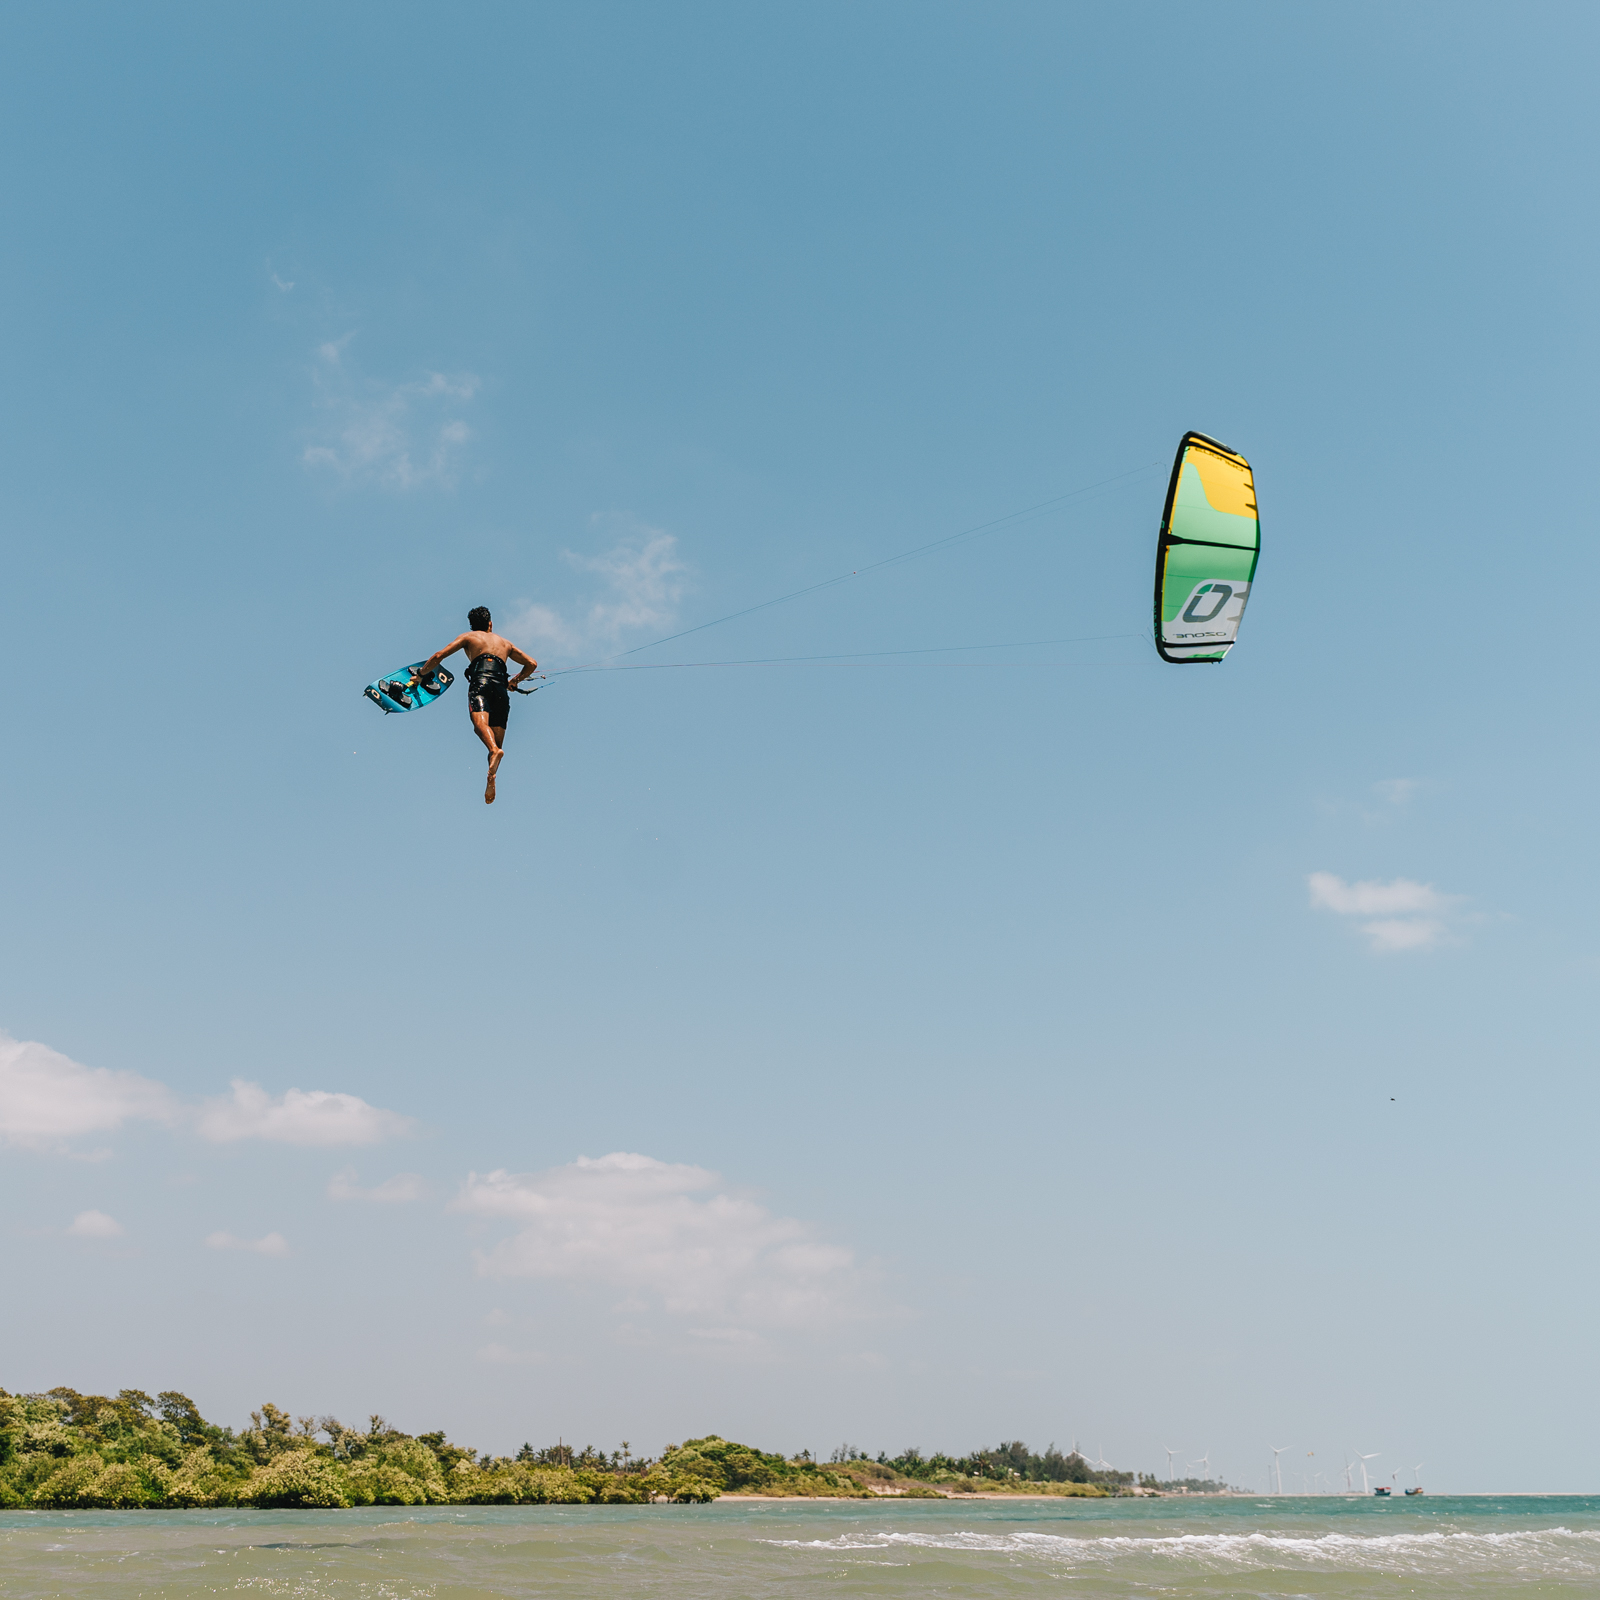
“WHEN YOU BRING THIS KITE TO THE BEACH YOU’RE NOT JUST CARRYING A SWISS ARMY KNIFE, YOU’RE PACKING AN ENTIRE ARSENAL. IT EXCELS IN EVERY SITUATION.”

JESSE RICHMAN
DO-IT-ALL…
 
“WHEN YOU BRING THIS KITE TO THE BEACH YOU’RE NOT JUST CARRYING A SWISS

V5 – THE ESSENTIAL SELECTION

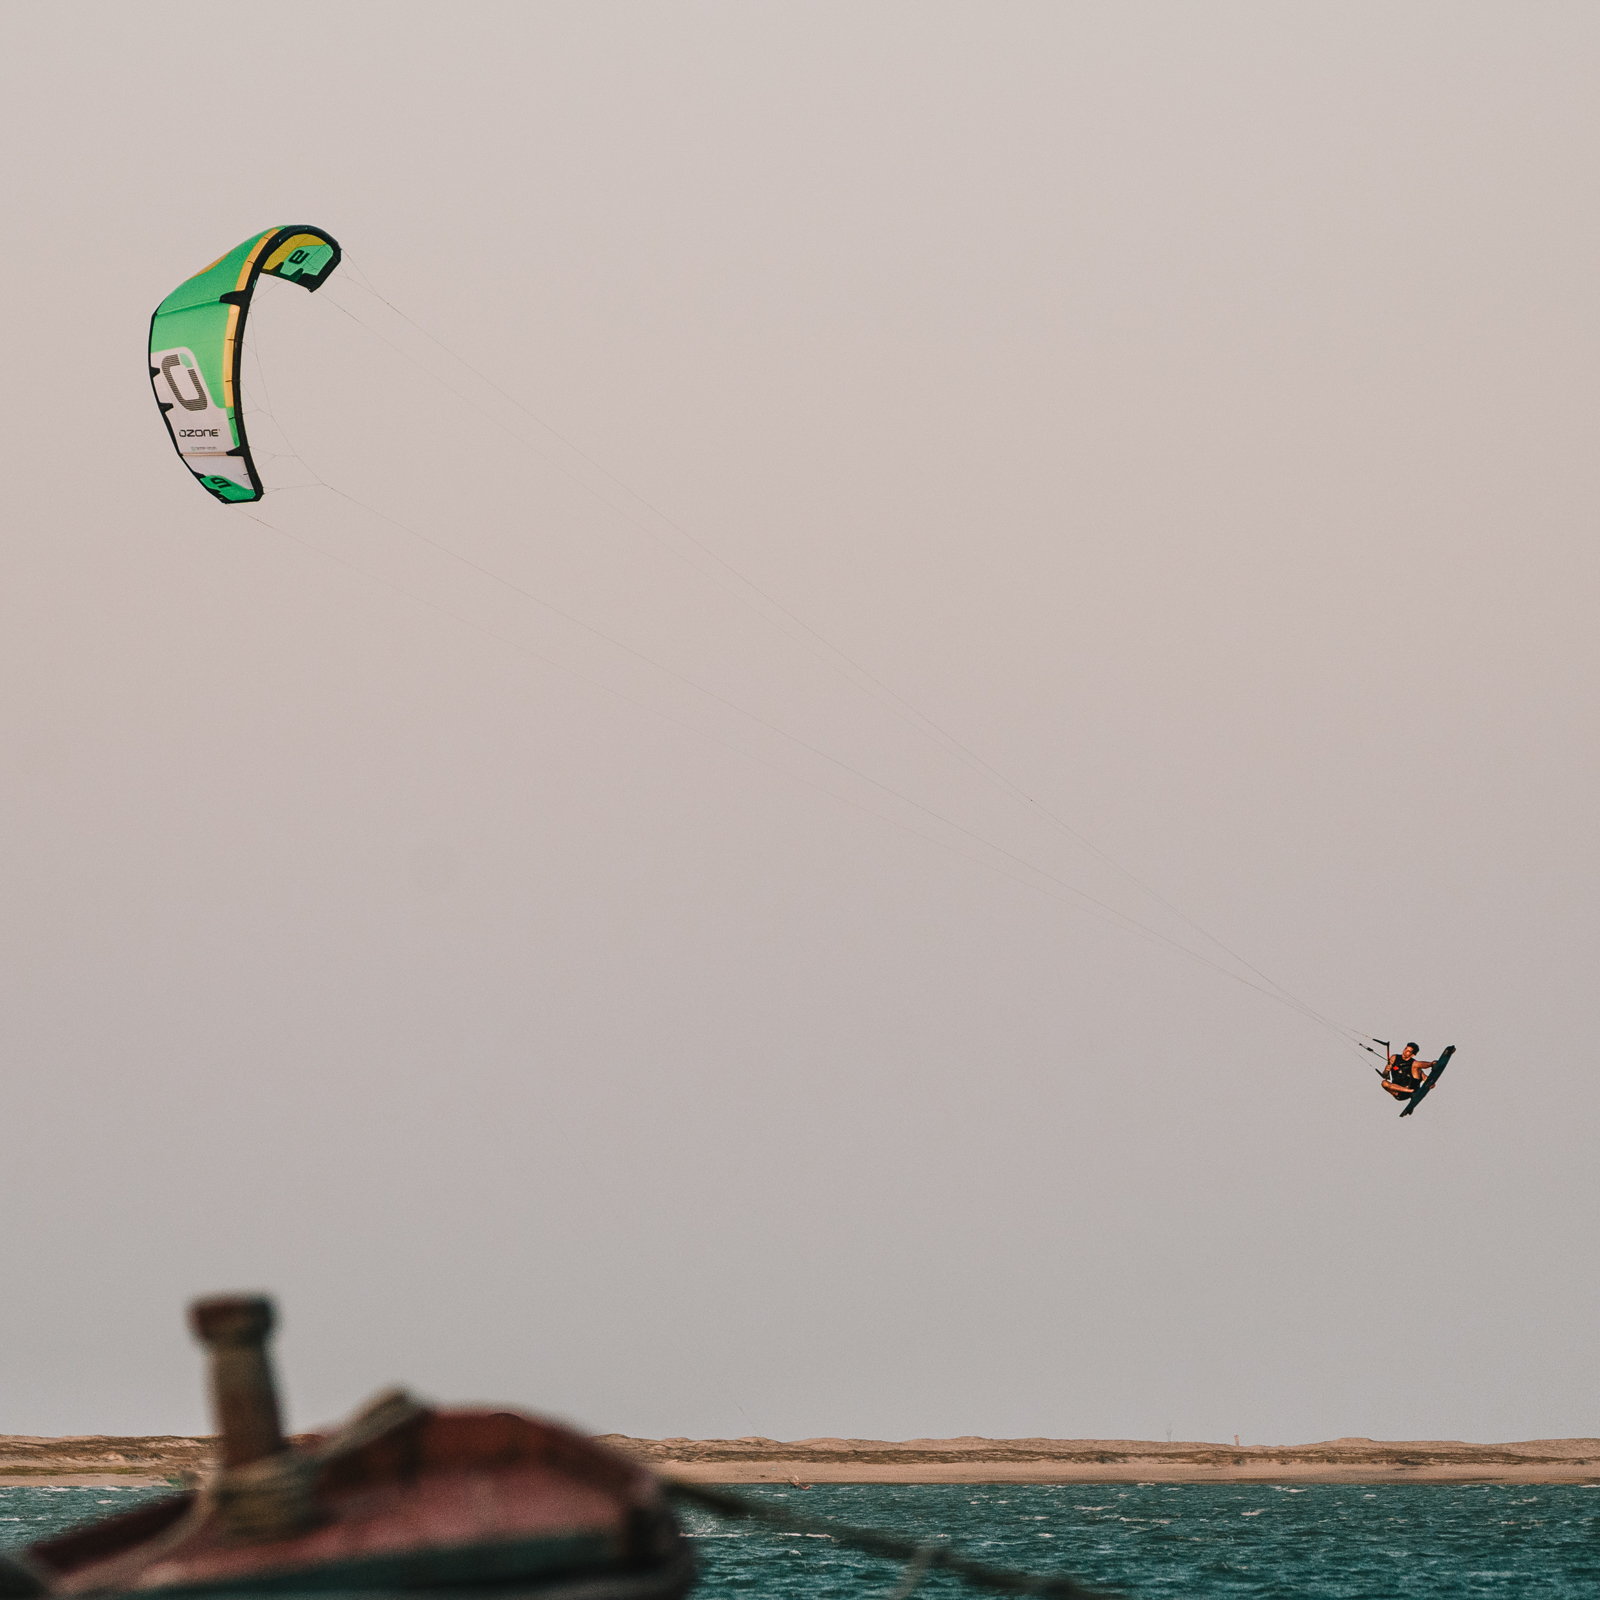
The Enduro V5 retains its signature DNA of all-round performance, but now produces more lift and hangtime.

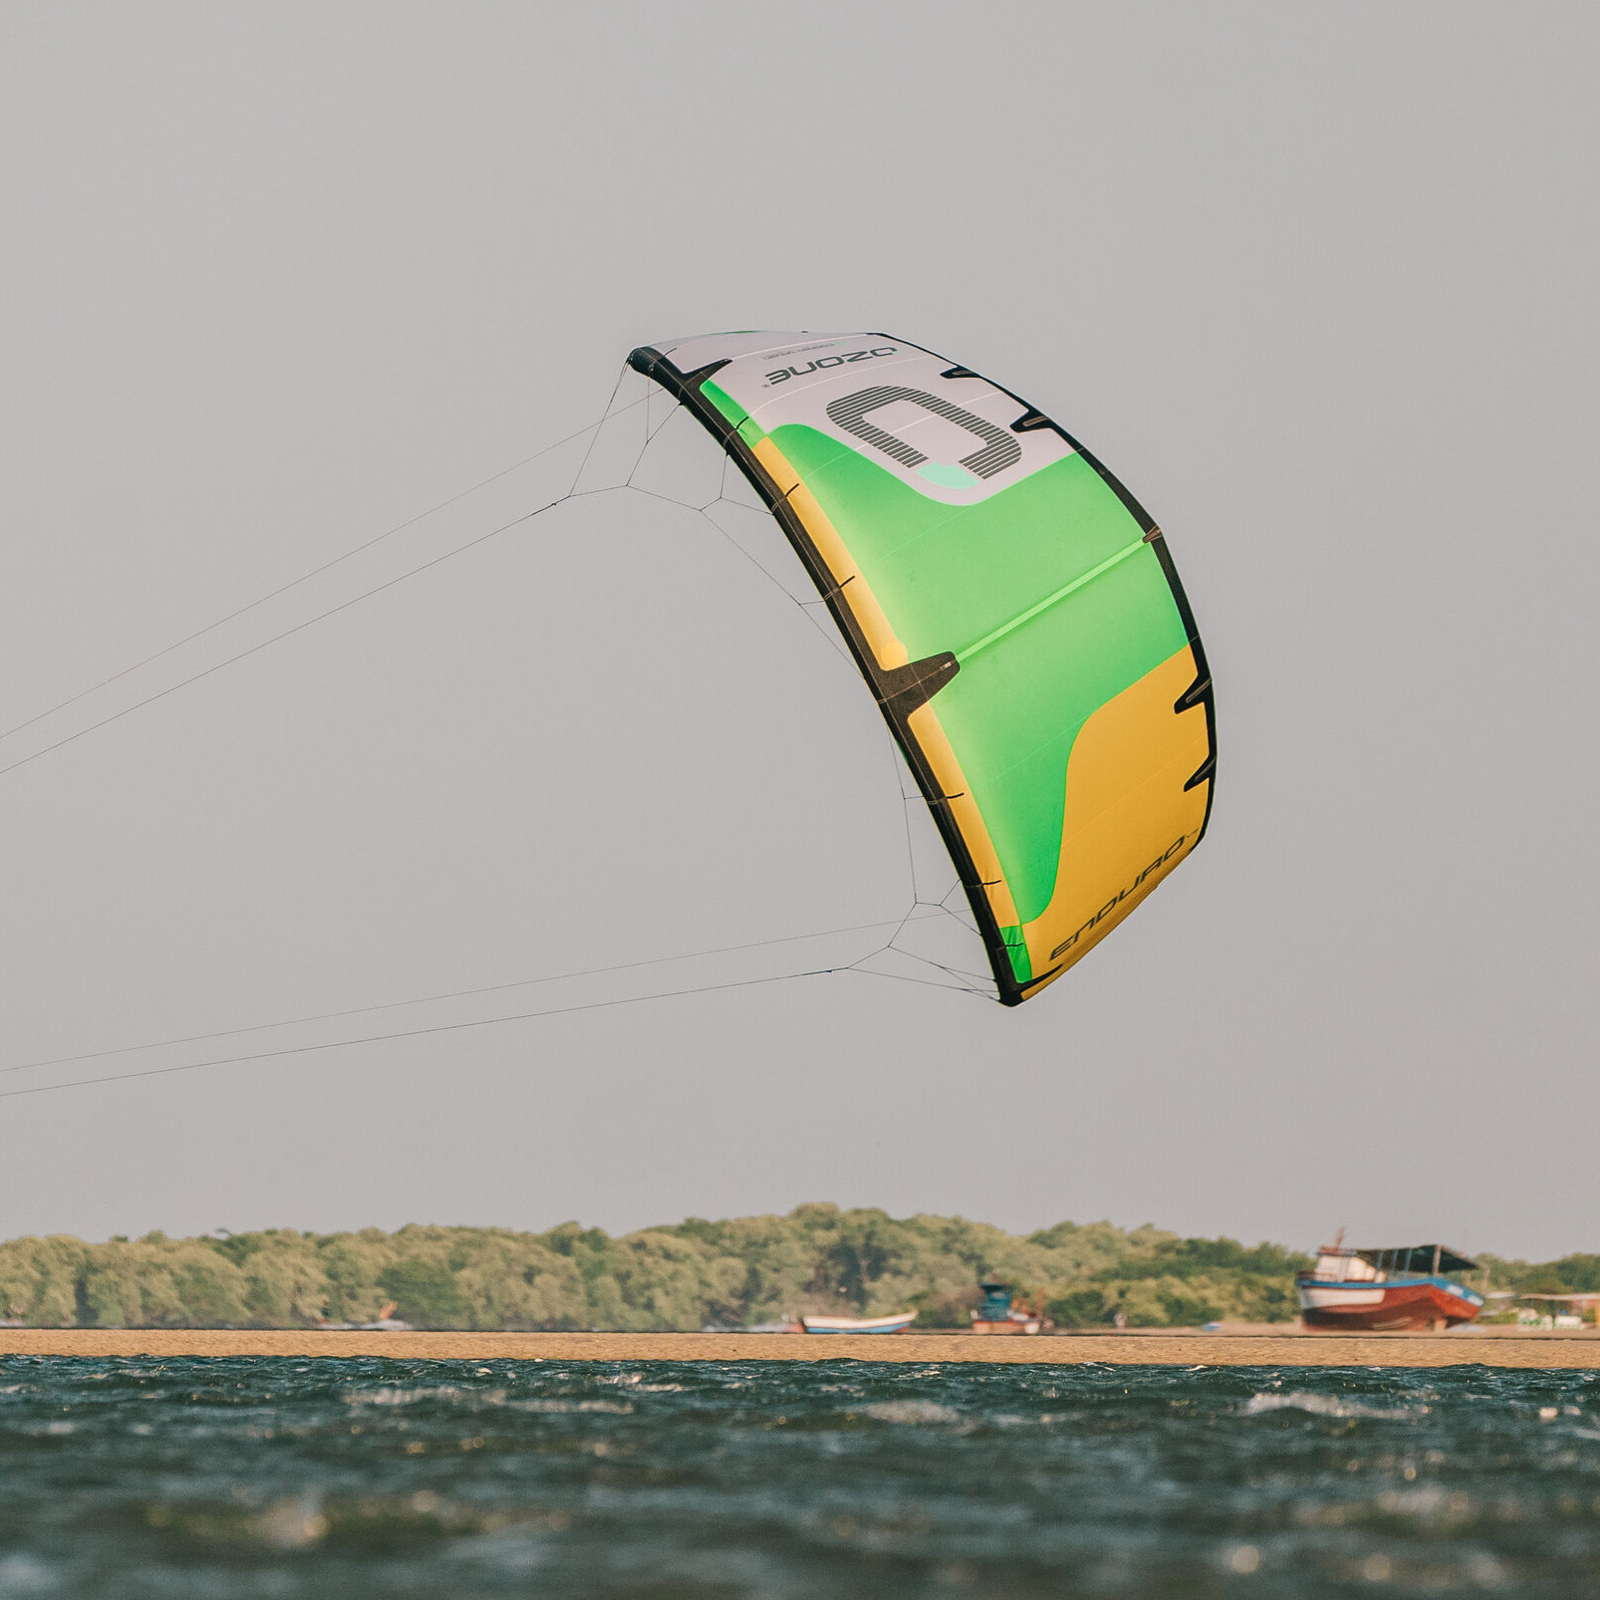
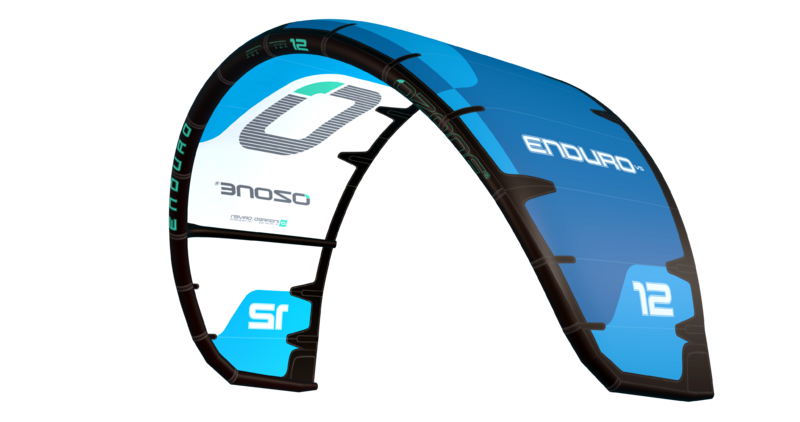
Inspired by the Vortex project, we’ve brought across some of the most effective design features, like the 16-point bridle connection and sail tension, that helped make it such an explosive yet accessible performance jumping kite.

These, alongside a revised Enduro shape with less arc in the central section, have dramatically enhanced the jump and float capabilities of the V5 compared to its predecessor.

Tried and tested to deliver long lasting performance in thousands of kites for many years, the Enduro V5 is designed with the most reliable material combination. Balancing strength and durability at a reasonable weight, the Teijin dacron airframe and triple-ripstop canopy cloth form a formidable partnership.

Expect thrilling performance and a pin-point handling feel without the premium price tag.
V5 – THE ESSENTIAL SELECTION
The Enduro V5 retains its signature DNA of all-round performance,

VORTEX INSPIRED, LOADED WITH EXTRA BOOST

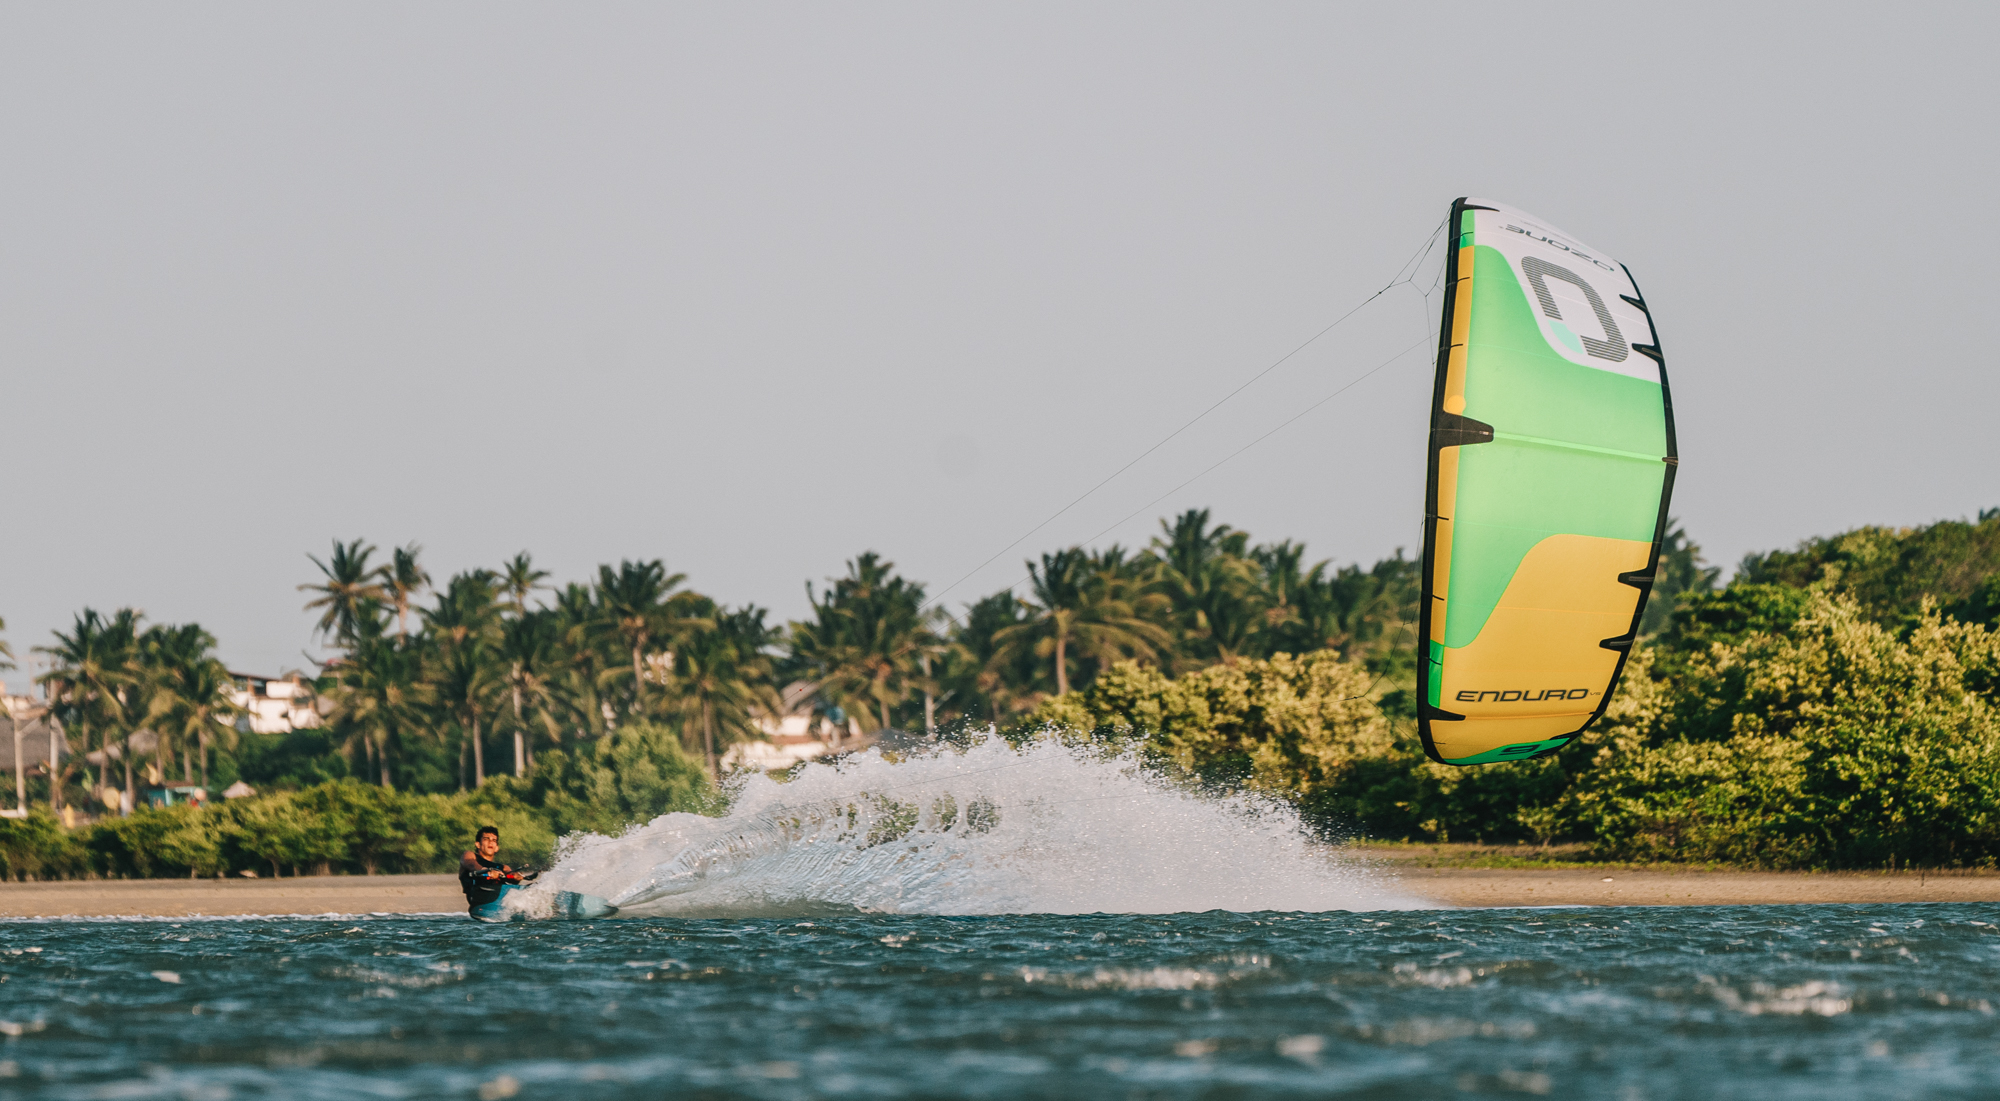
The Enduro V5 has a rock-solid, stable airframe with minimal bouncing, but it’s not merely a tuned-down Vortex. The V5 sits alone, as a phenomenal all-round weapon.

Reduced bar pressure and steering forces facilitate longer, heavily powered sessions, enhancing the overall freeriding experience. Additionally, the kite’s tendency to sit further forward in the wind window makes upwind riding effortless and efficient, with minimal lateral pull.

The clean forward drive and perfectly balanced feel have only added to the Enduro V5’s unhooked freestyle performance.
VORTEX INSPIRED, LOADED WITH EXTRA BOOST
The Enduro V5 has a rock-solid, stable airframe with minima
VORTEX INSPIRED, LOADED WITH EXTRA BOOST
The Enduro V5 has a rock-solid, stable airframe with minima


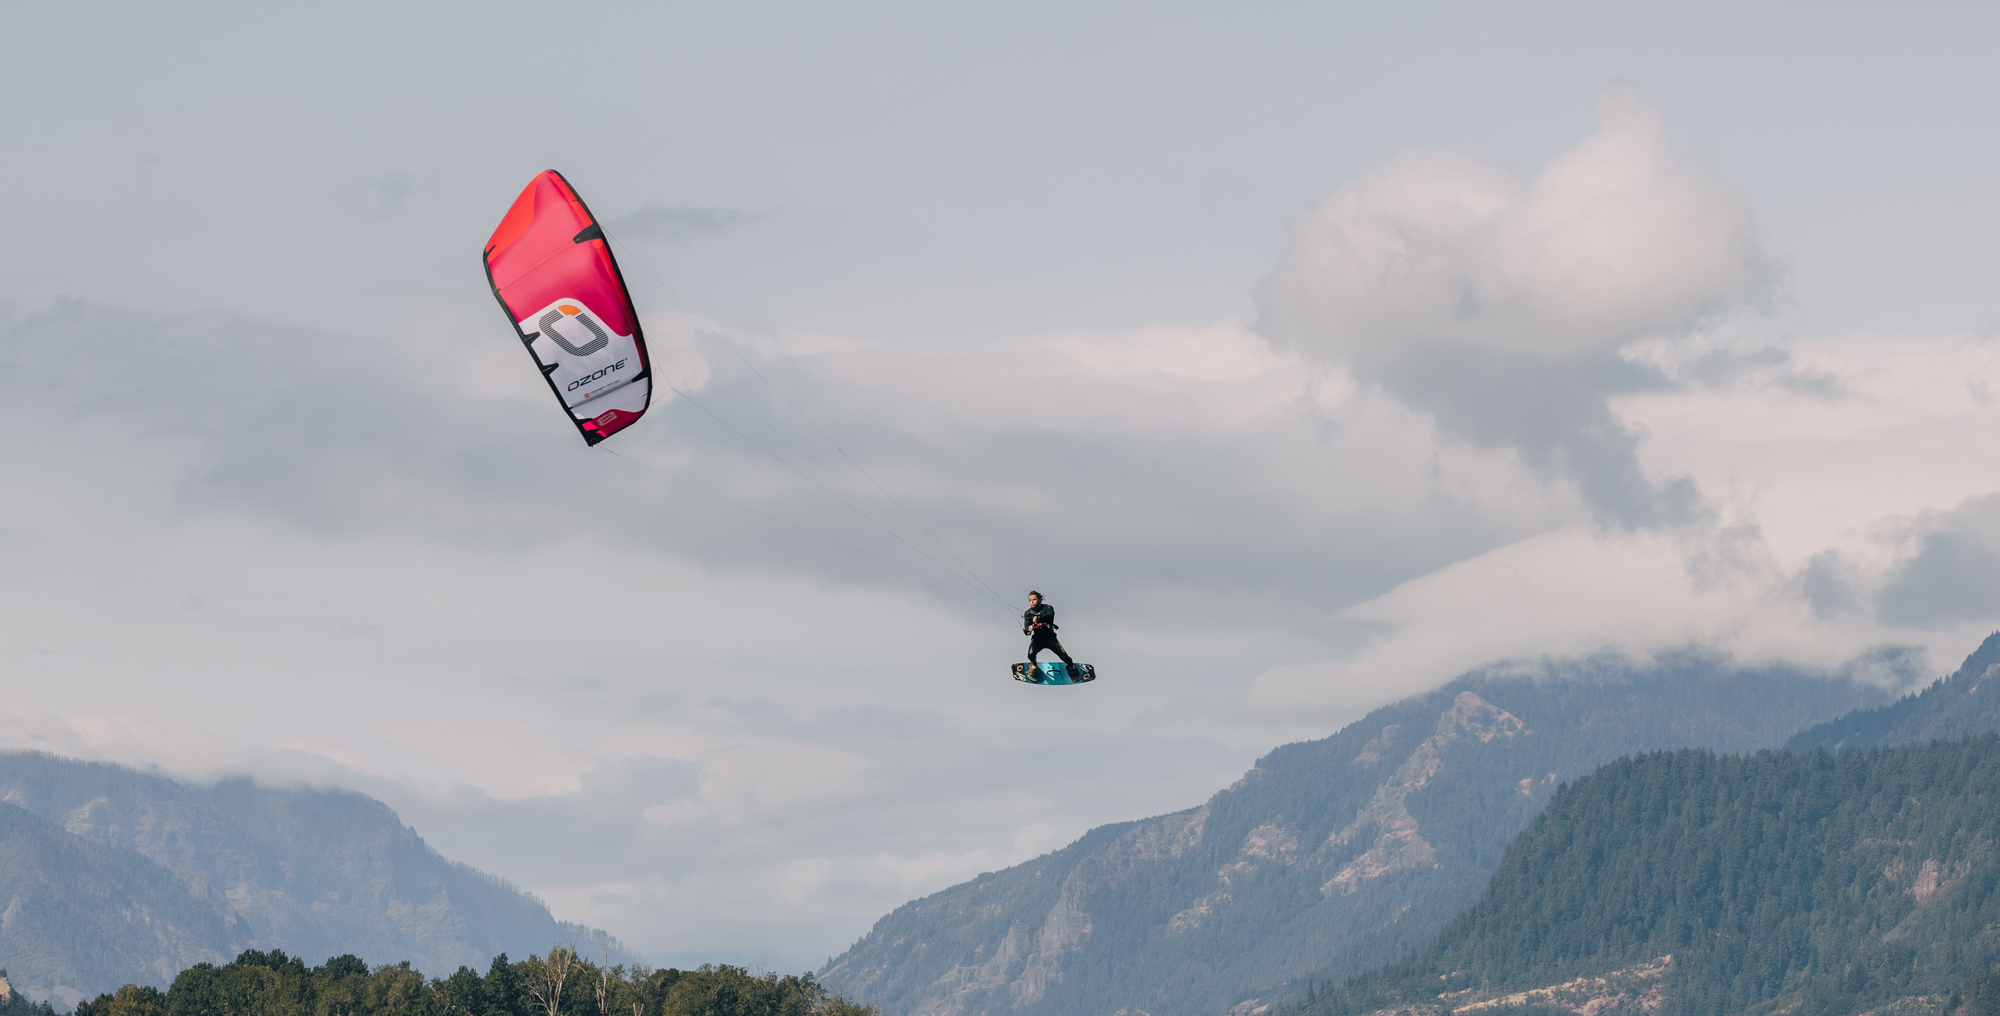
I immediately experienced a lot of really wild jumps on the Vortex — jumps where I kept going up and, just when I thought I was coming back down, I would go back up again. These jumps had previously felt rare, but I find them all the time on the Vortex. The same thing now happens with the Enduro V5
JESSE RICHMAN
WHATS NEW? 

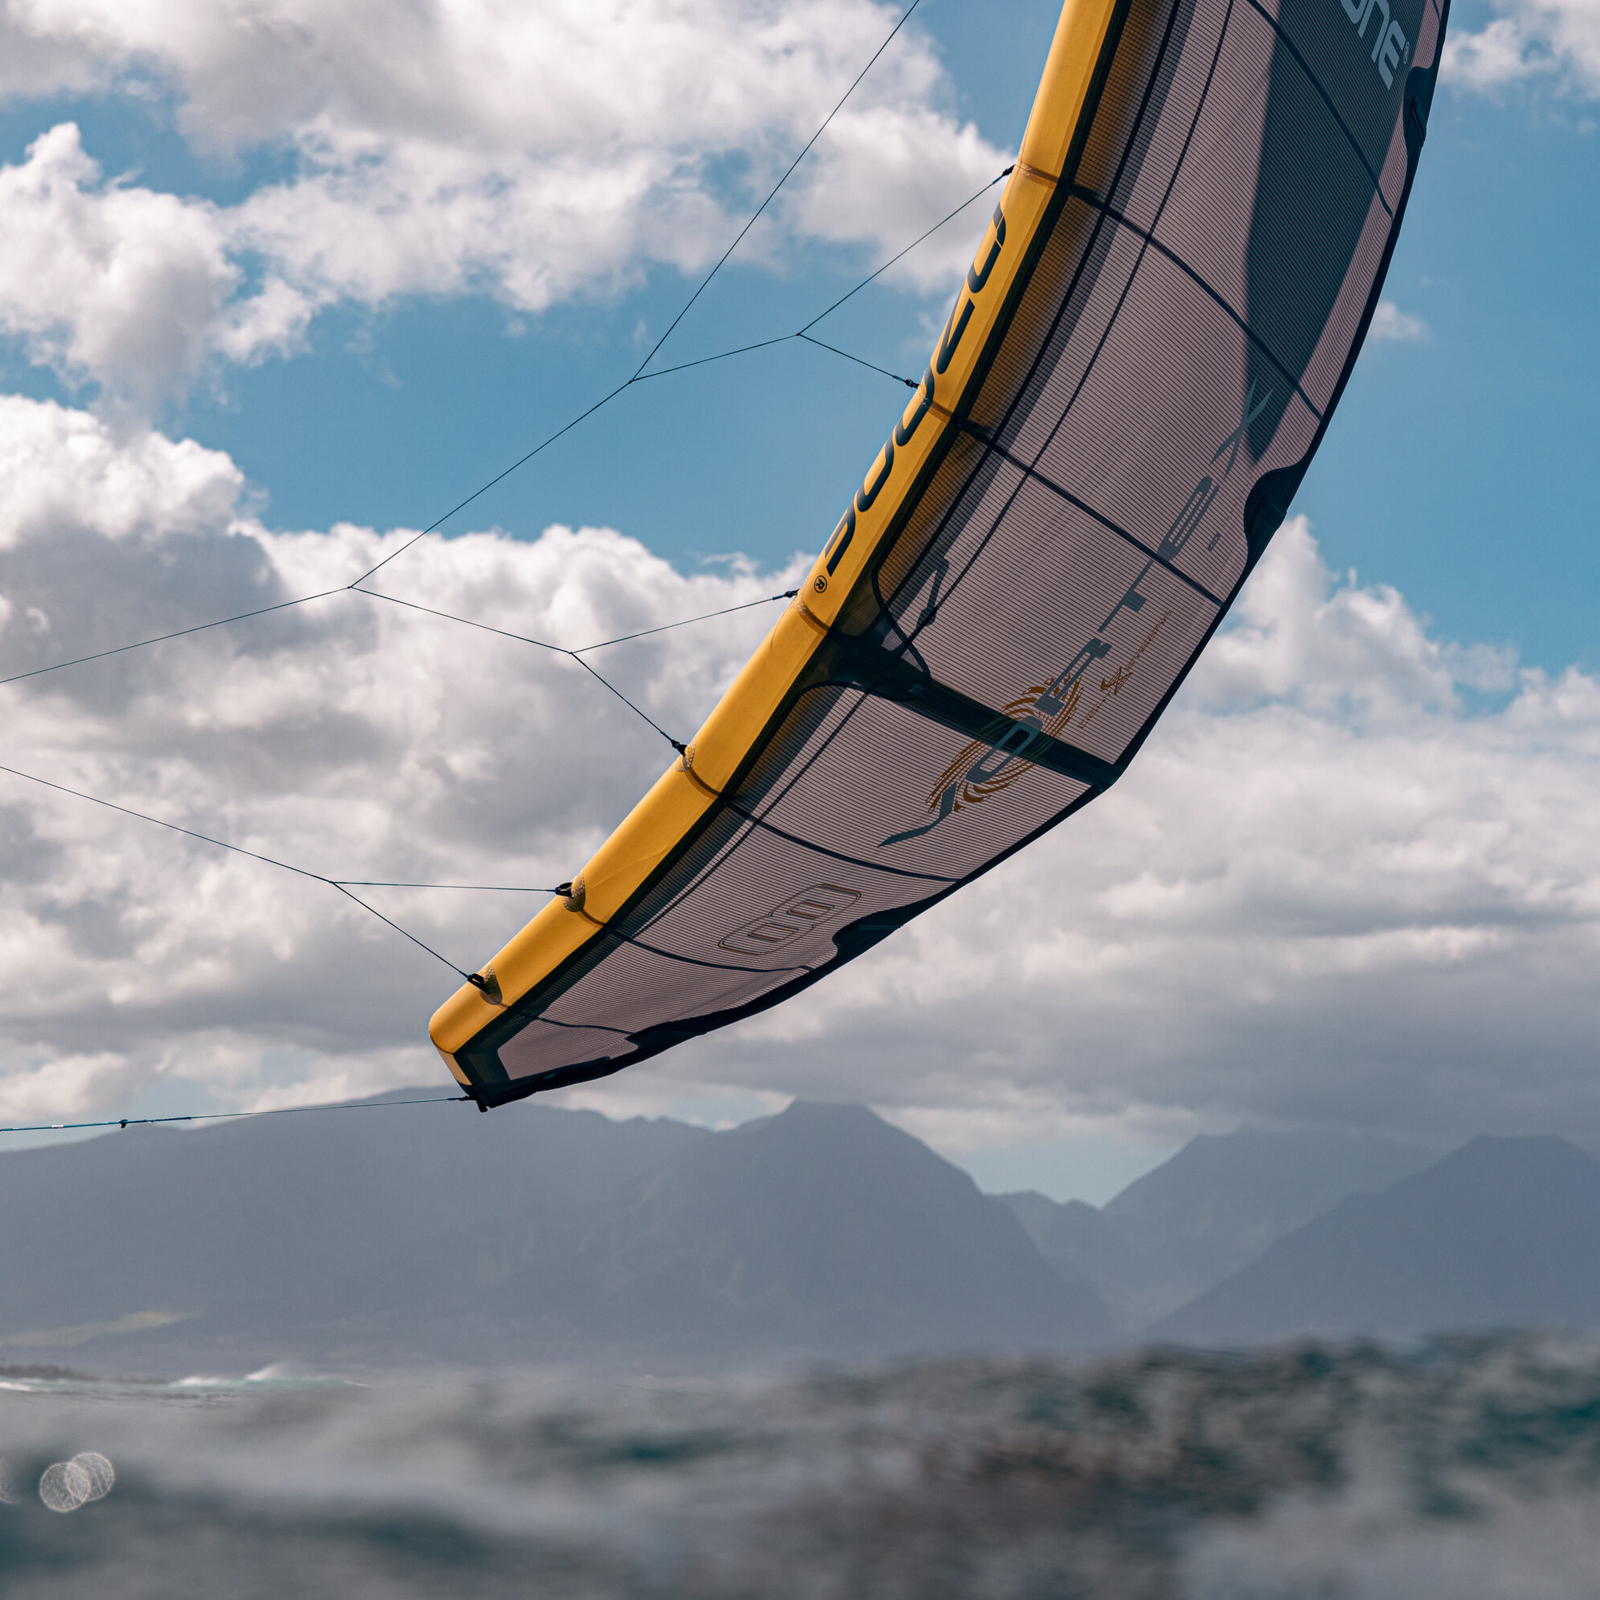
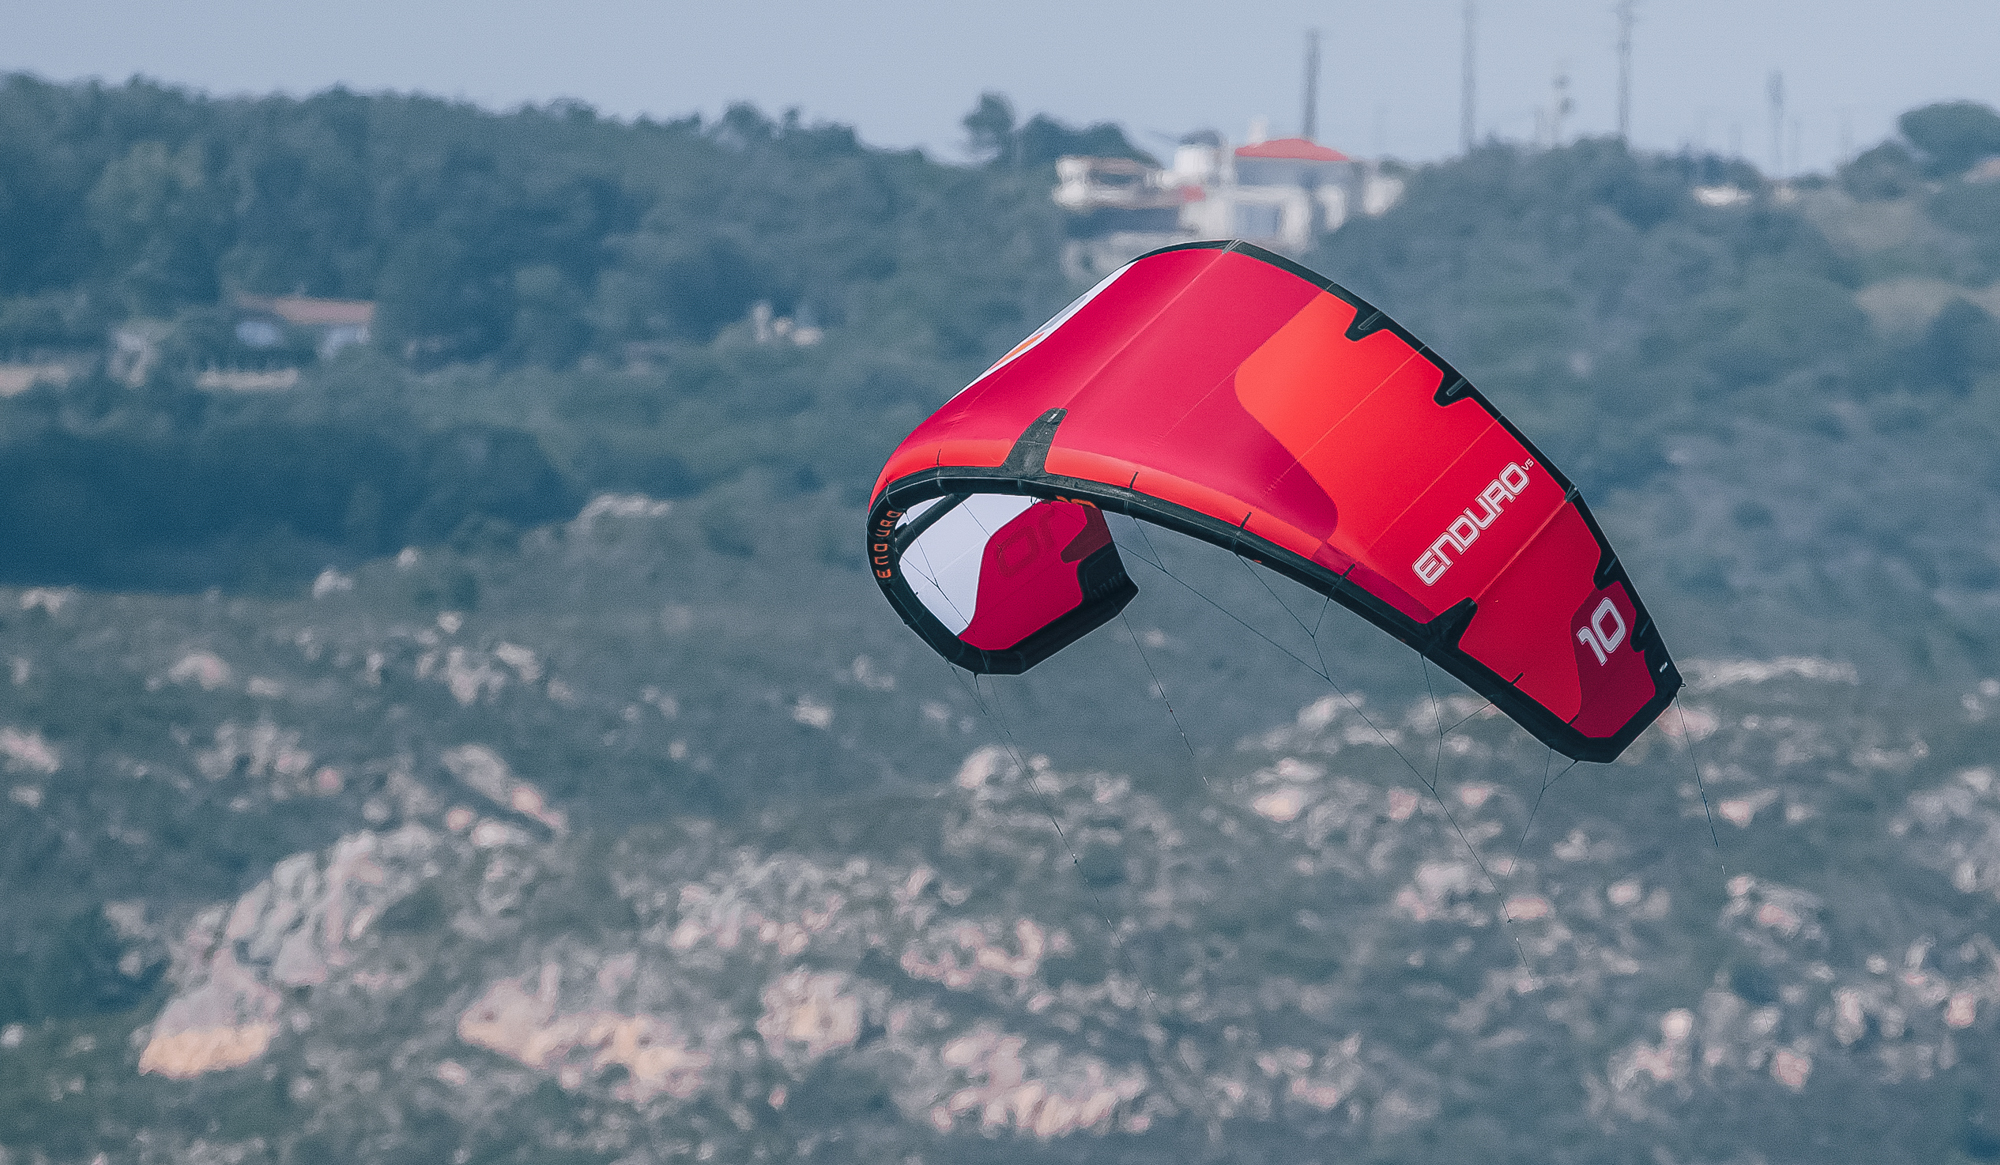
  • New planform for decreased bar pressure and steering forces
  • New shape with less arc in the centre section which enhances jumping capabilities and float

VORTEX CROSS-OVER FEATURES

  • Improved sail shaping has produced an even tighter canopy and contributes to high reactivity and less sail flutter
  • 16 point bridle attachment points for a very stable and direct airframe
  • Soft and rigid anti-flap battens
VORTEX CROSS-OVER FEATURES

Improved sail shaping has produced an even tighter canopy and contribute

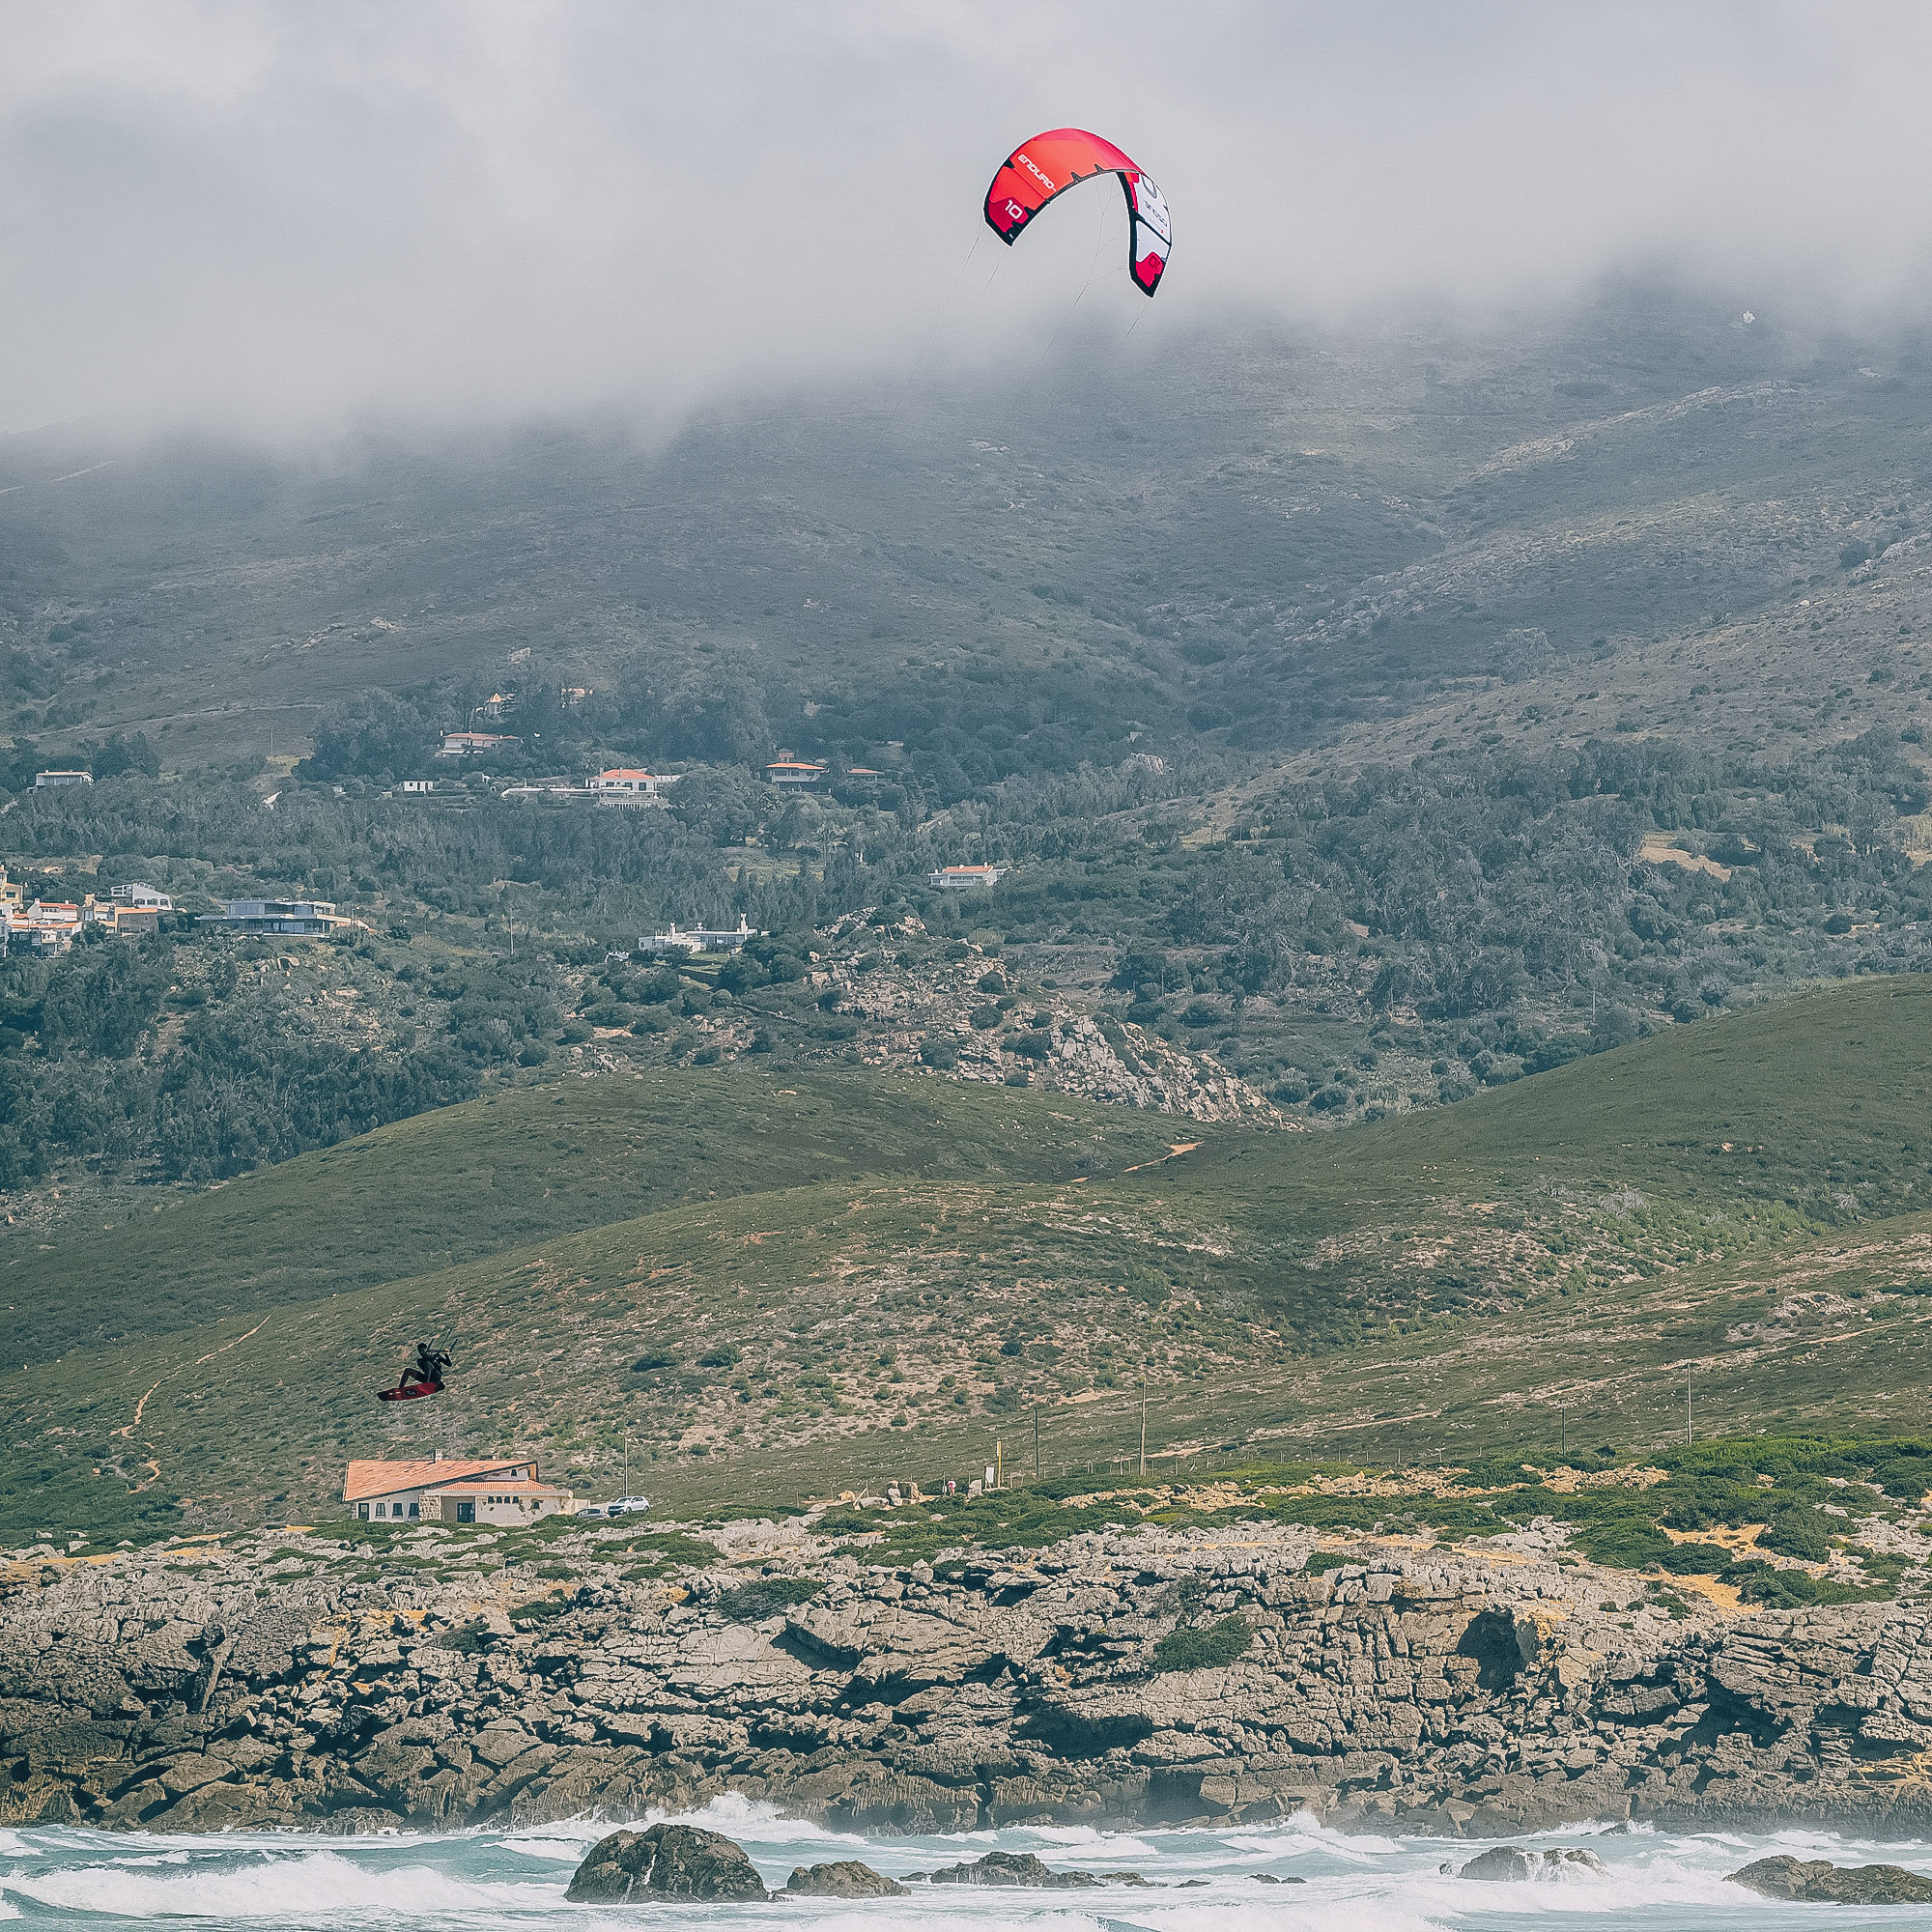
RETURNING ENDURO FEATURES 

  • Continuous Curve leading edge
  • Transverse Sail Shaping
  • Variable Bridle Geometry
  • Back line adjustment settings

(Click the ‘Features’ tab on this page for more information on each)
 

RETURNING ENDURO FEATURES 

Continuous Curve leading edge
Transverse Sail Shaping
Variable Bridle G

THE V5 IS STILL A WONDER IN THE WAVES

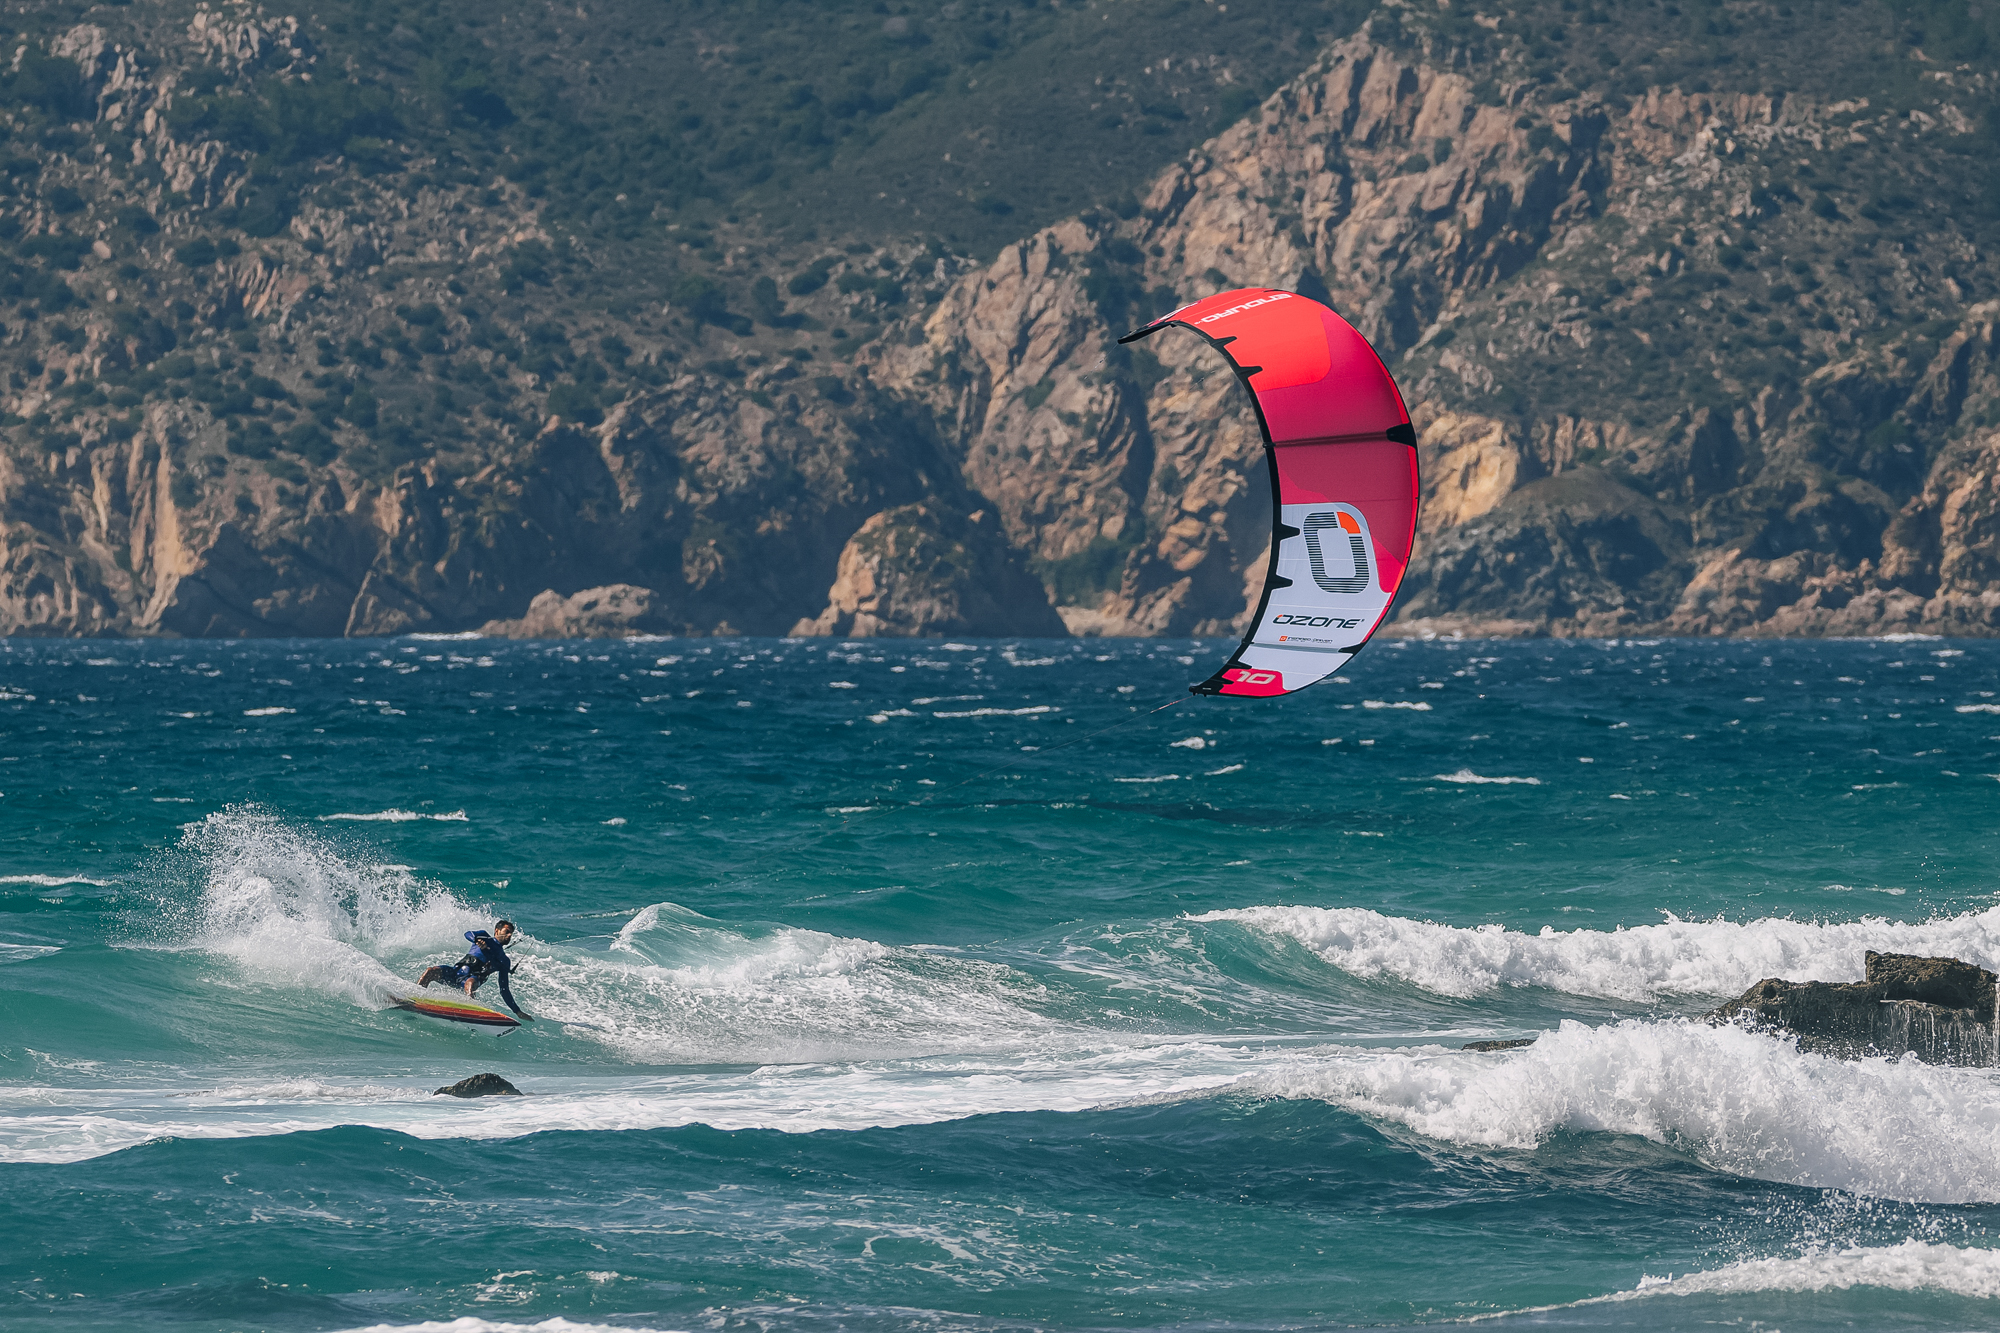
“The Enduro V5 is an all-around beast of a kite. Providing a super direct feel through the bar it also flies very quickly through the window. While there’s undoubtedly more big air performance, the V5 still feels fantastic in the waves.

“For pure wave riding and unparalleled drift, the Ozone Reo is the simply the best, but the Enduro V5 is still an amazing kite in the surf, especially if you like to actively fly your kite.

“The direct bar response and increased lift allow you to power through turns at full throttle and then instantly depower with all the finesse you need to hit the wave just where you want and then stay connected.

“I love to mix powerful airs and a more motocross style of riding on my surfboard, which is why the Enduro is the perfect machine for me.”

JESSE RICHMAN
THE V5 IS STILL A WONDER IN THE WAVES
“The Enduro V5 is an all-around beast of a kite. Providing a

“You always get those magic / lucky moments where you realise that you have a really good kite in your hands. Having recently cracked the Vortex development and receiving all the great feedback, we were able to transfer particularly advantageous features into the Enduro V5 and nailed a really good design that we are all very stoked with.

From there we focused on fine tuning all the sizes, while taking on Jesse’s high value feedback to make this all-round kite as epic as possible.”


ENDURO V5 DESIGNER, DOM ZIMMERMANN

“You always get those magic / lucky moments where you realise that you have a really good kite in

Variable Bridle Geometry

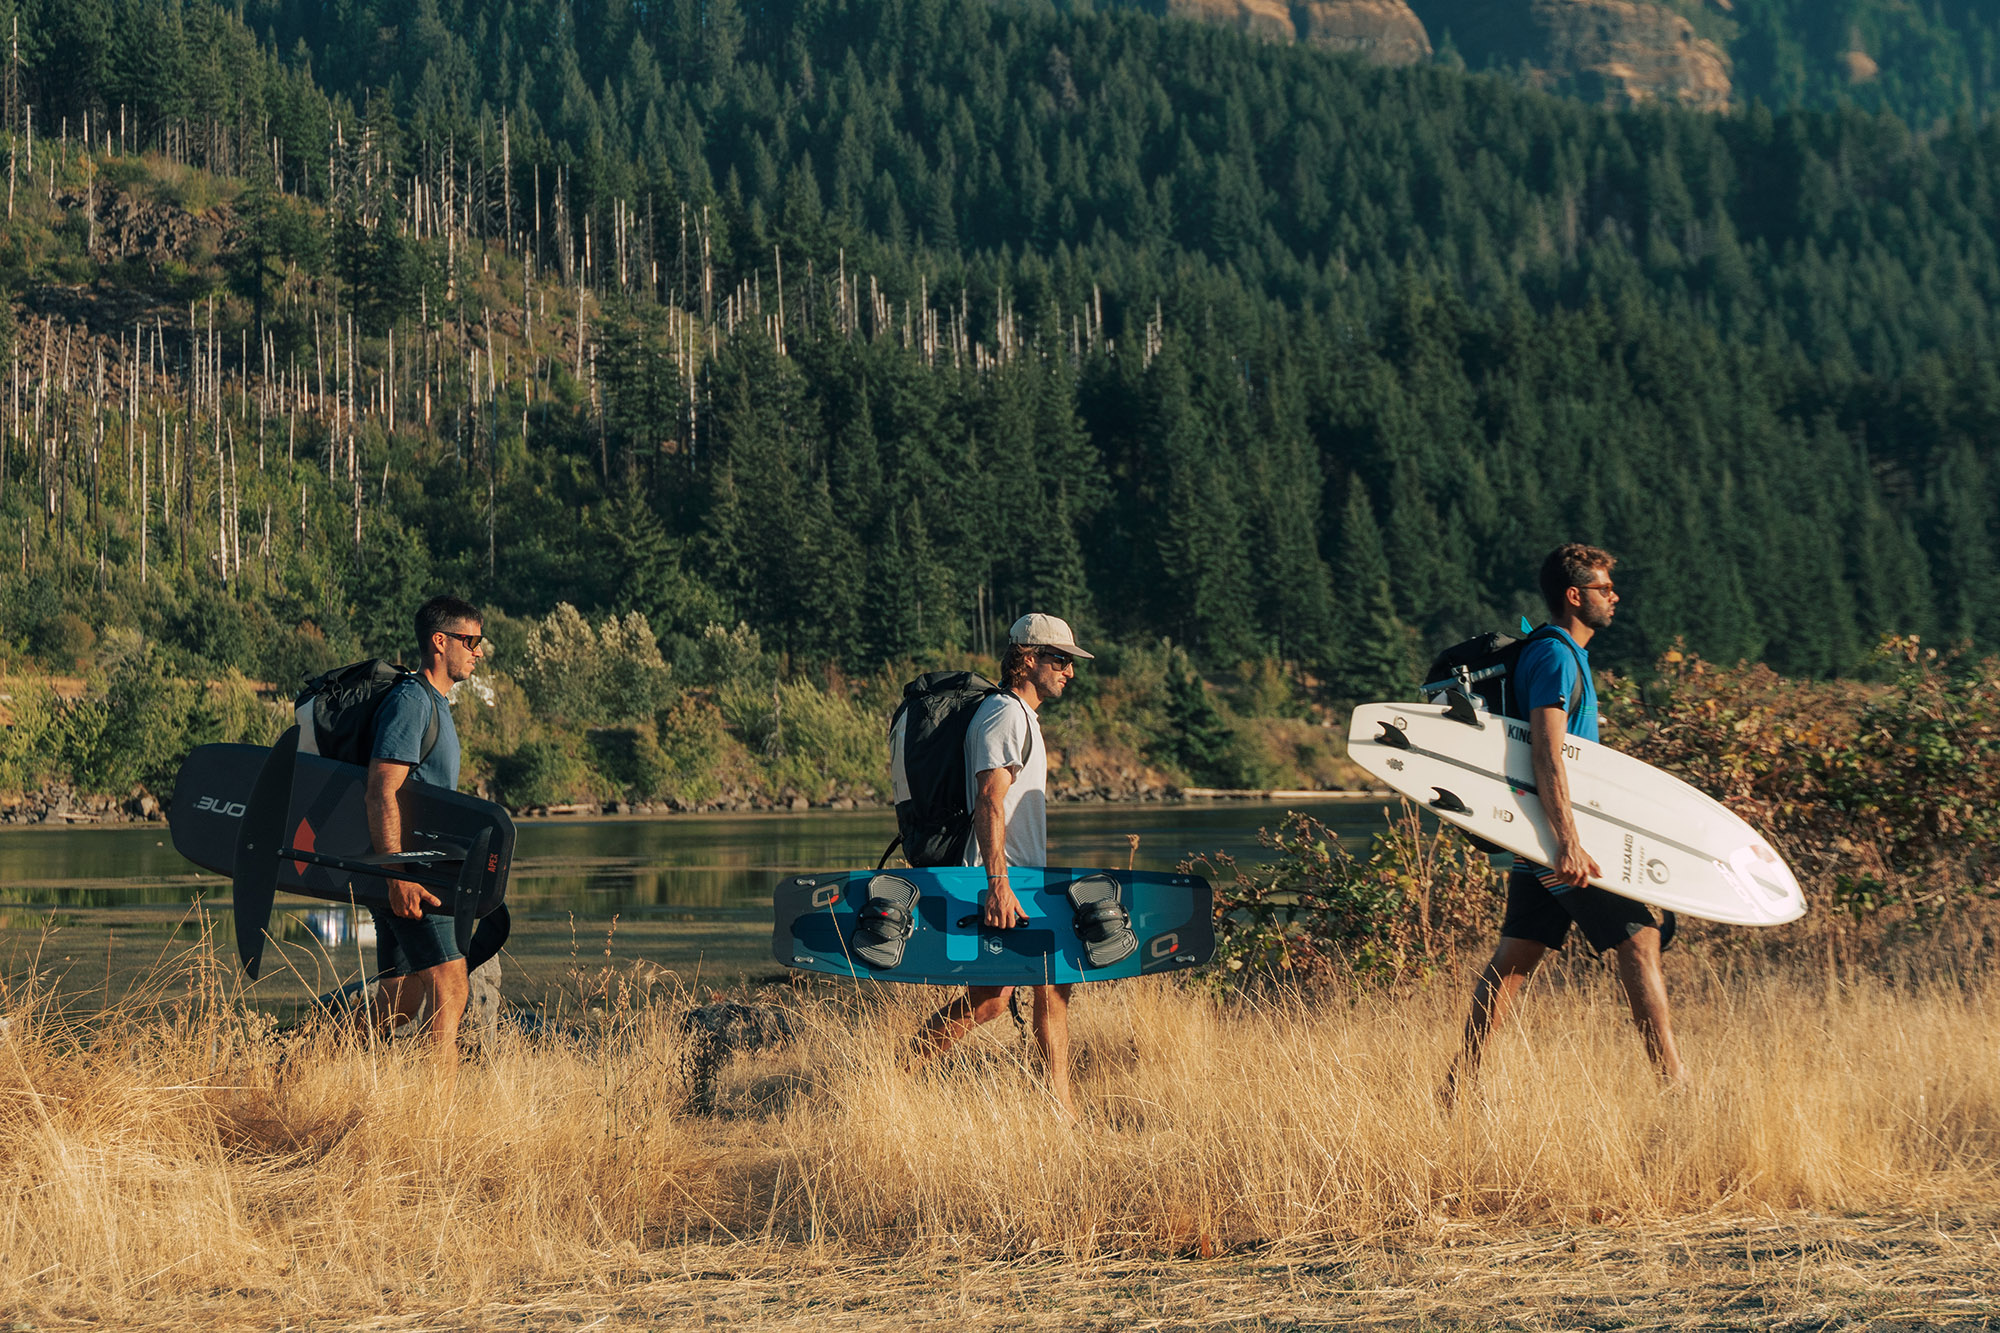
Quick and easy to change with no extra lines to add or remove. Choose from three pigtail positions on the Enduro V5’s front bridle’s VBG settings to adjust the kite’s operating range, bringing another level of versatility to this outstanding design

Variable Bridle Geometry
Quick and easy to change with no extra lines to add or remove. Choose from
FREERIDE/BIG AIR
The ideal balance in performance and feeling for all-round riding in any conditions

FREERIDE/BIG AIR

The ideal balance in performance and feeling for all-round riding in any conditions. The Freeride setting is the middle knot on the VBG Pigtails (factory setting).

FREERIDE/BIG AIR
The ideal balance in performance and feeling for all-round riding in any conditions

FREESTYLE

Increases sheeting bar pressure, increases power in kite loops and increases pop for unhooked tricks. If you prefer a heavier and direct feel this could be the setting for you. The Freestyle setting is the lower knot on the VBG Pigtails.

FREERIDE/BIG AIR
The ideal balance in performance and feeling for all-round riding in any conditions

WAVE/FOIL

Decreases bar pressure and increases steering reactivity in all states of power and de-power. It is easier to turn the kite while de-powered when riding a wave or hydro foiling. The Wave/Foil setting is the upper knot on the VBG Pigtails.

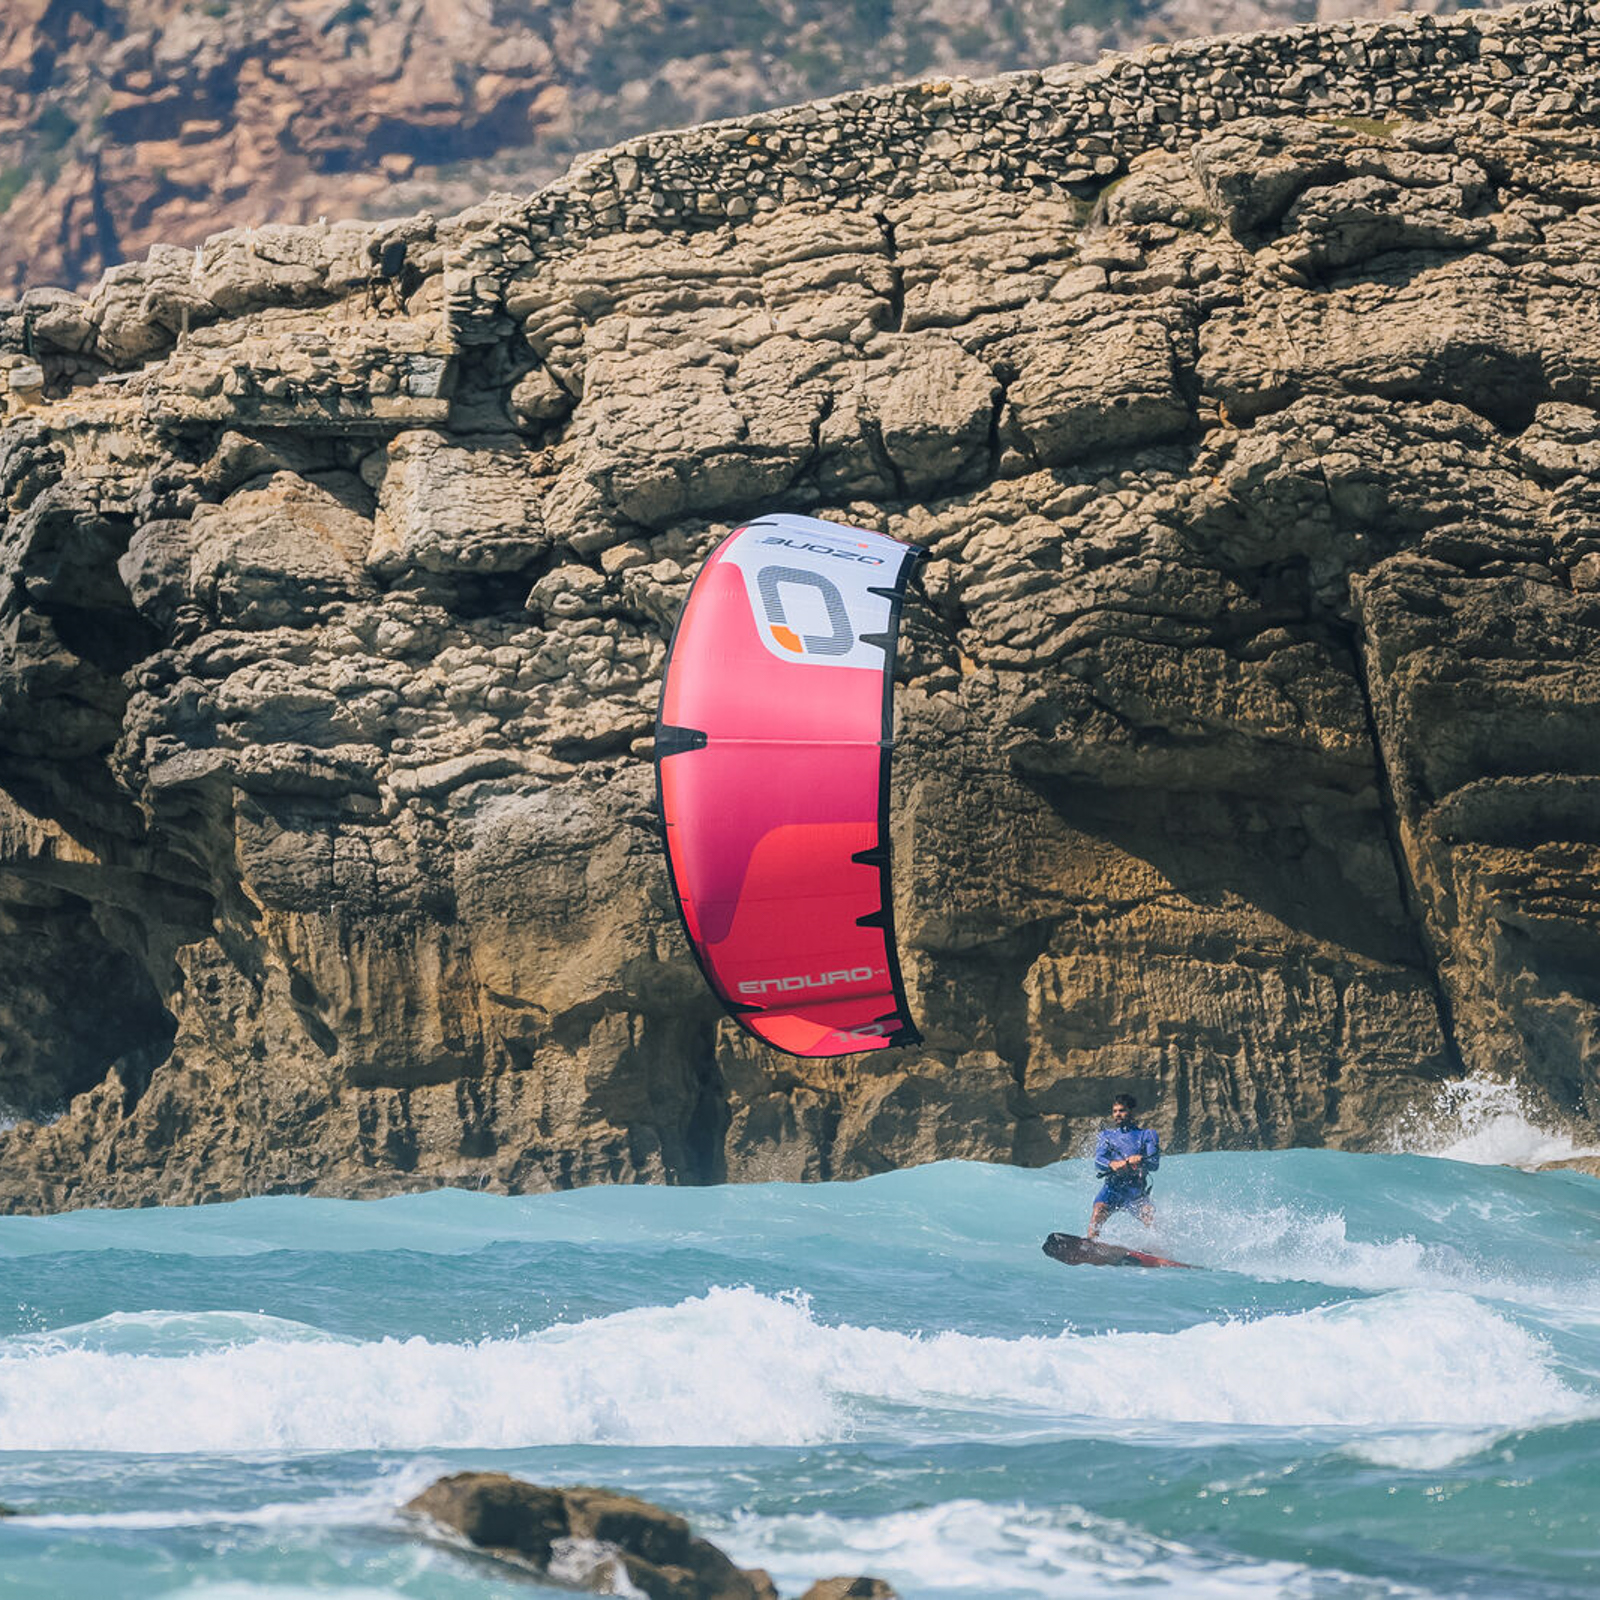
IN-HOUSE DESIGN & MANUFACTURE: OUR STRENGTHS APPLIED

Balancing strength and durability at a reasonable weight and price point, the Teijin Triple Ripstop dacron used in the airframe and Triple Ripstop canopy cloth are adaptable and easy to work with, especially when it comes to perfectly producing the often intricately shaped sections that make each size fly so sweetly.

Our in-house factory team has vast experience in working with these ultra reliable materials, guaranteeing the relentlessly perfect finish that Ozone kites are known for.
IN-HOUSE DESIGN & MANUFACTURE: OUR STRENGTHS APPLIED
Balancing strength and durability at a reas

BORN LIGHT, GENETICALLY STRONG

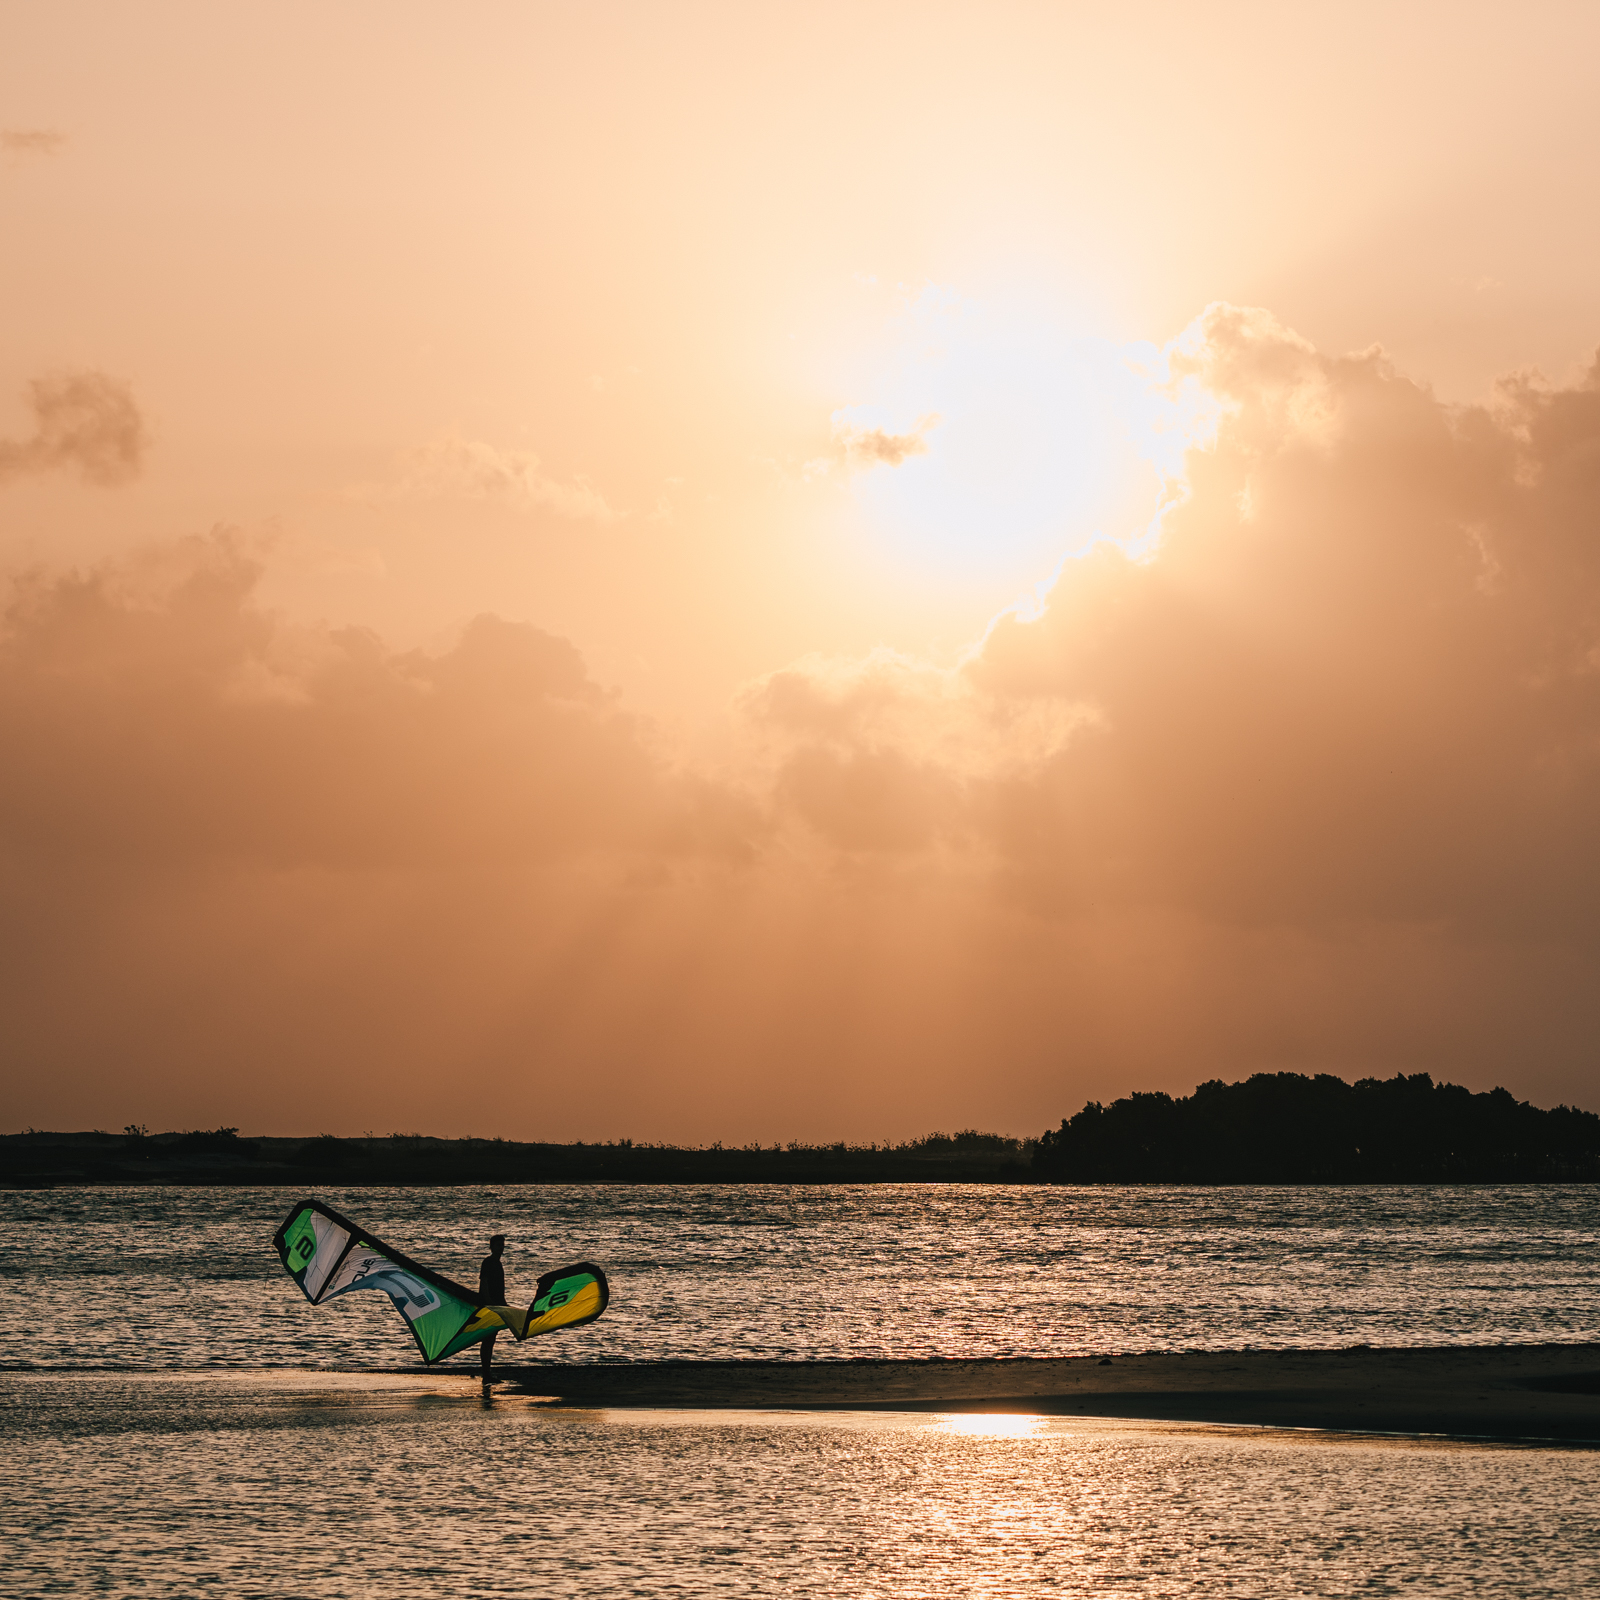
Guided by the shaping precision made possible by our custom-built OzCAD design software, we’re also able to control every step of the production process and quality control in our own factory.

Like all our kites, the Enduro V5 is Born Light, but is Genetically Strong – with each and every stitch perfectly placed to provide strength in the structure.

BORN LIGHT, GENETICALLY STRONG
Guided by the shaping precision made possible by our custom-built OzC

Marie Testimonial

“The kite has improved A LOT!”

Ken Adgate

One of the craziest foilers on the planet!

Riders of lower ability will love the stability overhead, the light feel, good quality construction, bar feel and input. For the riders who are pushing their riding, twin-tipping, looping super hard and riding waves really well… the feel, the drift and how it works at the top level is really exceptional, and probably better than most in this category.

Matt Nuzzo, Real Kiteboarding
Enduro V5 product run-through with Paulino Pereira

Enduro V5 product run-through with Paulino Pereira

Ozone Enduro V5... Re-Boosted | Do-it-all performance

Ozone Enduro V5... Re-Boosted | Do-it-all performance

Designed to do EVERYTHING! | Enduro V5 testimonials

Designed to do EVERYTHING! | Enduro V5 testimonials

Factory Ownership Advantage 

Factory Ownership Advantage 

Ozone uniquely owns its own factory where all kites, wings, boards, hydrofoils, paragliders, speed wings and accessories are made. Guaranteeing hand checked quality control and the finest materials at every step, there are also excellent working conditions for all 1000 employees. 
Designed with OZ-CAD

Designed with OZ-CAD

The future is now. All Ozone kite and wings are designed with our own highly advanced custom built CAD software that we control and modify with each new product design. Allowing for specifically tailored technical developments, our designers can maximise performance while also minimising waste. 

Teijin TechnoForce Triple Ripstop canopy & Teijin Triple Ripstop dacron

Teijin TechnoForce Triple Ripstop canopy & Teijin Triple Ripstop dacron

Teijin is the world’s leading supplier of technical performance materials for marine sports, setting the benchmark in quality with proven superiority in dynamic strength and durability.

The new triple rip-stop canopy material has an advanced coating to increase strength, rigidity and durability while improving feedback to the rider for a more direct feeling.

The technical triple rip-stop dacron is incredibly strong and reliable. It’s used in areas requiring rigidity and stability, the leading edge, struts, wingtips and reinforcement areas.
Continuous Curve Leading Edge and Transverse Sail Shaping

Continuous Curve Leading Edge and Transverse Sail Shaping

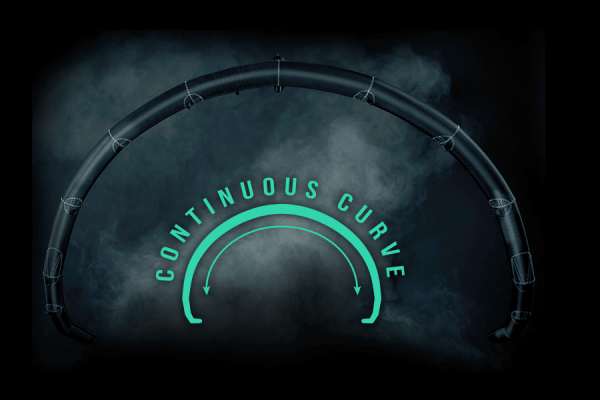
Each Leading Edge segment is curved to form a perfect smooth arc from tip to tip as opposed to straight segments with angled joints. Transverse Sail Shaping perfectly matches the Continuous Curve Leading Edge. These latest design features reduce parasitic drag and create a cleaner surface at the most important area of the airfoil. The result is less turbulent airflow, which positively affects the lift to drag ratio increasing overall performance.
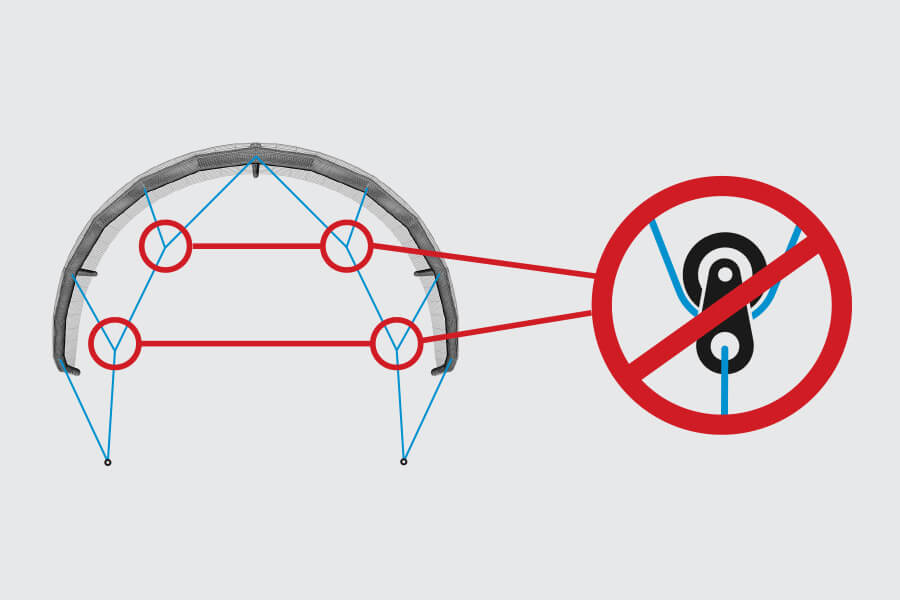
 

4-line Pulley-less System

4-line Pulley-less System

NO pulleys, NO problems. We design all our inflatable kites without pulleys, to inherit the unique Ozone feeling and performance across our range.
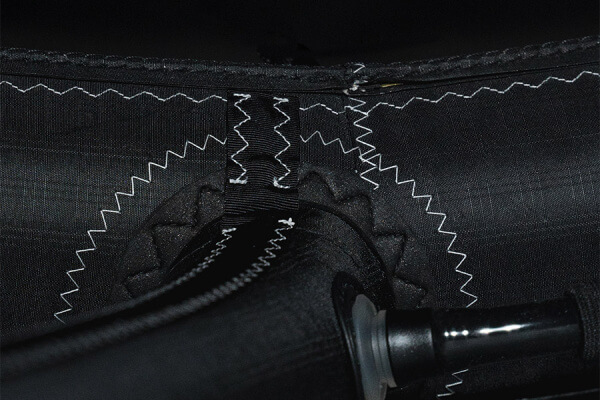
Internal reinforcements

Internal reinforcements

What’s on the inside counts too - we use top of the line materials and strategic internal reinforcements for increased strength and durability.
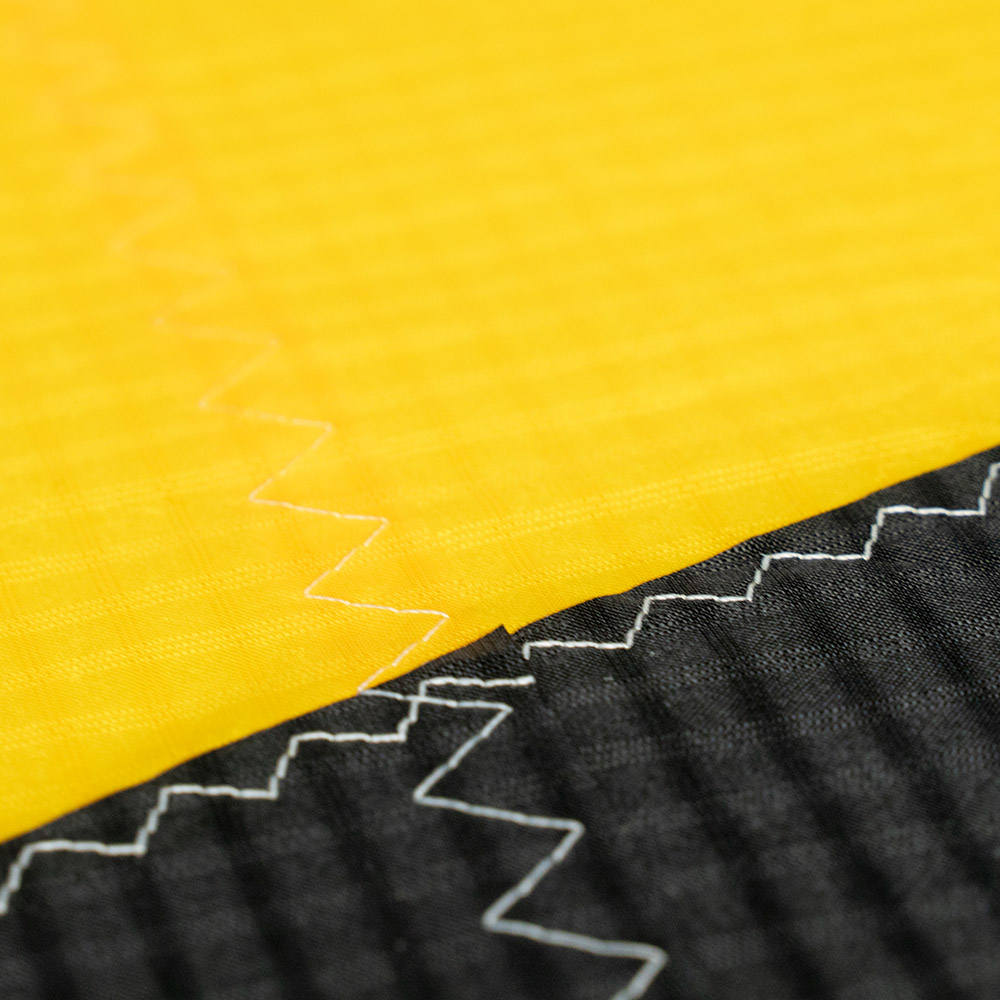
Overlap Flat Seams

Overlap Flat Seams

Overlap flat seam construction improves sail control resulting in an overall cleaner canopy.
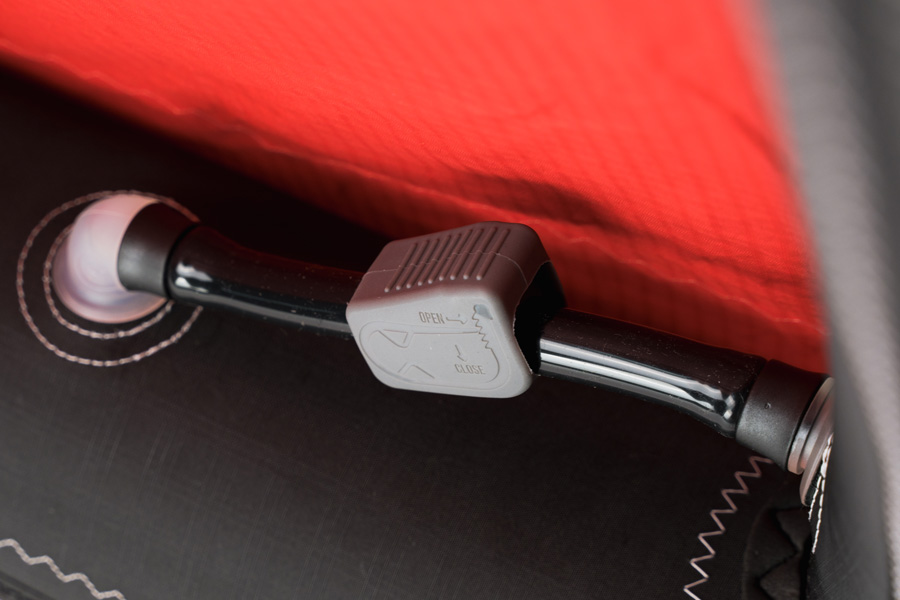
Fast Flow One-Pump Inflation System

Fast Flow One-Pump Inflation System

The Fast Flow One-Pump Inflation System makes set up and packing quick and easy. It features single point inflation/deflation and a high air flow rate between the Struts and Leading Edge, with clips to seal the hoses to prevent unwanted air flow in case of damage.
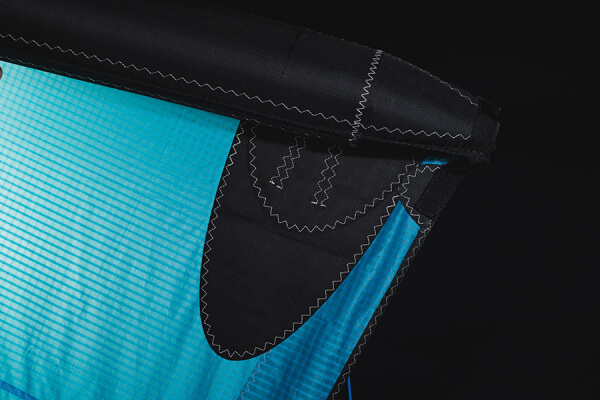
Load Distribution Panels

Load Distribution Panels

Dacron reinforcements are used on all loaded areas for enhanced load distribution. This means all loads are spread evenly into the sail ensuring the kite flies and performs at its best.
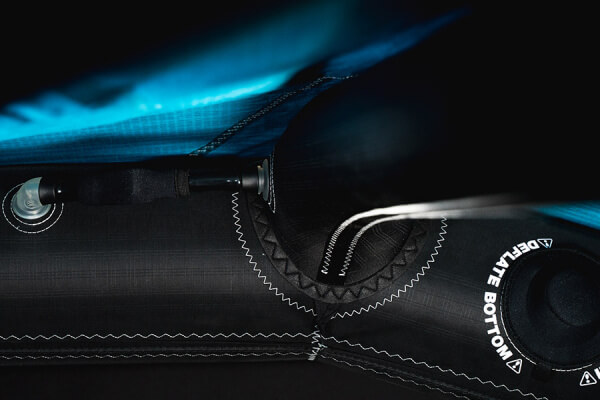
Direct Connect Struts

Direct Connect Struts

Our Direct Connect construction method improves load distribution between the Leading Edge, Struts and Canopy. Struts are connected directly to the Leading Edge with internal and external reinforcements. This unique construction method ensures clean profiles are maintained with the optimum canopy tension.
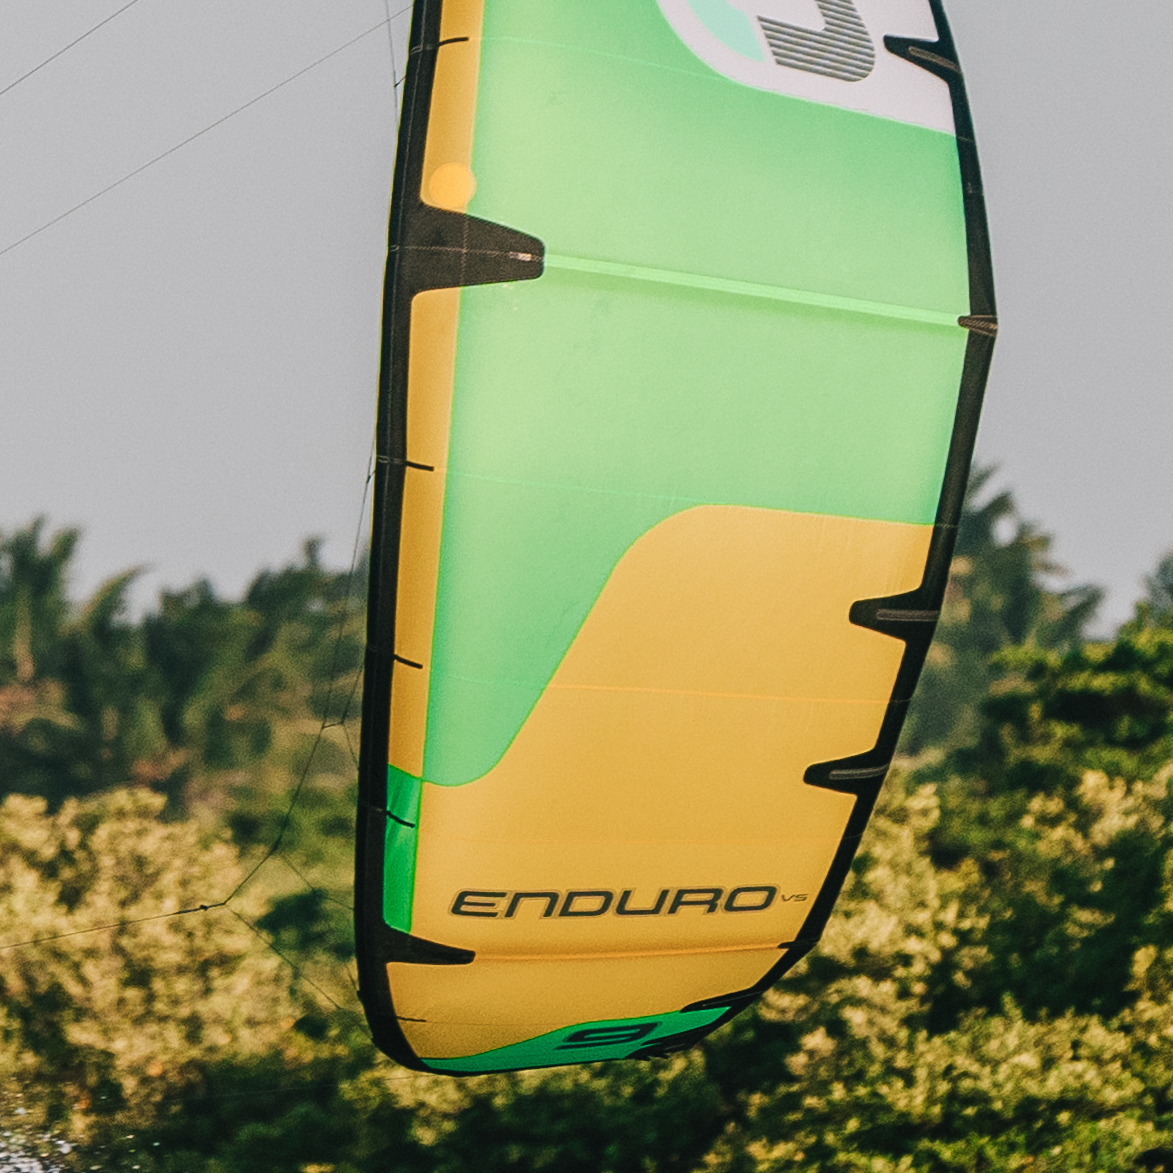
Reinforced Leading Edge and Struts

Reinforced Leading Edge and Struts

The Leading Edge and Struts are reinforced in high stress areas to ensure the kite canopy remains in shape and performs at its best.
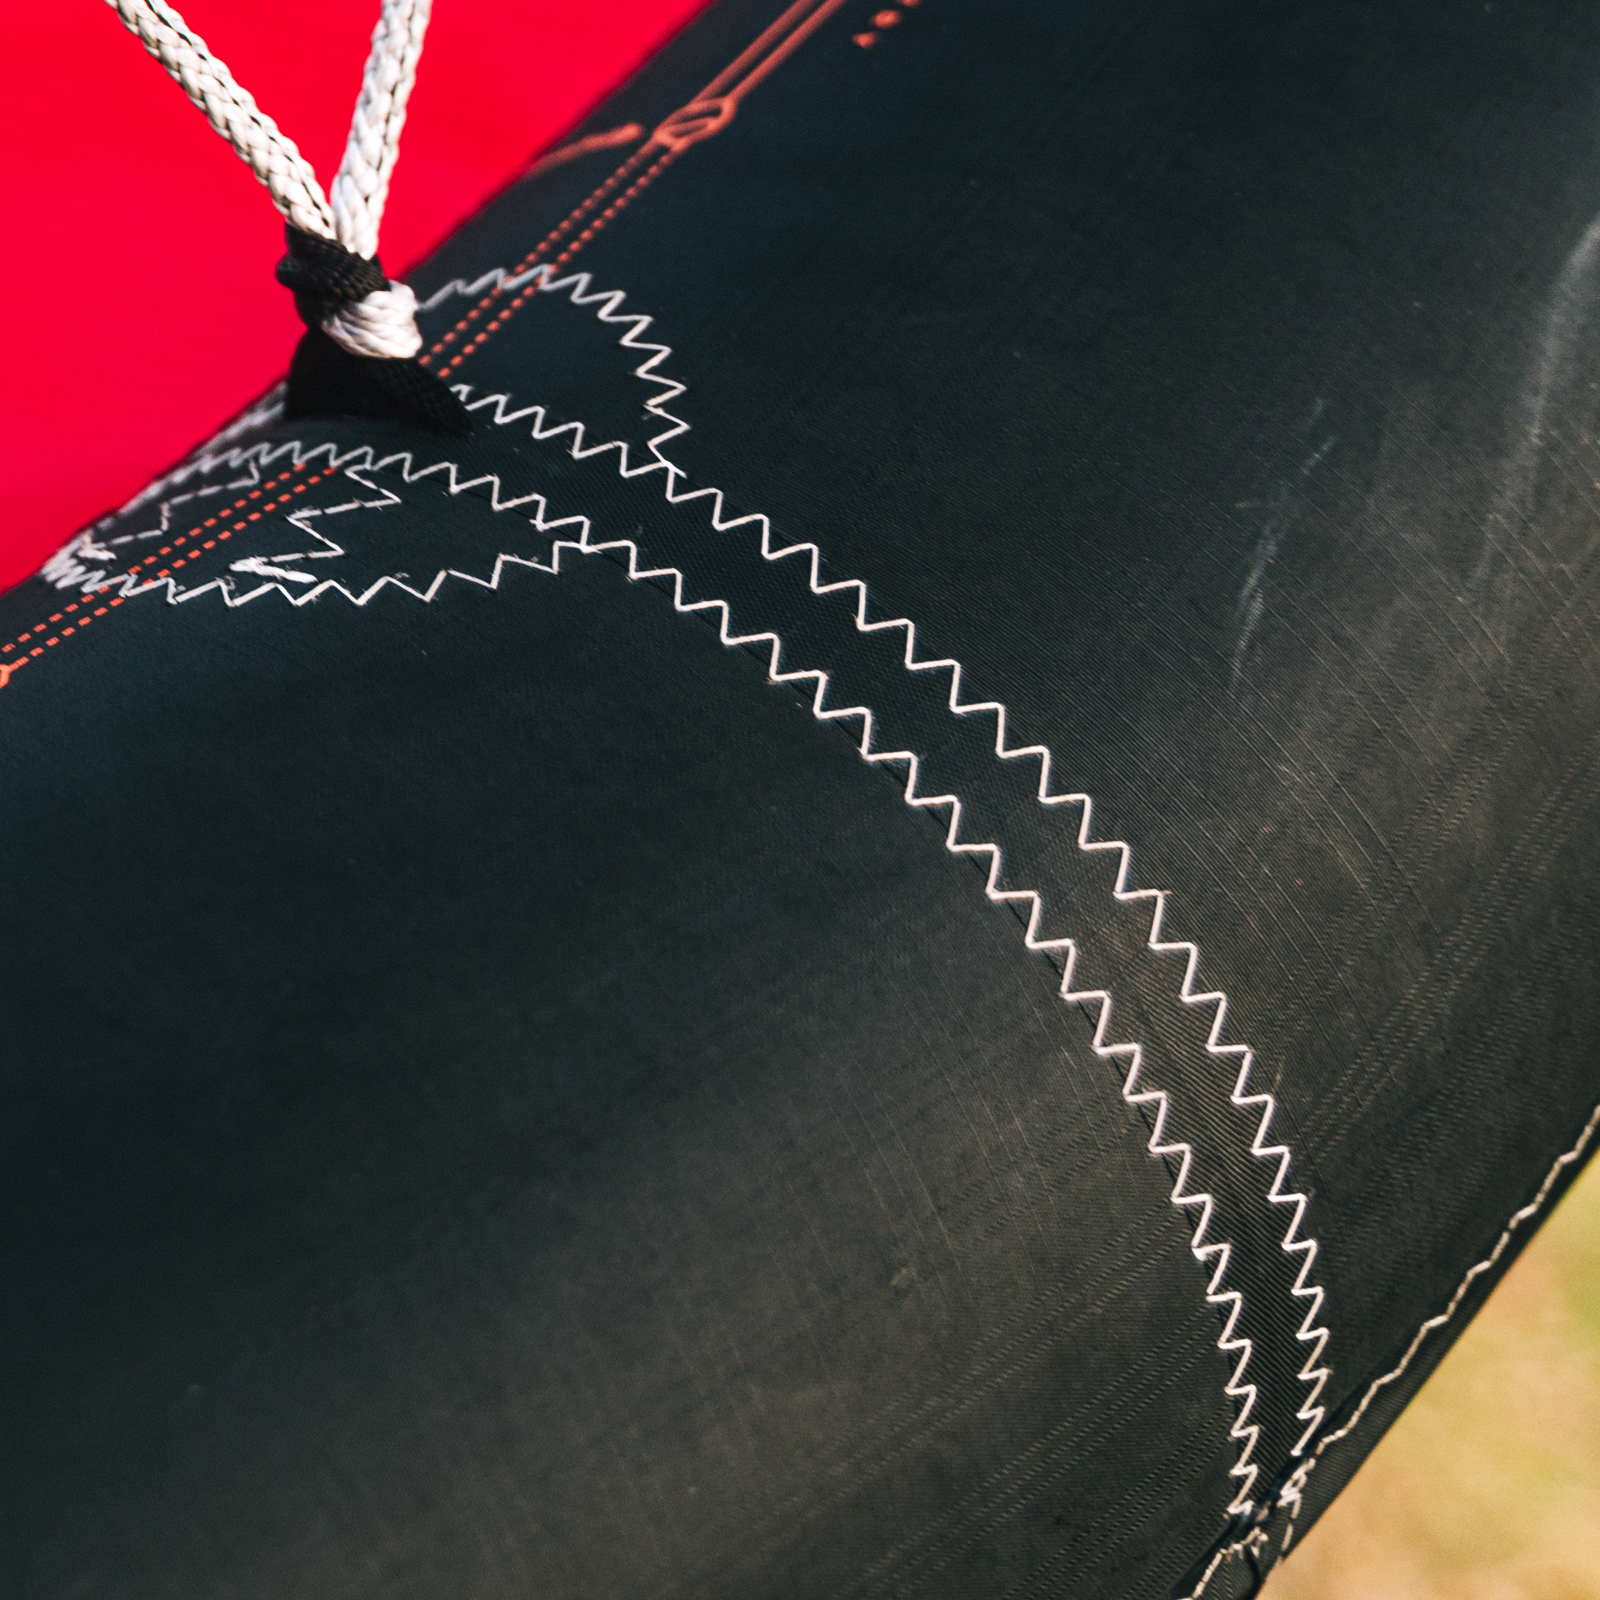
Low Profile Aerodynamic Scuff Pads

Low Profile Aerodynamic Scuff Pads

Leading Edge bumpers are often large and unnecessary cosmetic items. At Ozone we build our kites and wings for performance and durability using the best materials & components available. Any areas requiring scuff protection we use a lightweight durable material with superior abrasion resistance, while keeping a low profile in order to reduce drag and maintain performance.
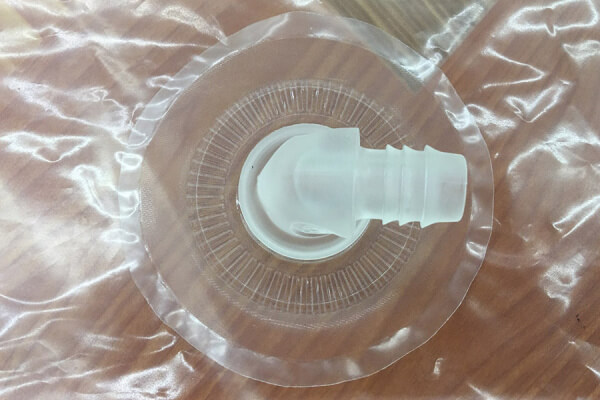
Unique bladder construction

Unique bladder construction

Our bladders are constructed in-house with advanced custom built welding machines. Double layered sections are applied to any potential wear areas.
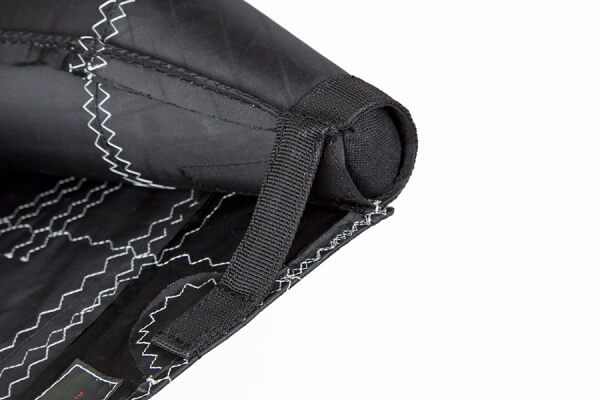
Anti-Snag line deflectors

Anti-Snag line deflectors

The Anti-Snag line deflectors prevent bridles and lines from tangling around the wing tip. Safety is increased when launching with a partner and water re-launch is made easier.
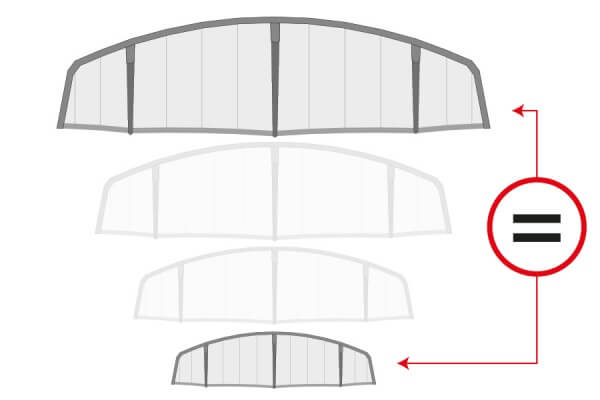
Tuned bridle geometry

Tuned bridle geometry

We work extensively during our R&D process to develop the size range to feel in tune with each other. Every kite has a unique bridle layout, individually tested and fine-tuned to maximize the feeling and performance.
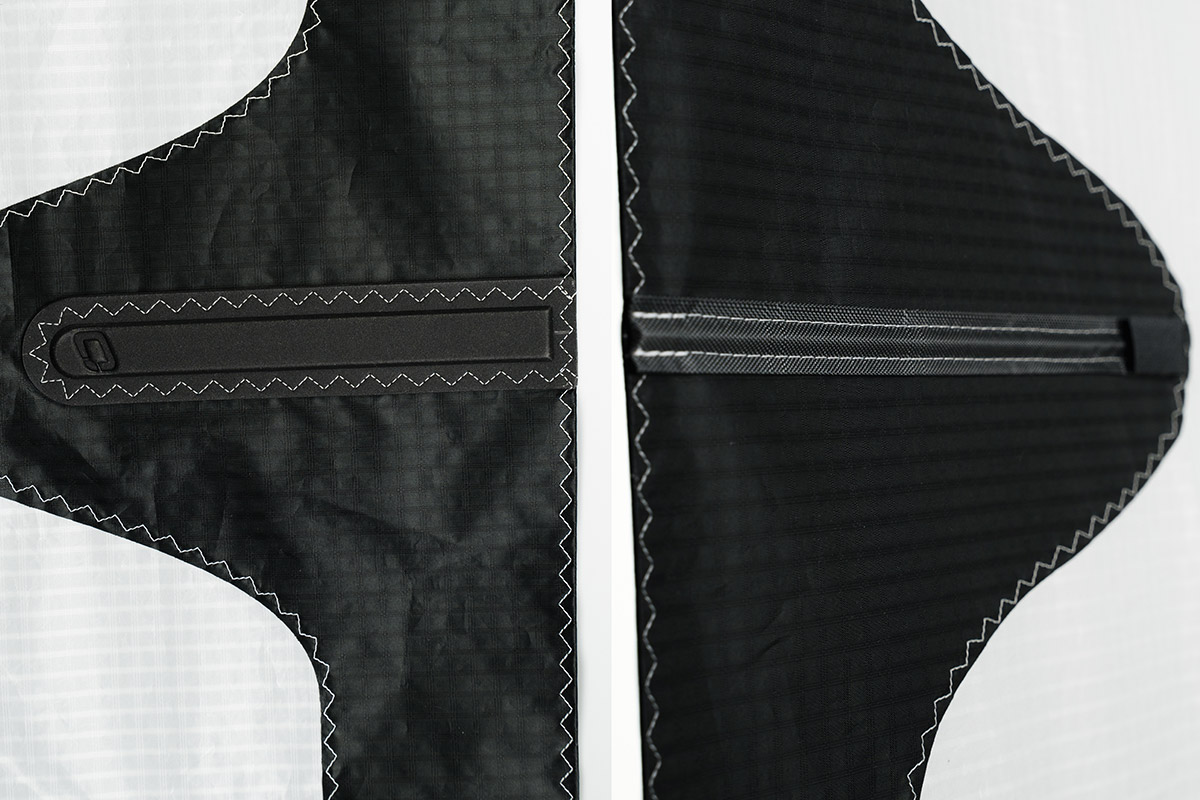
Anti-Flap Battens

Anti-Flap Battens

A combination of soft and rigid battens strategically positioned along the trailing edge provide canopy support and reduce flutter, enhancing kite feedback to the rider and also reducing canopy material wear.

Variable Bridle Geometry

Variable Bridle Geometry

Quick and easy to change with no extra lines to add or remove. Choose from the different pigtail positions on the front bridle’s VBG settings to adjust the kite’s operating range, bringing another level of versatility to this outstanding design.
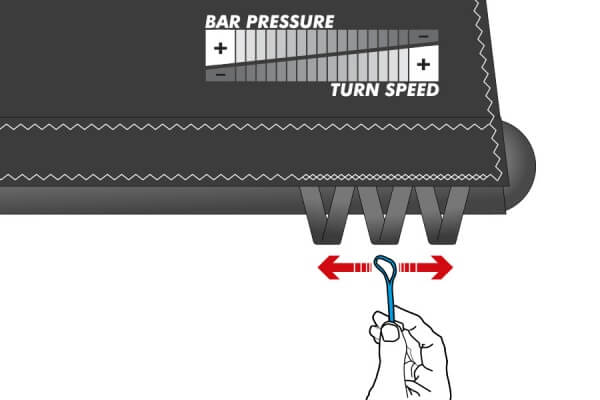
Back-line trimming options

Back-line trimming options

Customise your handling and bar pressure with the back line bridle attachments. Closer to the Leading Edge for slower turn speed and more bar pressure, or closer to the Trailing Edge for faster turn speed and less bar pressure.
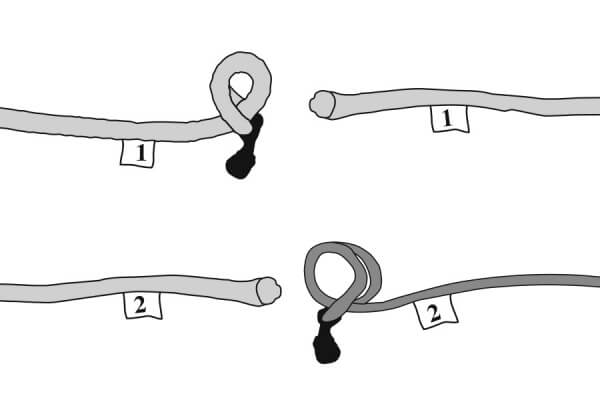
Fool proof line connectors

Fool proof line connectors

Fool proof line connectors prevent incorrect rigging of the flying lines to the kite.
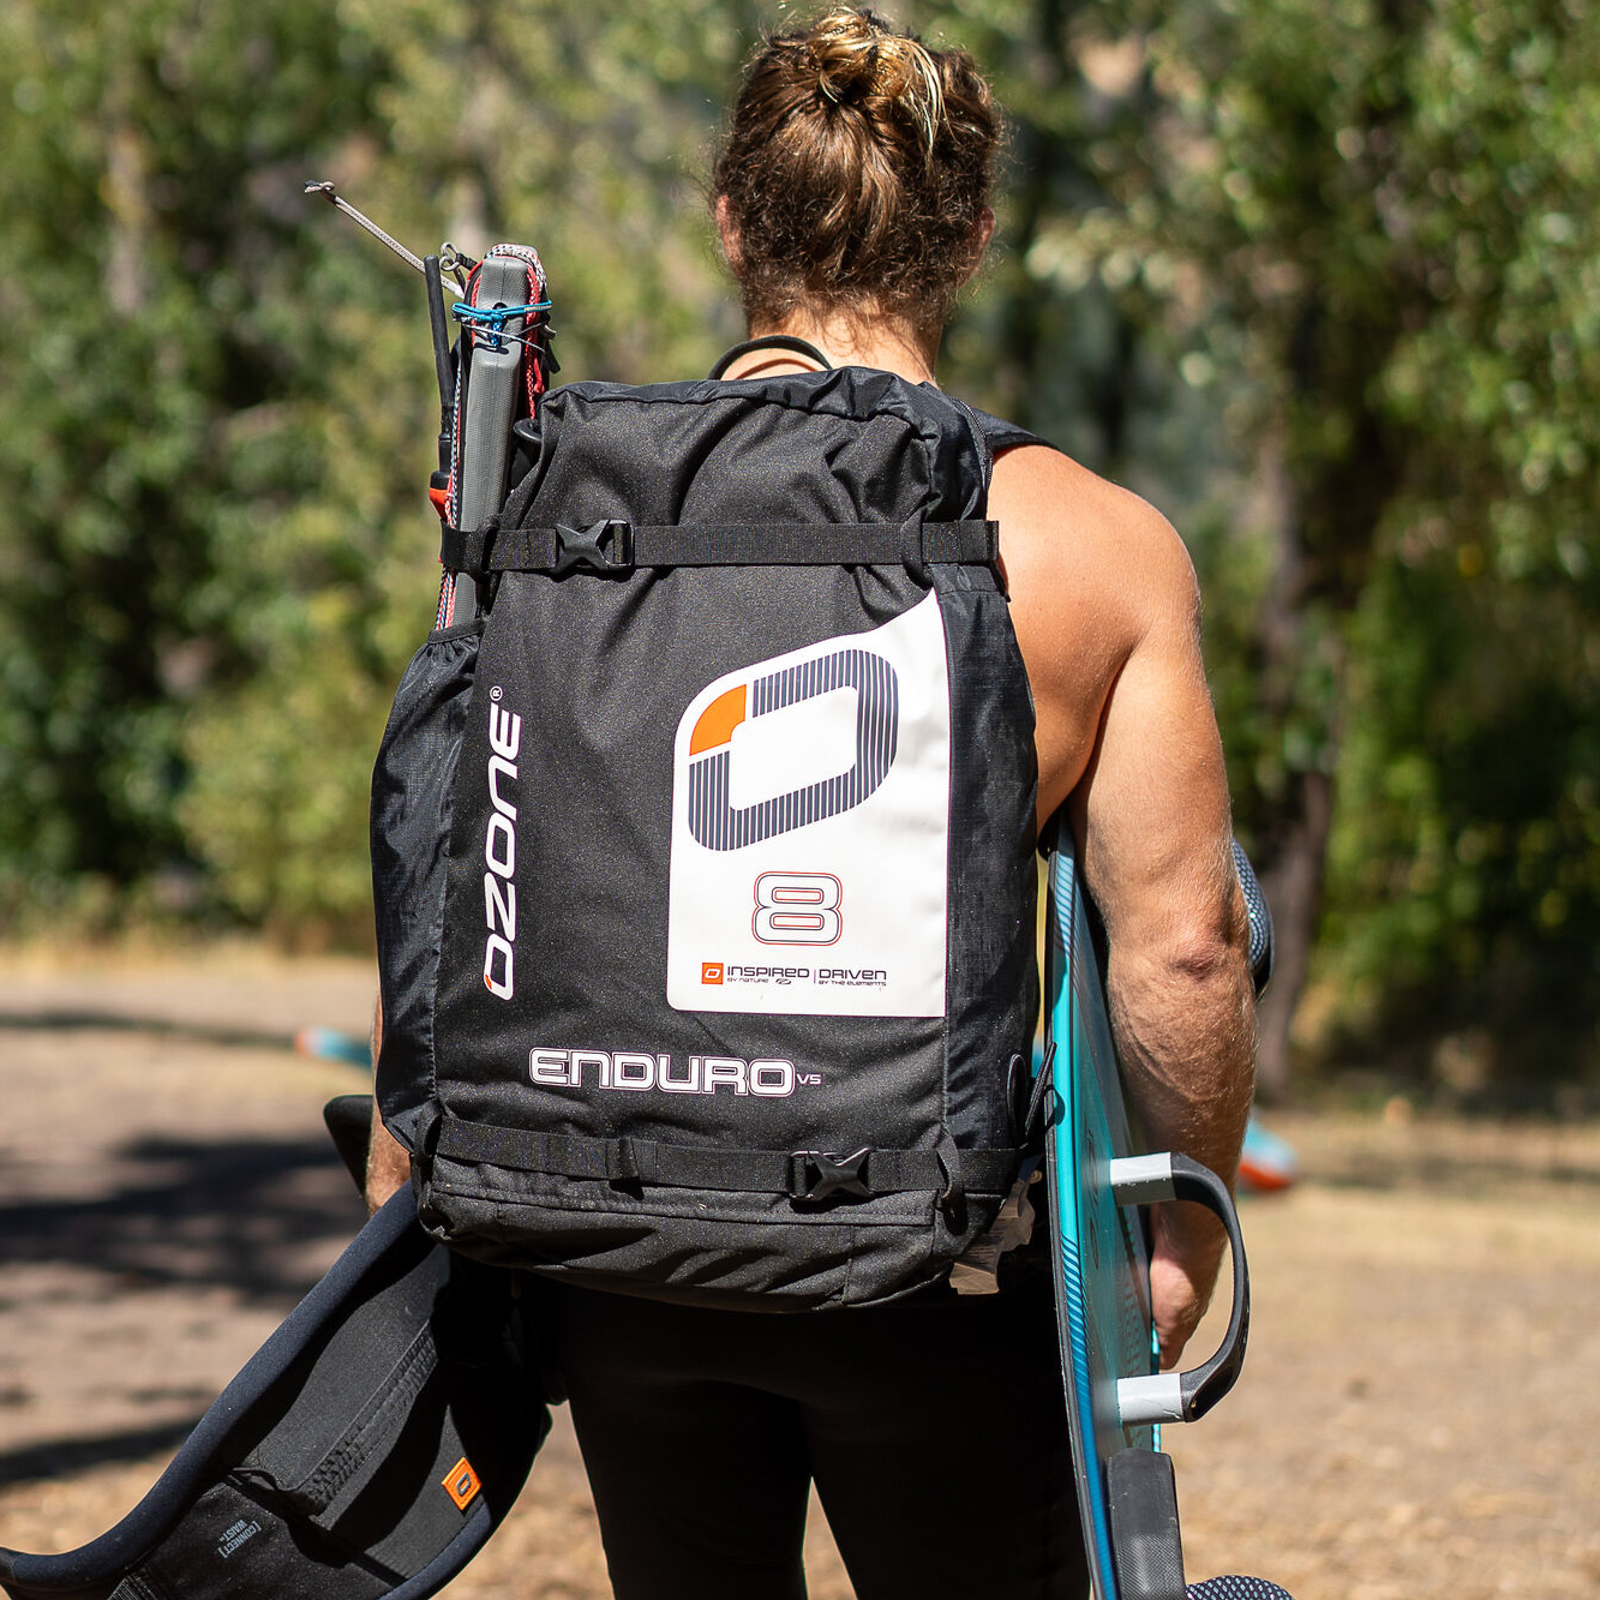
Water Kite Technical Bag

Water Kite Technical Bag

  • Technical Bag with loads of space
  • Internal stash pocket
  • External control system pocket
  • Board straps
  • Pump holder
  • Adjustable shoulder straps
  • Back panel foam padding provides extra comfort

User Manual

Thank you for purchasing this Ozone product. Our mission is to design and build quality products with cutting edge performance that are easy, fun and safe to use.

At Ozone we are passionate about sports, and it is this passion that drives our design team to perfect and develop products that we love to ride with. We are proud of the quality of our products, and are constantly searching for the best components and materials to use in our designs. We manufacture in our own high-quality production facility in Vietnam, which guarantees a build quality that we are proud to put the Ozone name on. A close look at one of our products reveals that same superior quality and construction that ensures that every Ozone product will enjoy a long life, with consistent performance and aesthetics. To view the factory video visit our website www.flyozone.com. Many dynamic action sports carry inherent risks but with common sense and education from qualified instructors means you can easily enjoy these incredible sports. Accidents generally happen due to a lack of experience, changing weather conditions or from using equipment not suited to the riders’ ability and/or conditions. Always take the time to learn safely with qualified instruction and you will progress far quicker. Ride safe Team Ozone

Release of Liability

OZONE KITESURF LTD / OZONE KITES LTD RELEASE OF LIABILITY, CLAIM WAVIER, ASSUMPTION OF RISK

By assembling and/or using this Ozone product, you agree that you have read and understood the entire Ozone product owners manual, including all instructions and warnings contained in that manual, prior to using the Ozone product in any way. You additionally agree that you will ensure any additional or subsequent user of your Ozone product will read and understand the entire Ozone product owners manual, including all instructions and warnings contained in that manual, prior to allowing that person to use your Ozone product.

ASSUMPTION OF RISK

Use of the Ozone product and any of its components involve certain risks, dangers, and hazards which can result in serious personal injury and death to both the user and to non-user third parties. In using this Ozone product, you freely agree to assume and accept any and all known and unknown risks of injury to you and third parties while using this equipment. The risks inherent in this sport can be greatly reduced by abiding by the warning guidelines listed in this owner manual and by using common sense.

RELEASE AND WAIVER OF CLAIMS

In consideration of the sale of the Ozone product to you, you herby agree to the fullest extent permitted by law, as follows;

TO WAIVE ANY AND ALL CLAIMS that you have or may in the future have against Ozone Kitesurf LTD or Ozone Kites LTD and all related parties resulting from use of the Ozone product and any of its components.

TO RELEASE Ozone Kitesurf LTD or Ozone Kites LTD and all related parties from any and all liability for any loss, damage, injury or expense that you or any users of you Ozone product may suffer, or that your next of kin may suffer, as a result of the use of the Ozone product, due to any cause whatsoever, including negligence or breach of contract on the part of Ozone Kitesurf LTD or Ozone Kites LTD and all related parties in the design or manufacture of the Ozone product and any of its components.

In the event of your death or incapacity, all provisions contained herein shall be effective and binding upon your heirs, next of kin, executors, administrators, assigns, and representatives. Ozone Kitesurf LTD or Ozone Kites LTD related parties have not made and expressly deny and oral or written representations other than what is set forth herein and the Ozone product owners manual.
Warranty

Ozone warrants this product according to the laws in force against any major manufacturing defect. This warranty is subject to the following limitations:

  • The warranty is valid only when the product is used for its intended use, and does not cover products used in rental or teaching operations.
  • Ozone will make the final warranty determination, which may require inspection and/or photos of the equipment, which clearly show the defect(s). If necessary, this information must be sent to the Ozone dealer, postage prepaid.
  • If a product is deemed to be defective by Ozone, the warranty covers the repair or replacement of the defective product only.
  • Ozone will not be responsible for any costs, losses, or damages incurred as a result of loss of use of this product. The warranty does not cover damage caused by misuse, abuse, neglect or normal wear and tear including but not limited to; assembling with other than Ozone components, damage due to excessive sun exposure, damage caused by improper handling or storage, and damage caused by anything other than defects in material and workmanship.
  • This warranty is voided if any unauthorized repair, change or modification has been made to any part of the equipment. The warranty for any repaired or replaced equipment is good from the date of the original purchase only. The original purchase receipt must accompany all warranty claims.
  • The name of the retailer and date of purchase must be clear and legible.
  • There are no warranties that extend beyond the warranty specified herein.

WARRANTY CLAIMS

  • Warranty claims must be sent to Ozone by an official Ozone dealer or country distributor.
  • Warranty claims must be processed and be issued a return authorization prior to shipping to the Ozone dealer the product was purchased from.

Warnings & Safety Precautions

This manual refers to the current product it comes with. No information contained herein applies to previous and/or other products or components. Always read and understand all warnings and instructions for any other product or component being used. To read previous product manuals go to www.flyozone.com

Read the following points before assembling and/or using this product:

General Warnings:

  • Before using this product you must take lessons from a certified instructor/school.
  • Always wear a Coast Guard approved Personal Flotation Device when using this product near or on the water.
  • Always carefully inspect all of your equipment before using it.
  • The use of this product exposes the user to many unavoidable and unexpected risks, dangers and hazards.
  • Always use extreme caution when using this product.
  • Misuse of this product can cause serious injury or death.
  • Only use this product if you are in good physical health.
  • Never act in a careless manner when using this product.
  • You are responsible for your own safety and the safety of others around you when using this product.
  • If you are under the age of 18 you should have your parents or legal guardian read all warnings and instructions. You should not use this product unless you are under proper guidance and supervision.
  • Do not use this product if you are under the influence of alcohol, drugs or medications.

Kite and Control System Warnings:

  • Always have a partner when launching and landing your kite.
  • Always learn to use a small trainer kite before attempting to use a larger power kite.
  • Never allow anyone who is not familiar with power kites to use this product.
  • Never use this product without a safety leash system. A loose kite is extremely dangerous.
  • The kite/control system is equipped with passive safety systems, which need to be activated by the user for them to work.
  • The leash system is not a permanent attachment to this product. Never permanently attach yourself to the kite or any of its components.
  • Never use this kite with another control system or safety leash. Only use the control system that is supplied with this kite. Other brands are not compatible with this design therefore and the safety system will not work.
  • Always wear protective equipment when using this product, for example; helmet, gloves, shoes, protective eyewear etc.
  • Always use a high quality and well maintained kite specific harness.
  • Get yourself used to the way all quick release devices work by testing them often in a non-emergency situation.
  • Rinse all quick release devices in fresh water after each use. Quick release devices have a limited lifetime and must be checked and replaced often.
  • Always activate and re-load all safety systems to familiarize yourself with how they work. This is the only way to be sure that you know how to use them in all situations, and that they are correctly loaded and safe for use.
  • The quick release trim loop and kite leash equipped with a quick release must be replacement after 250hours of use. Replace them before if you see any sign of wear. The wearing of quick release devices is not considered a warranty issue.
  • Never touch the flying lines when the kite is in use. Flying lines are extremely dangerous while under tension and can cause serious injury or death.
  • Never use this product with worn lines. A line that breaks while under tension can cause serious injury or death.
  • Always check your flying lines for knots before each use. Knots greatly reduce the strength of the lines.
  • Stay away from tangled flying lines unless the kite is secured to the ground. An unsecured kite can self launch unexpectedly, and can cause serious injury or death.
  • Never allow yourself, or anyone else, to get between the control bar and the kite when using this product.

Choose safe weather conditions and locations:

  • Be aware of the general risks associated with action sports.
  • Ensure you understand all weather forecasts and prepare for changes in weather.
  • Never learn to use this product in more than 10 knots of wind.
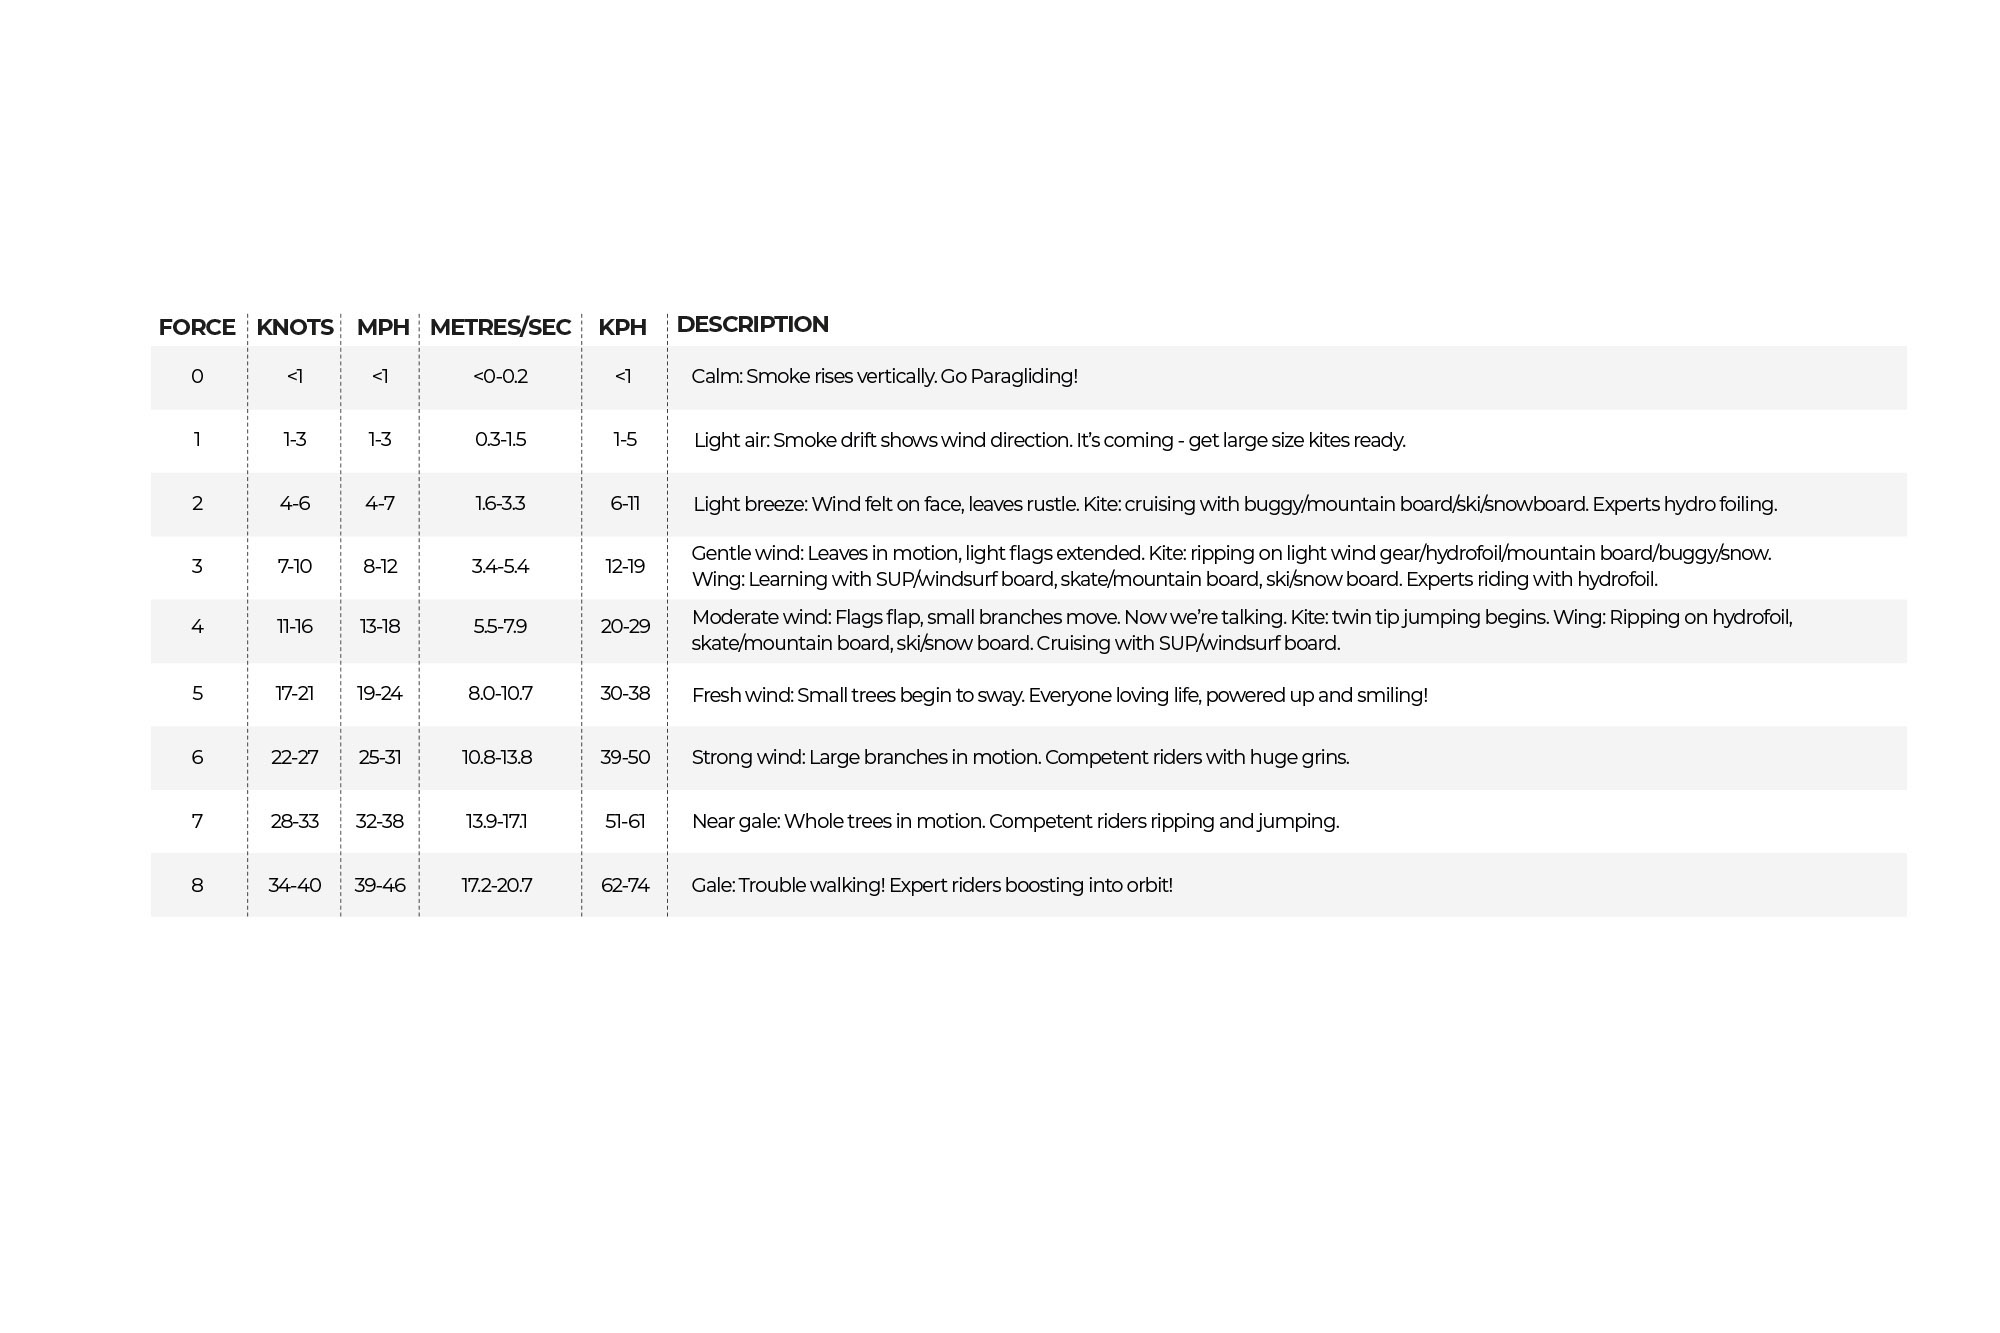
  • We highly recommend you purchase a wind speed indicator to be able to measure wind speeds. Study the wind guide to understand wind speeds.
  • Never use this product in high winds.
  • Never use this product in thunderstorm and lightning conditions.
  • Only use this product when you can remain in a standing position.
  • Never use this product in wind conditions that are above your ability level.
  • Never use this product near or on the water in offshore wind condition unless you are an expert swimmer.
  • Always observe local rules and regulations when using this product.
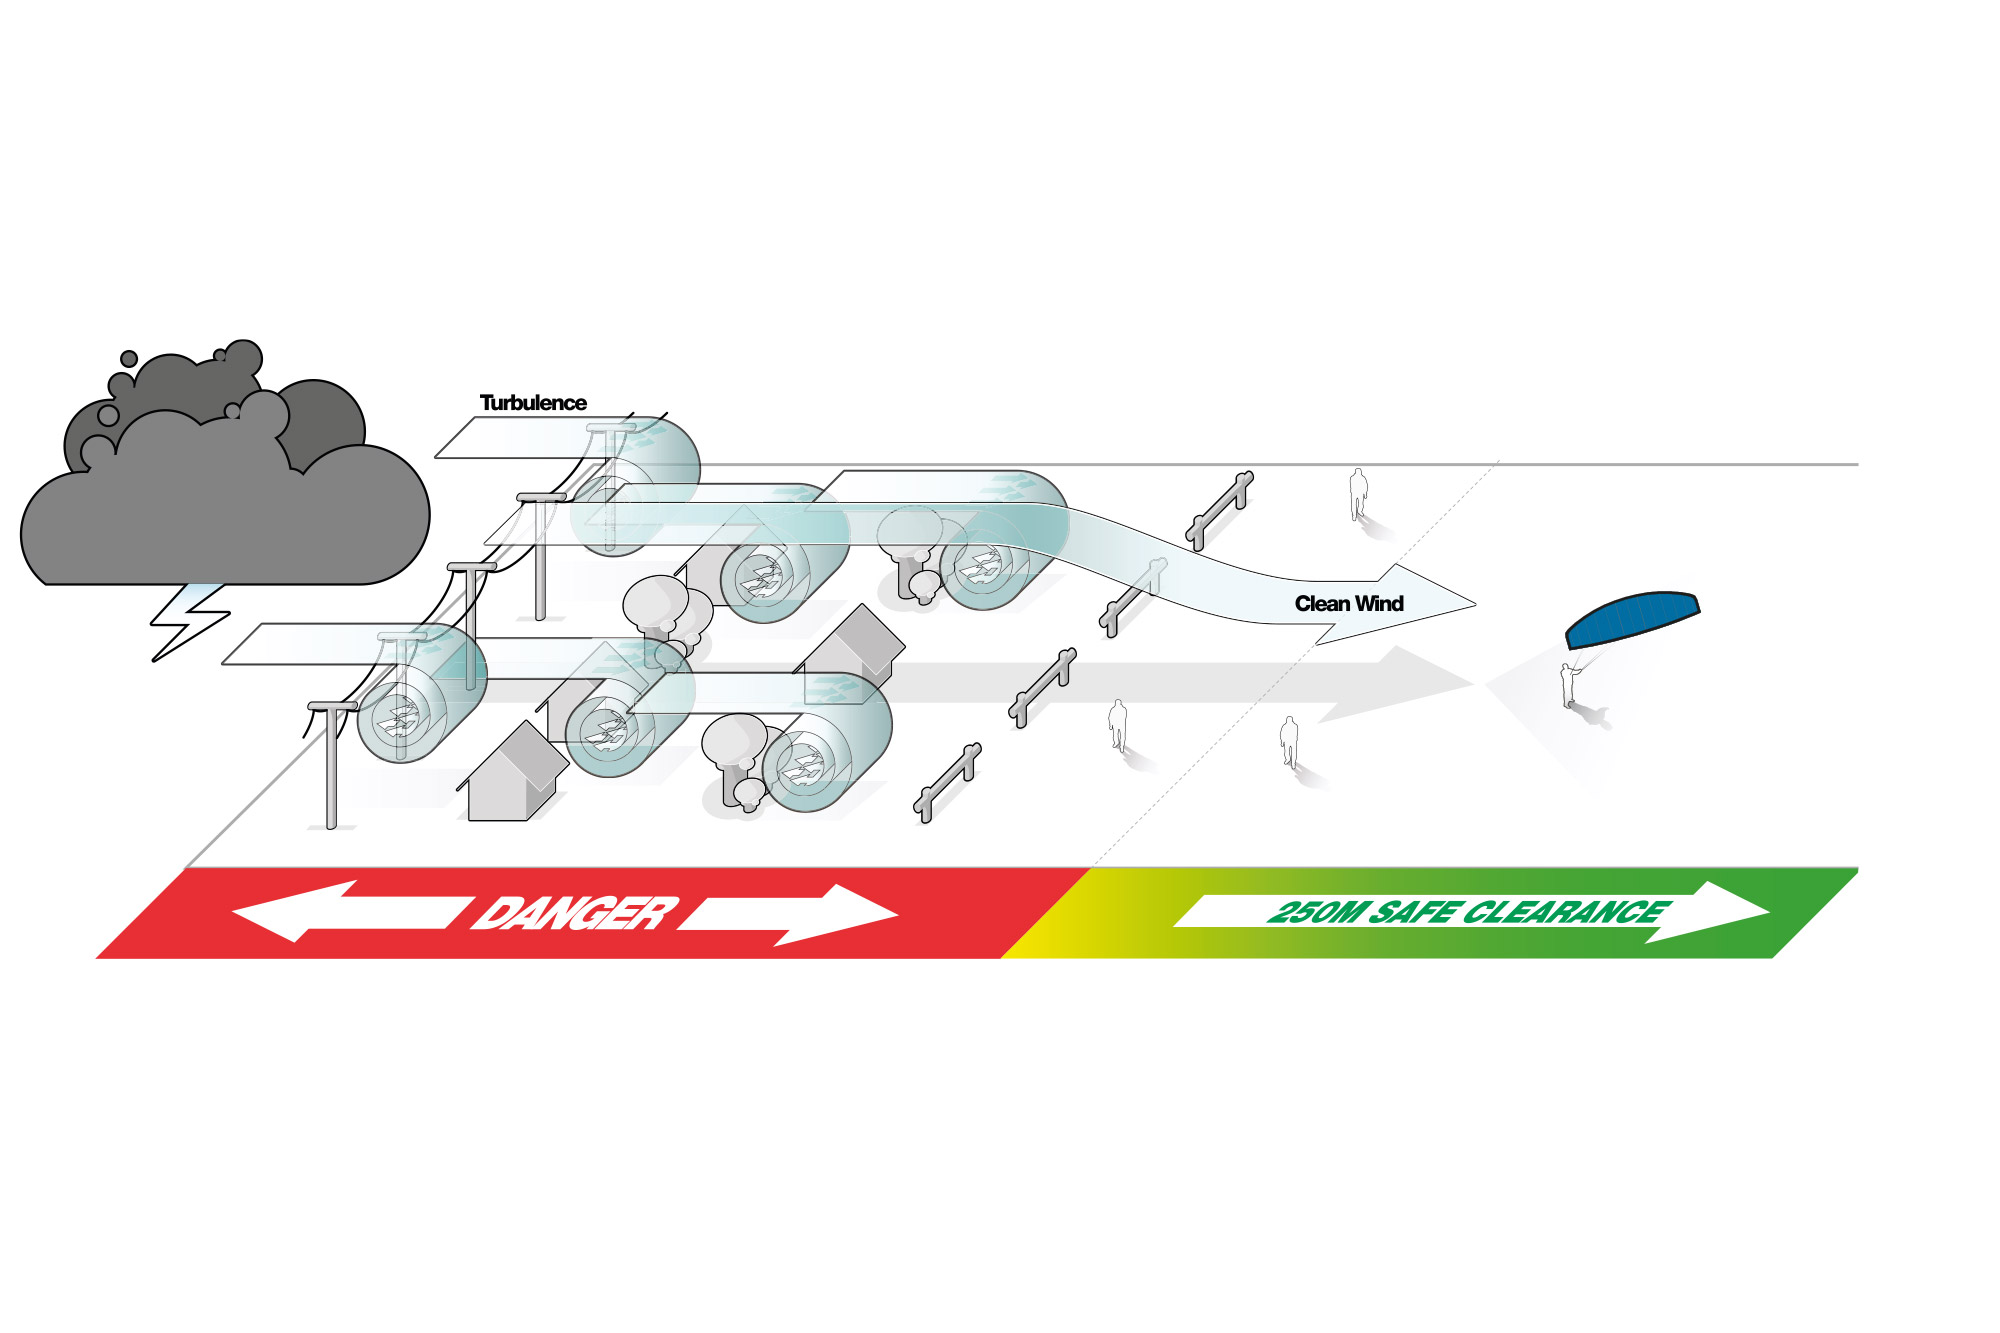
  • Never use this product near power lines, telephone poles, trees, bushes, roads, automobiles or airports.
  • Only use this product when you have at least 100m of clear space downwind, and on both sides of your launching position. The power of the kite can pull you downwind unexpectedly with great force.
  • Do not fly your kite over other people or pets. Spectators should remain upwind of you when using this product.
  • Never use this product on crowded beaches or fields.
  • Practice launching and landing procedures, and self rescue techniques before using this product near the water.


Set Up:

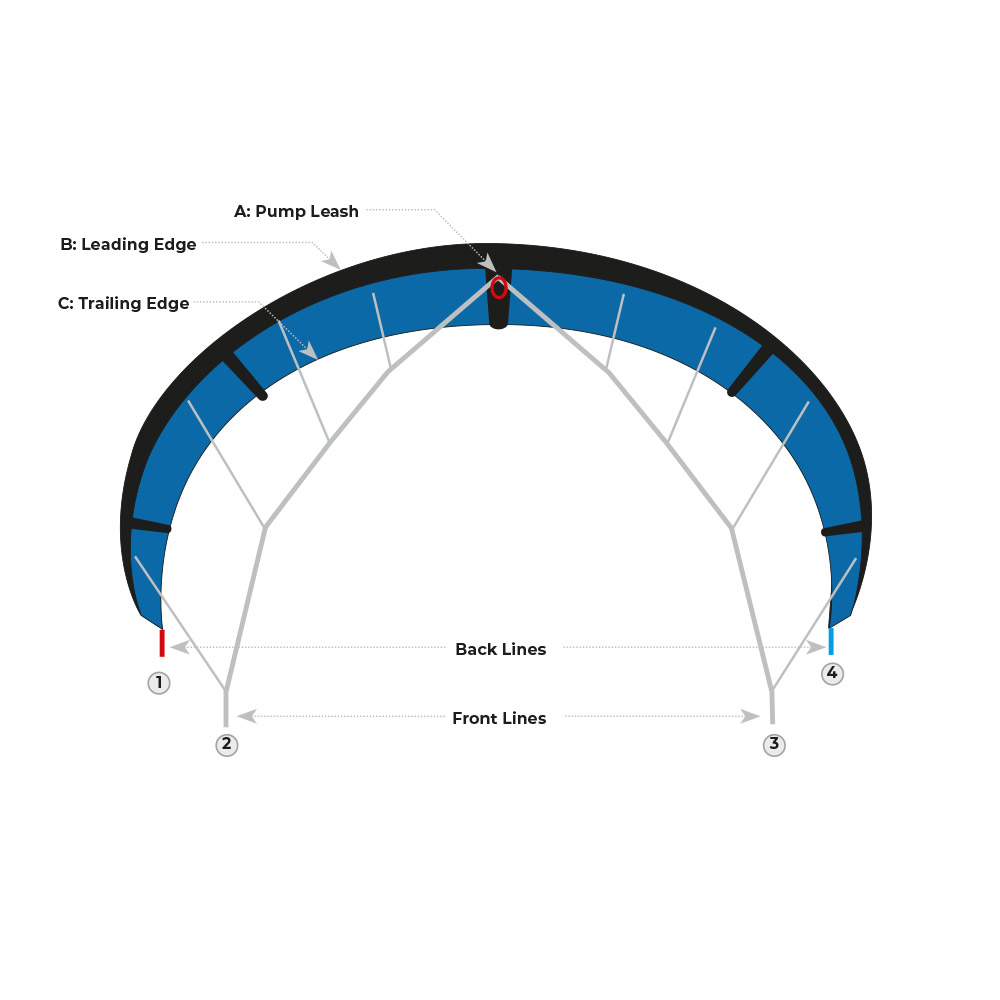
Attach The Lines To The Kite As Shown In These Diagrams.
View Is Of The Kite When Flying.

A: Pump Leash

B: Leading Edge

C: Trailing Edge

1 & 4: Back Lines

2&3: Front Lines
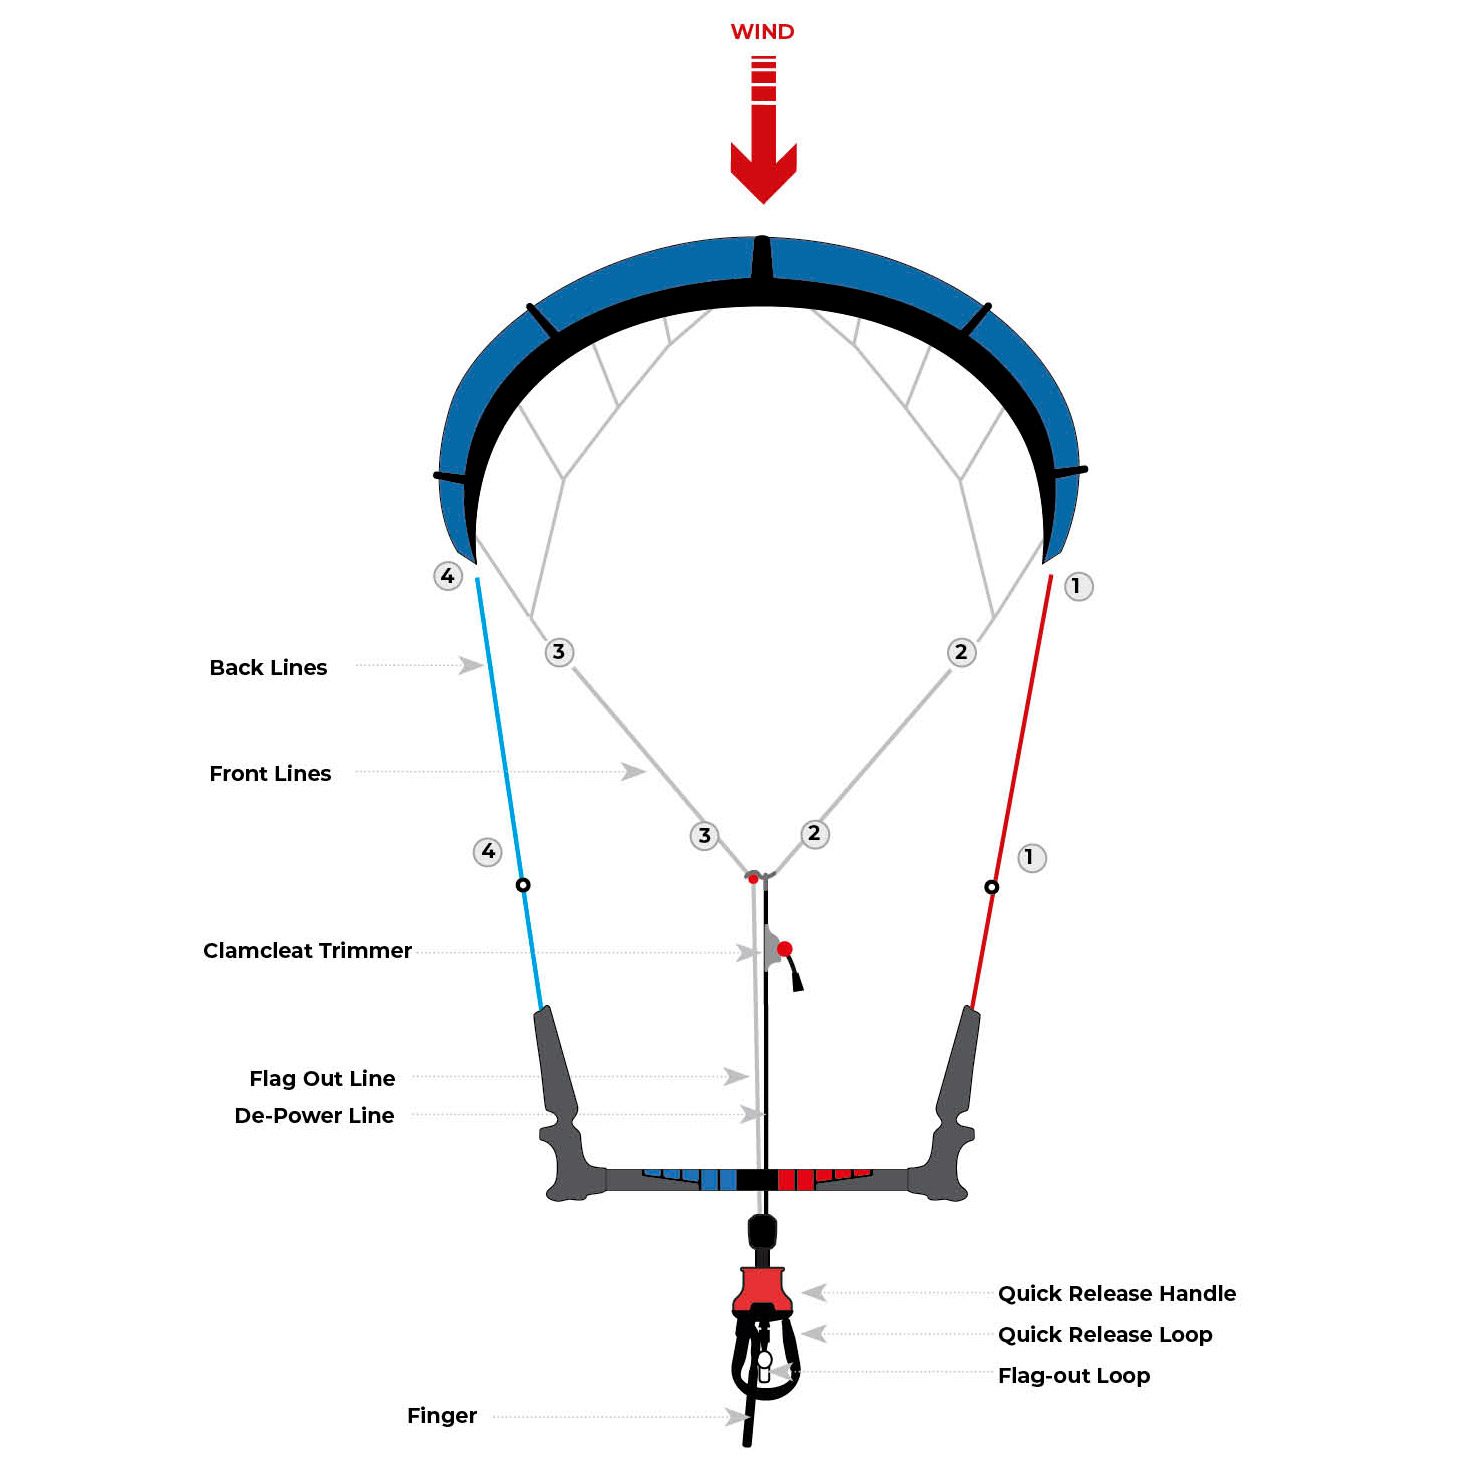
Set Up The Kite And Bar Face Down On The Beach With The Bar Downwind From The Kite.

1 & 4: Back Lines

2&3: Front Lines

A: Clamcleat Trimmer

B: Flag Out Line

C: De-Power Line

D: Quick Release Handle

E: Quick Release Loop

F: Flag-out Loop

G: Finger
Set Up

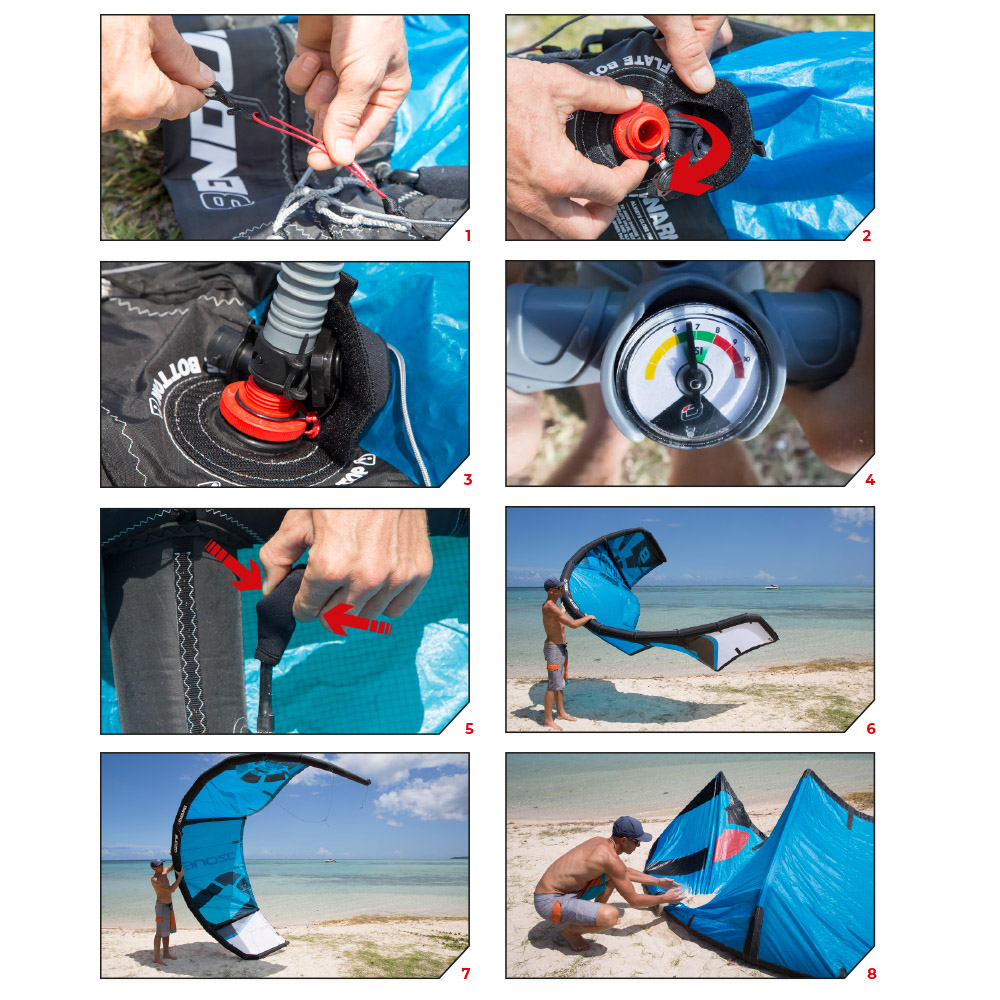
  • Attach the pump leash to the looped line at the centre of the leading edge.
  • Make sure all one-pump hose clips are open before you start inflating.
  • Inflate using the IN valve.
  • Refer to the recommended inflation pressure located next to the inflate/deflate valve.
  • Do not over inflate above the recommendation.
  • Do not under inflate or it will not perform as designed.
  • Close the top valve cap. Double check the valve is tightened firm and is sealing.
  • Close the protection cover.
  • Close all one-pump hose clips. This isolates each strut from the leading edge, so if you get a puncture in one part of the kite the rest of the kite will remain inflated.
  • Once the kite is fully inflated, turn the kite over and secure the kite using sand or sand bags on either side of the centre strut.
  • Never leave a kite unattended without sand or sand bags on the kite.

WARNING:

Do not ride the kite with the one pump clips undone. If you get a puncture the whole kite will deflate! Always close the one pump clips inside the neoprene covers after pumping up. Do not under inflate the kite or it will not perform to its designed trim and will not relaunch easily.
Attaching The Control Lines

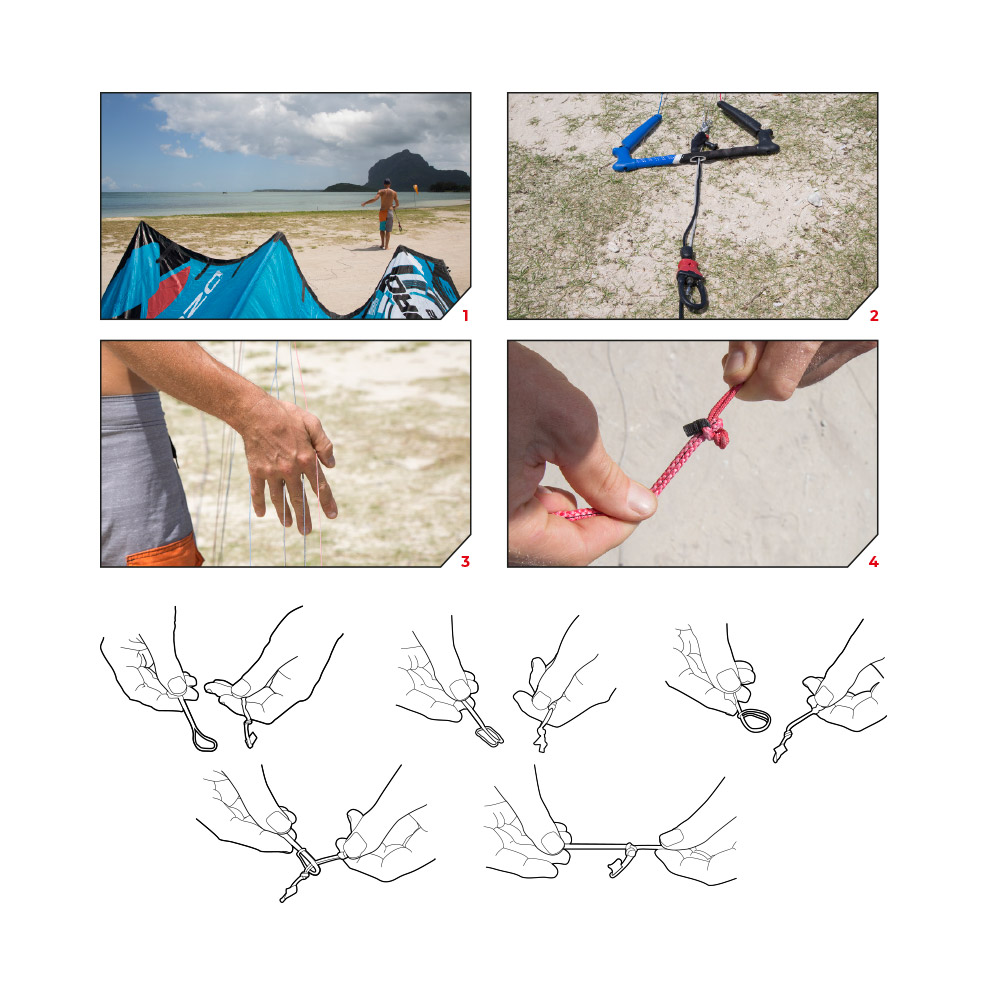
  • With the kite on the sand and leading edge facing upwind start to unwind all the lines from the bar walking downwind.
  • Put your bar in the sand with red side of the bar on the right and start untangling the flying lines, walking upwind towards the kite.
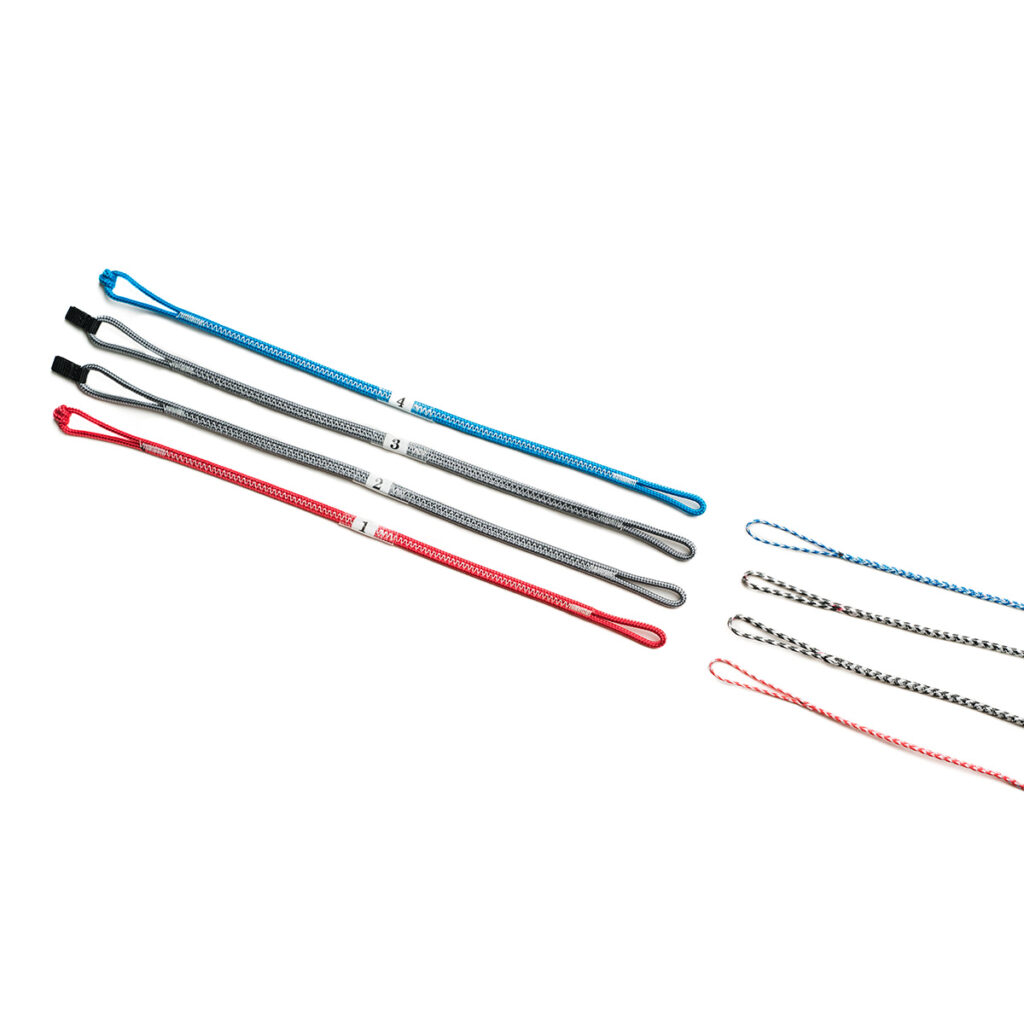
  • We label each line with numbers which correspond to the same numbers on the kite. Use a larks head knot to attach the lines making sure the line label system matches >>  4 to 4; 3 to 3; 2 to 2; 1 to 1. The line labels are on the bar, lines and kite to make rigging stress free and easy.
  • The frontlines have stitched loop ends and the back lines have knots so it is very difficult for you to attach the lines incorrectly.

All line to kite connections are made using a “LARKS HEAD” knot.

Always double check your lines before launching. Wrongly attached lines will stop the kite flying correctly and could therefore mean you have no control of the kite putting yourself in a dangerous situation.
Security

Quick Release Connection

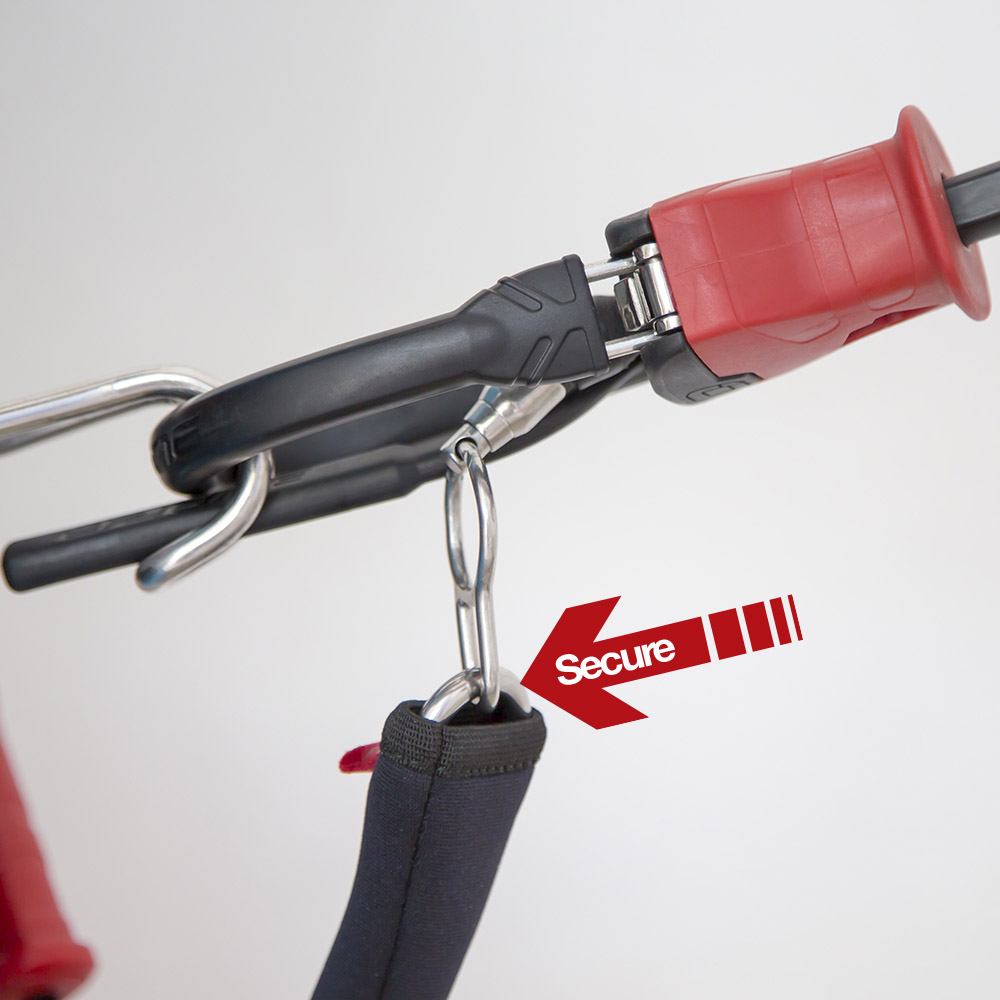
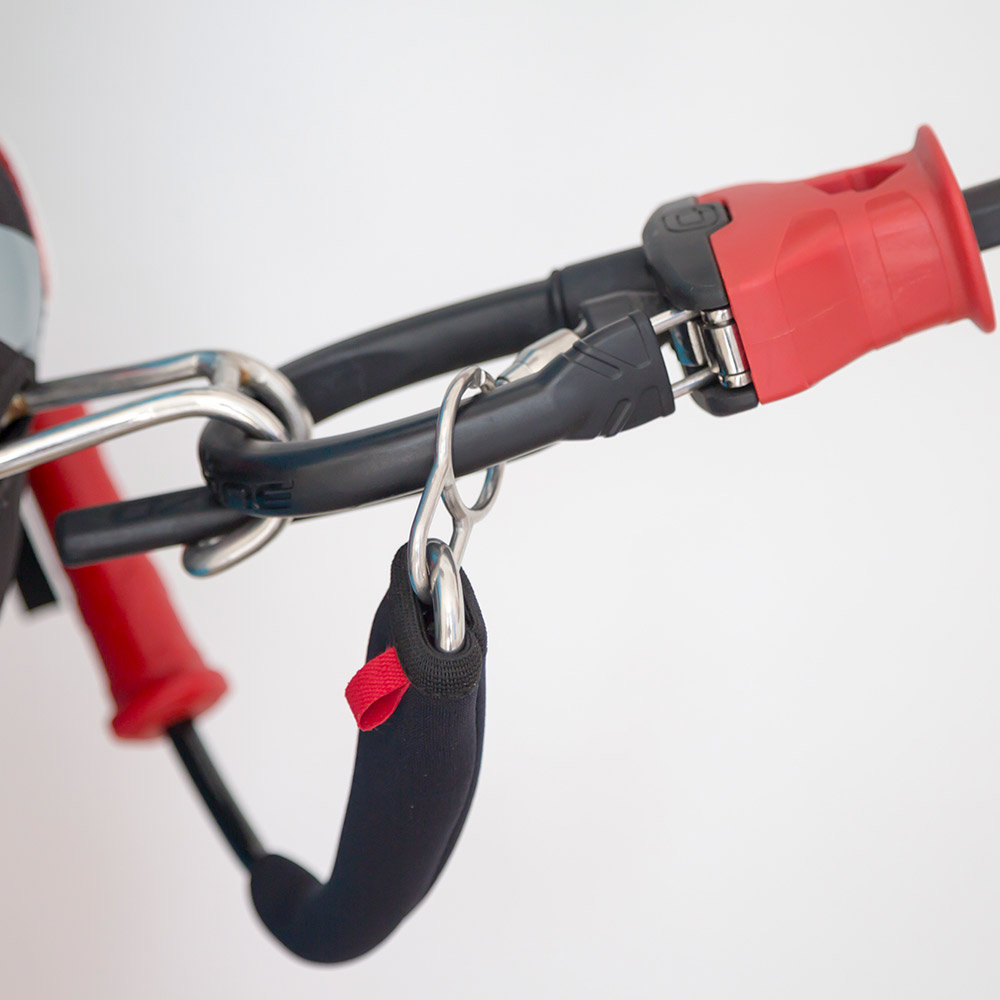
The Quick Release is the primary connection to the kite. Make sure you connect to the Quick Release using the finger as shown in the pictures.
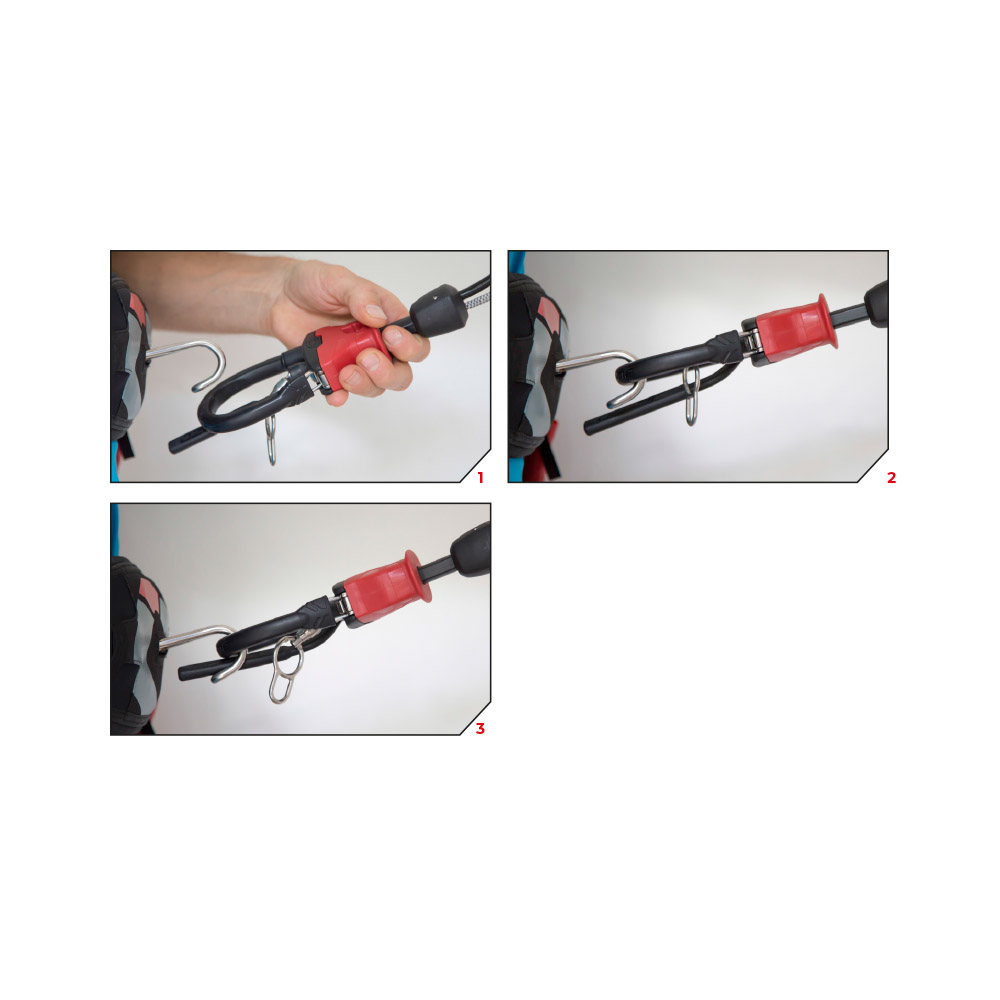
Below the Bar Release (Recommended Mode)

All riders should attach their Kite Leash to the Flag Out System. This is the small eyelet on the Stainless Steel Swivel Ring.
When the release is activated, the kite will flag out and fall to the water/ground.

In all situations make sure that all lines are clear of all working release systems and the kite leash is connected in the right way.
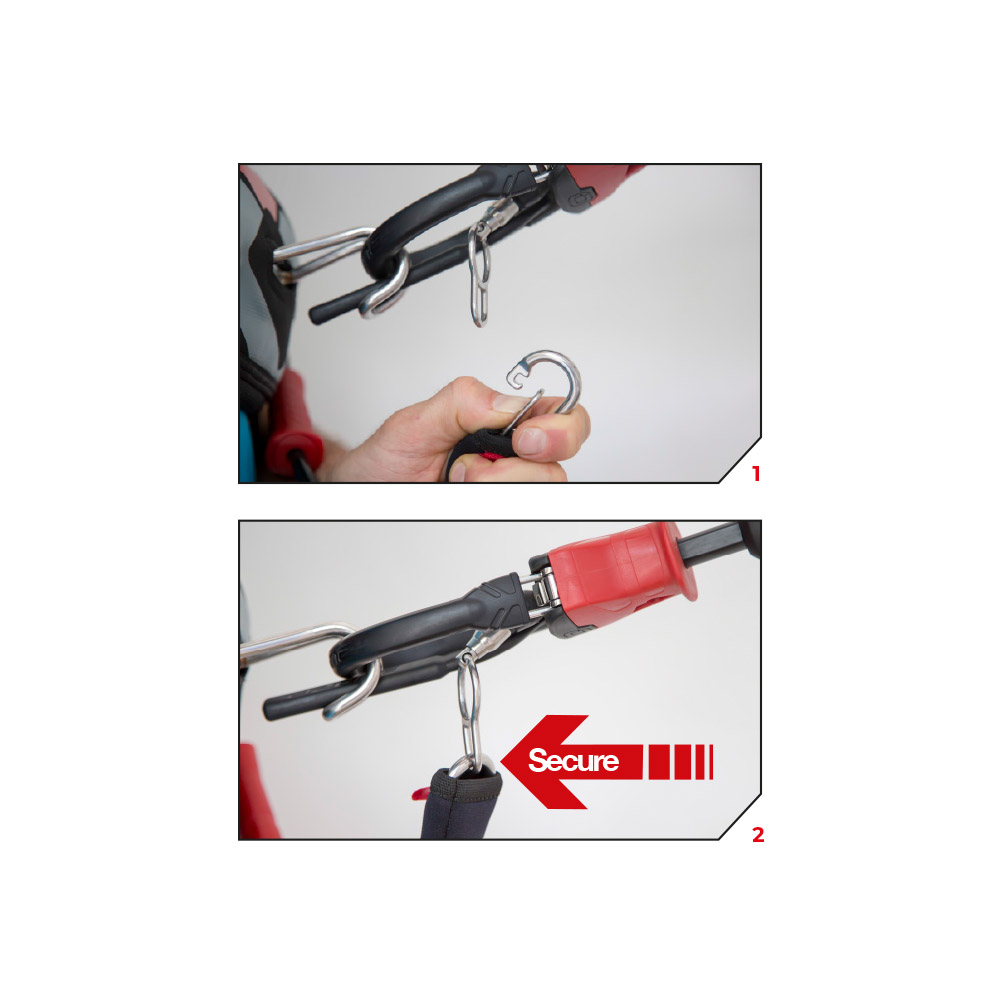
Advanced Riders (Use at your own risk, not recommended) 

Riders performing unhooked tricks or who are more confident and have spent many hours Kiting can attach in Expert mode, where the loop part runs through the large eye of the steel ring. When letting go of the bar in Expert mode (without activating the release e.g. missed handle pass) the kite will depower but WILL NOT flag out.

Be aware in this situation, the Quick Release will be out of reach and can therefore not be released. When hooked in and activating the Quick Release the steel ring automatically slips off and the kite will flag out.
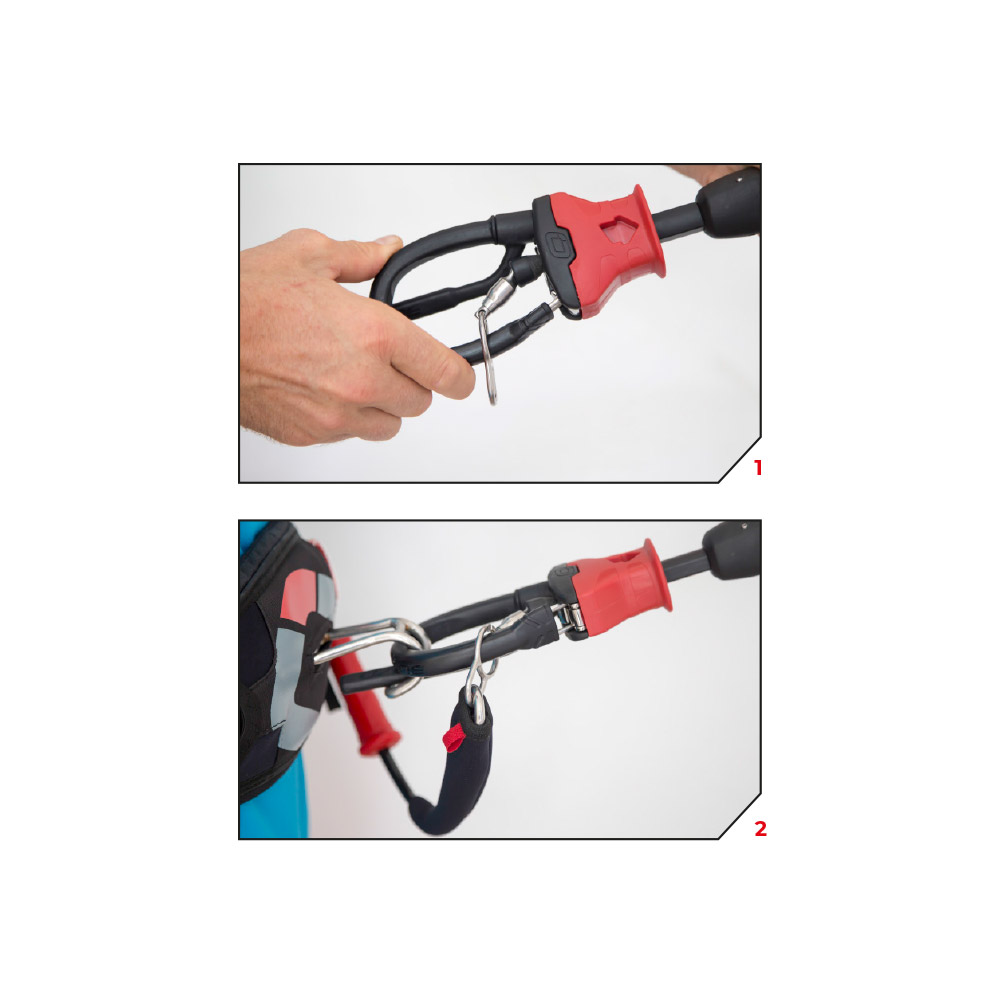
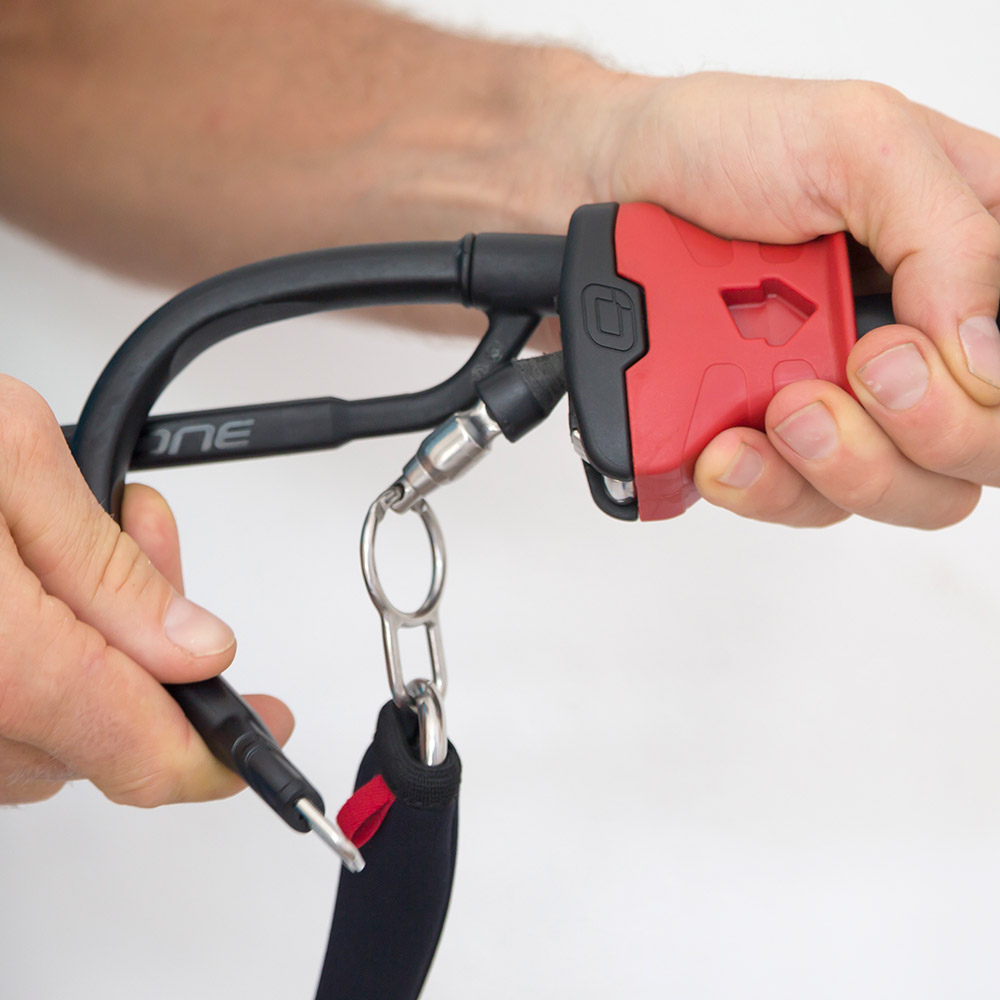
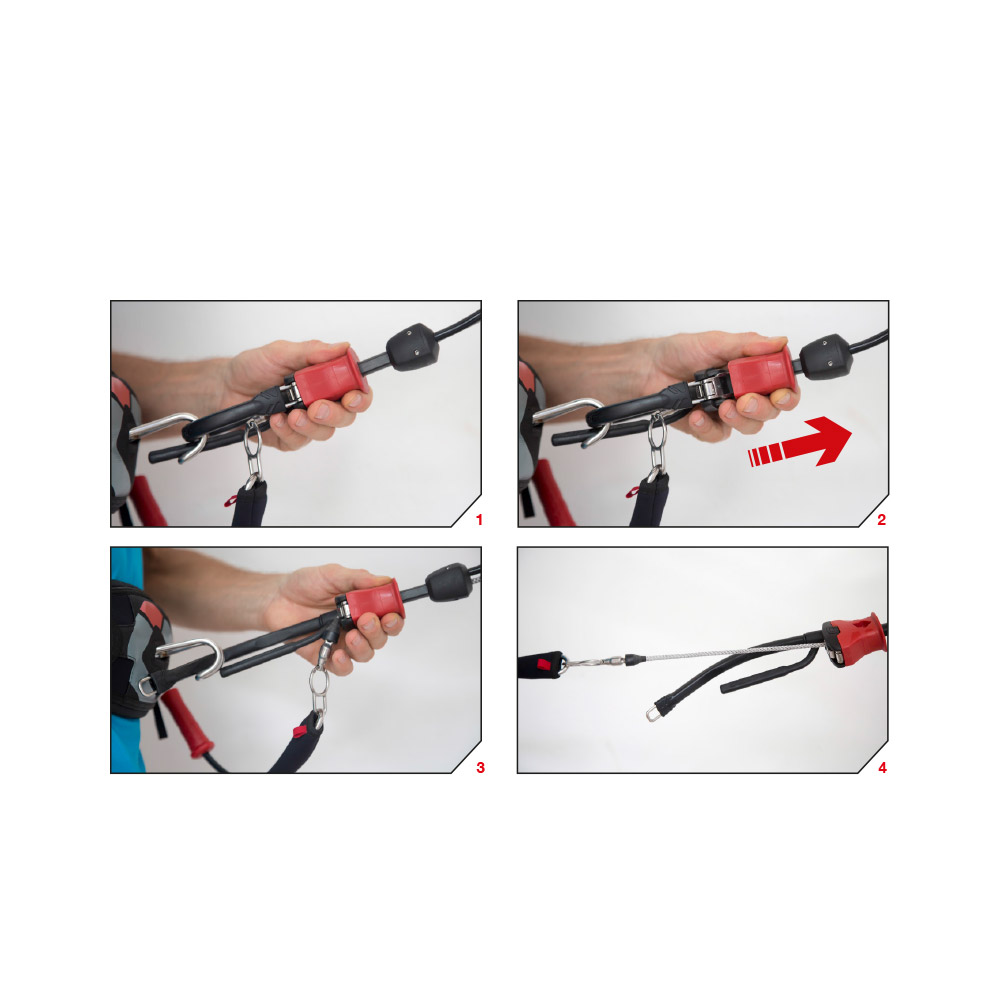
1st Stage of  Release

Activate the Quick Release as shown in the pictures. Providing your leash is attached to the flag out system the kite will 100% depower.
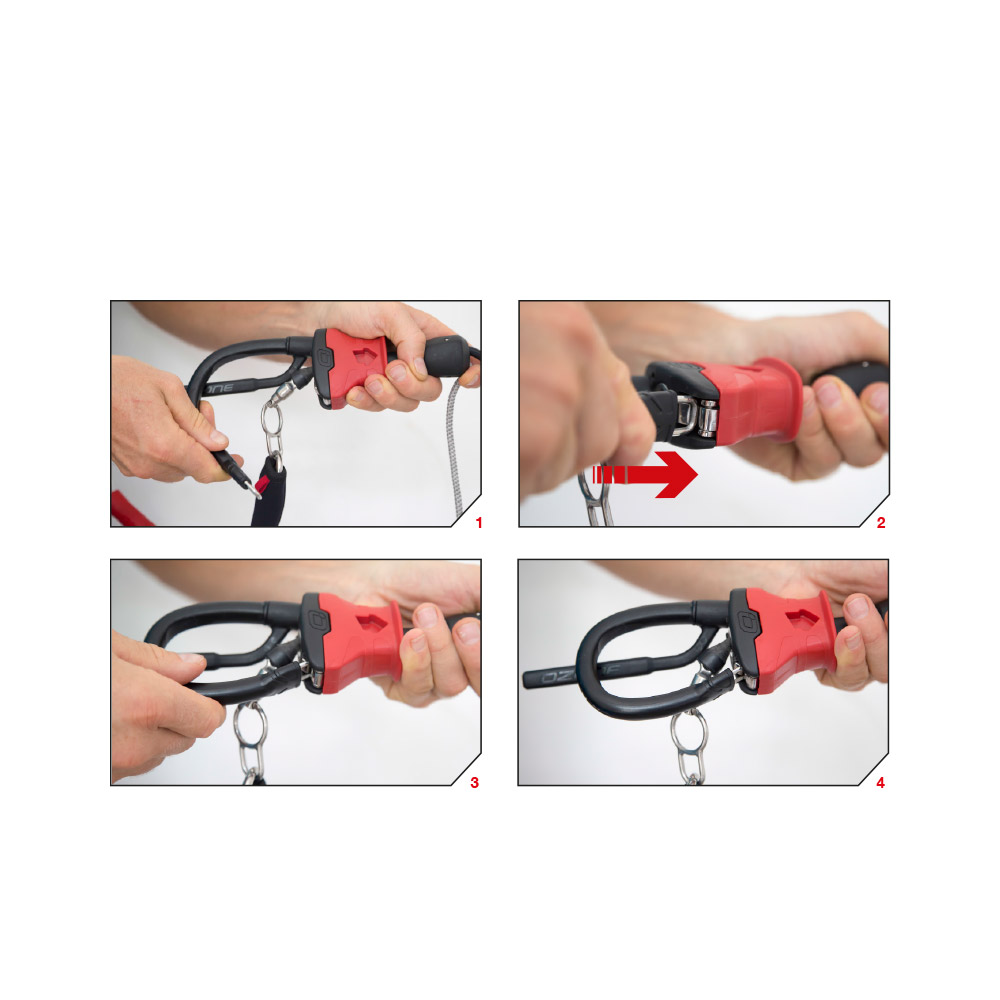
Reloading the Quick Release

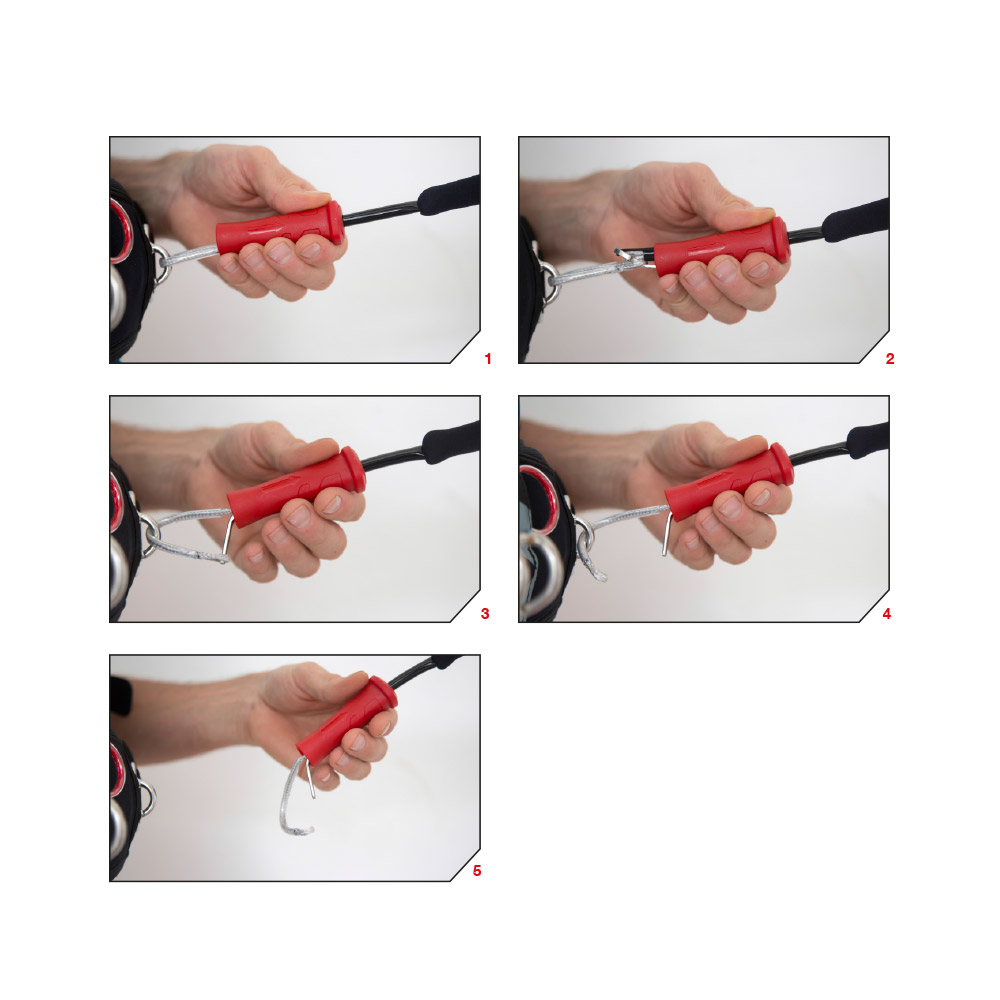
Final Stage of Release (in an extreme emergency)

In the case of an extreme emergency where you need to completely release from the kite, use the quick release on the kite leash. This will completely detach the kite and control system from the user, and could therefore hit anything or anyone downwind causing damage, serious injury or death. RIDE RESPONSIBLY.
1st FLY 

WARNING:
NEVER LAUNCH A KITE DIRECTLY DOWNWIND OF YOU IN THE POWER ZONE!

Launching and Landing

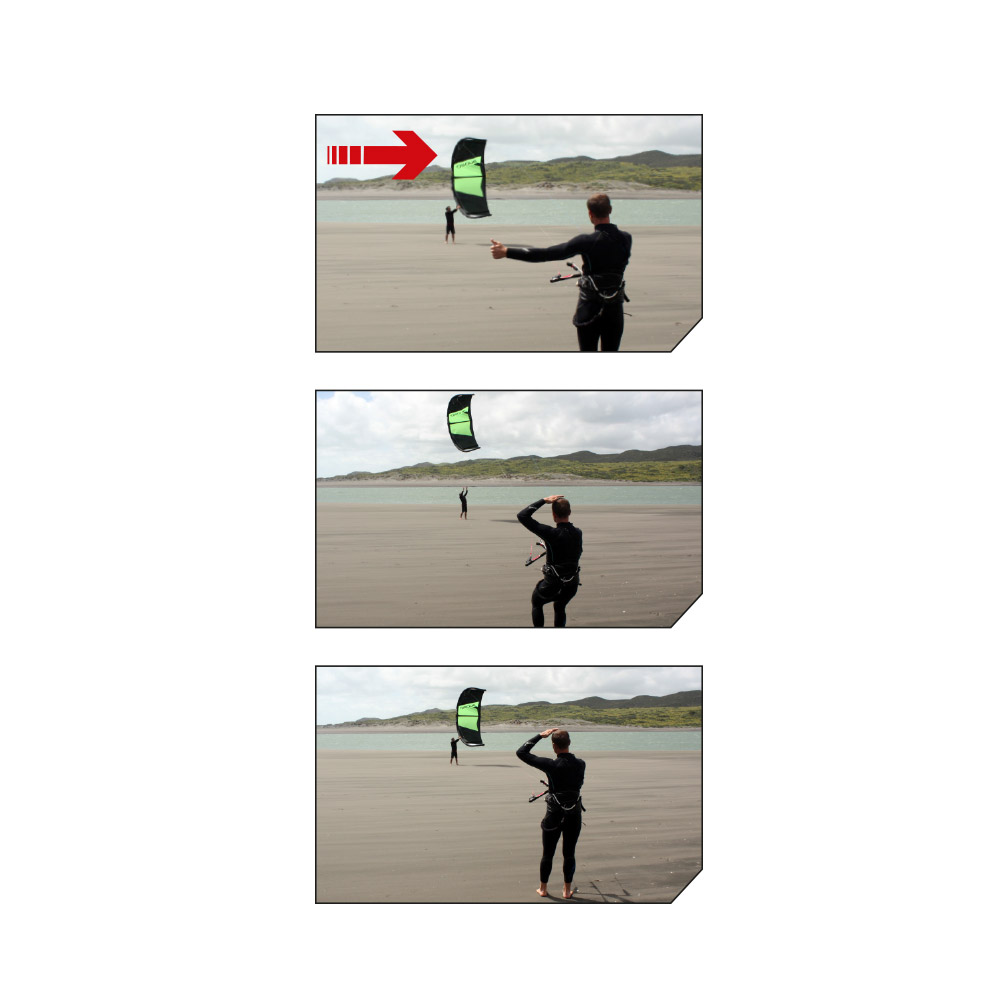
Instruct your partner on how to handle the kite and agree on a sign together for the release and landing. They should hold the kite in the center of the leading edge at the edge of the window and double check that all lines are clear. It is possible for lines to get wrapped around the tip so make sure they understand that all lines must run clearly from each attachment point.

Before you give the signal to release make sure you are 100% confident that all lines are clear. Then give your pre-agreed signal for your partner to release the kite and gently launch the kite to the top of the window.   

Landing the kite use the same principles >> Most importantly keep your head clear, be smooth and controlled with the kite and land before you are too tired or overpowered.

WARNING:
Make sure you grab the correct side of the bar
– we colour code the bar red for left.
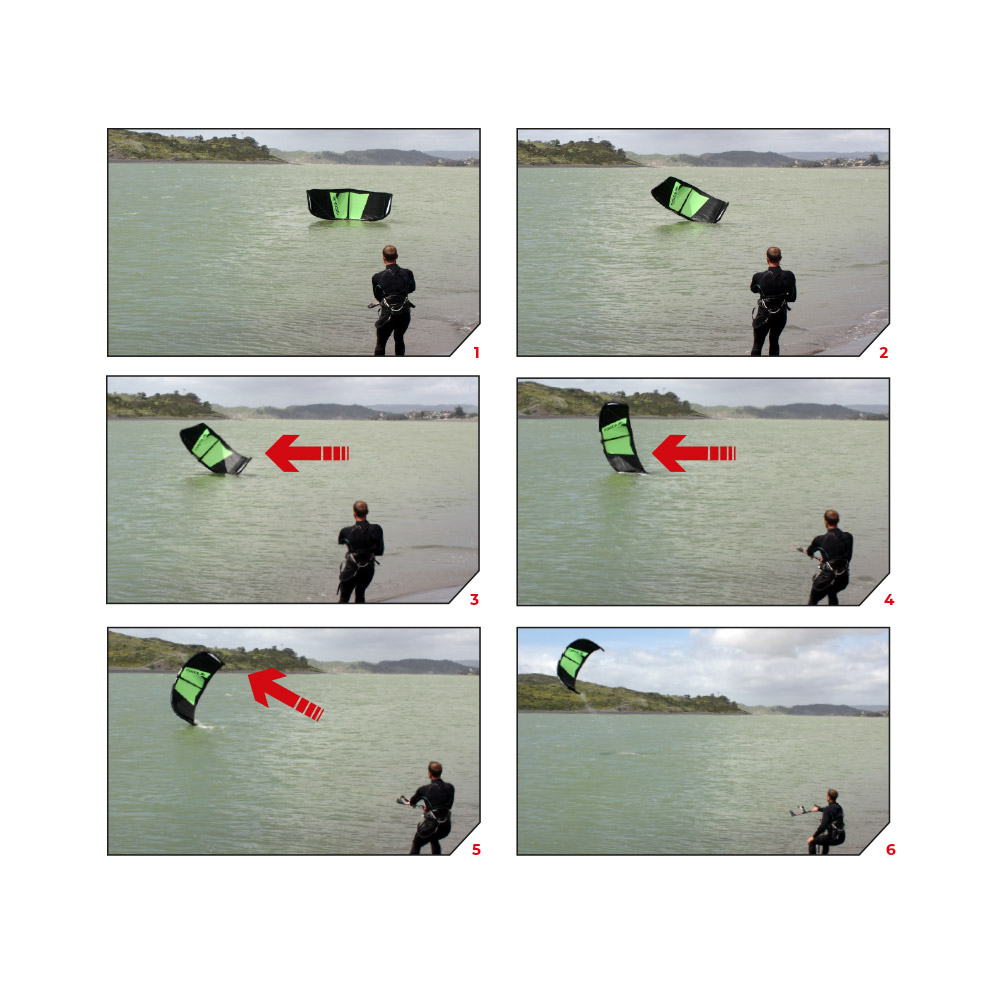
Water Relaunching

Once the kite is face down with the leading edge touching the water:

  1. Pull the bar in towards you to increase back line tension.
  2. Pull one of the rear lines (line attached to bar ends) towards your body with constant tension. Look at the kite as you pull the rear line and be ready to release some tension as the kite flips up onto its tip.
  3. Once on its tip the kite will work its way to the edge of the wind window. This requires some skill and finesse in order to not stall the kite backwards onto the water.
  4. When the kite is at the edge of the window make sure you have the bar pushed at least half de-powered and steer the kite gently to the top of the window.

NOTE: If the kite somehow lands nose down but with the tips facing away, pull one of the rear leader lines to help the kite blow around to the correct position then follow the steps above for getting the kite re-launched.
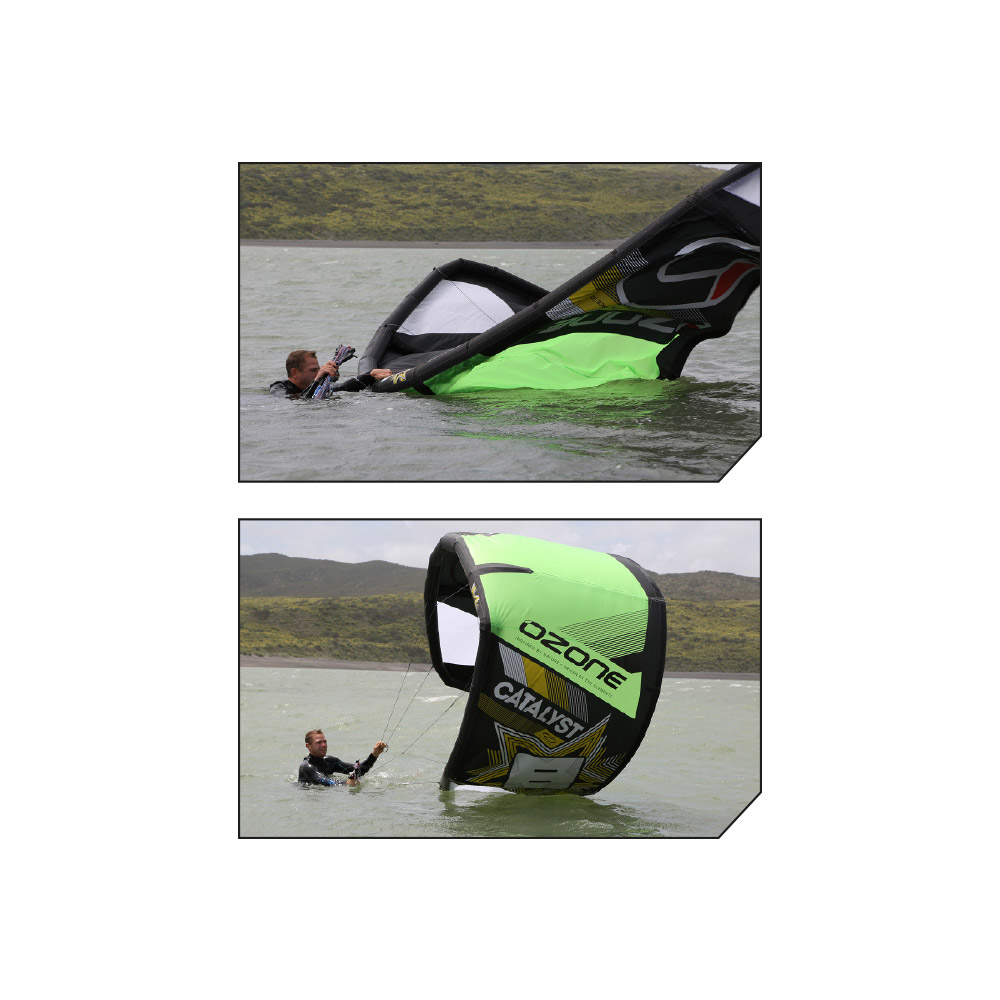
Self Rescue

If you get in trouble out in the water, there is a simple way to self rescue yourself.

Firstly kill the kite’s power with the flag out system by releasing the chicken loop. The kite will flag out and drop to the water.

Lines are dangerous in this situation so make sure you wind the flag out frontline around the bar at least 10x to disable the kite. Then wrap all the lines together onto the bar as you normally would. You will end up at the kite ideally with the lines wrapped tightly and neatly on the bar. Make a few half hitches to secure the lines.

Once you have got hold of the kite you can drop the bar. When you have reached the kite, take hold of the bridle lines at each wingtip. Hold both bridals to use the kite as a sail to get back to shore safely.
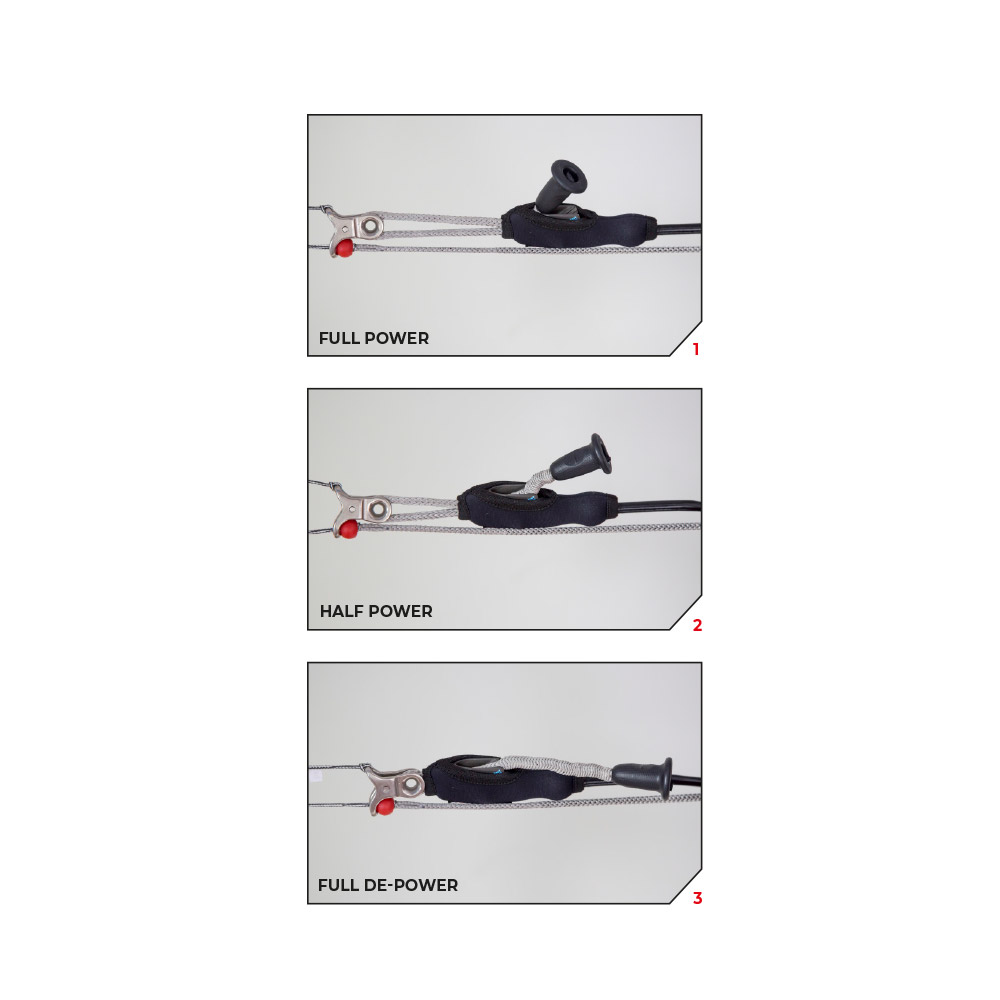
Clamcleat Trimmer

To release the line from the cleat teeth, first pull out and down to unlock the line from the teeth, then set the trimmer line to the desired amount.

Pull the trimmer line down to de-power the kite. This is needed if you are overpowered, for unhooked riding, or if you are walking on the beach or snow.

Release the trimmer line away from you to increase kite power.

1: FULL POWER

2: HALF POWER

3: FULL DEPOWER
Trimming For Line Stretch

All lines should be maintained as close to equal length as possible. Flying lines can stretch over time, generally the front lines stretch more as these take the majority of the load.

To check your lines, unwind the lines from the bar and have a partner hold the lines even at the bar end. Taking hold of the lines at the other end, pull on the lines to check they are even. If the lines are not even you may either;

1) Stretch out the shorter lines. Attach the shorter lines to a car hitch or something very solid. Then take hold of the bar and pull with enough force to stretch the line. Do this to any lines that are shorter and re-check that all 4 lines are equal length.

2) Use the Leader Line trimming knots located underneath the bar ends.
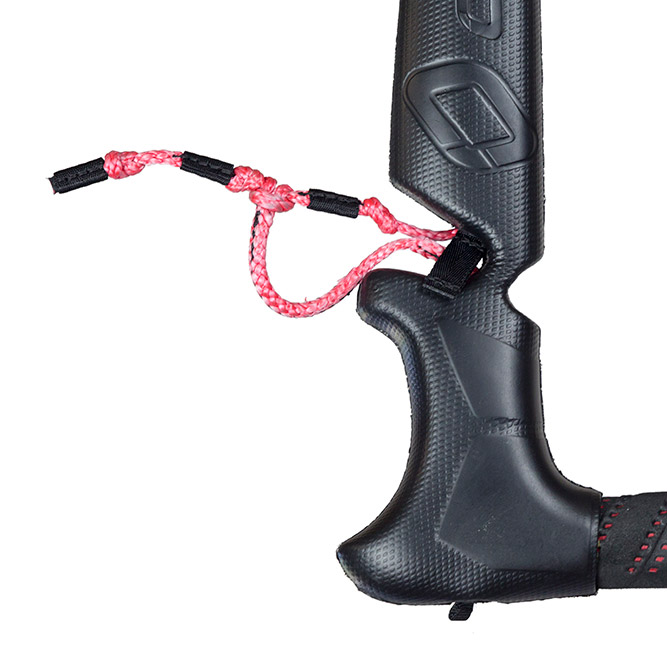
Packing

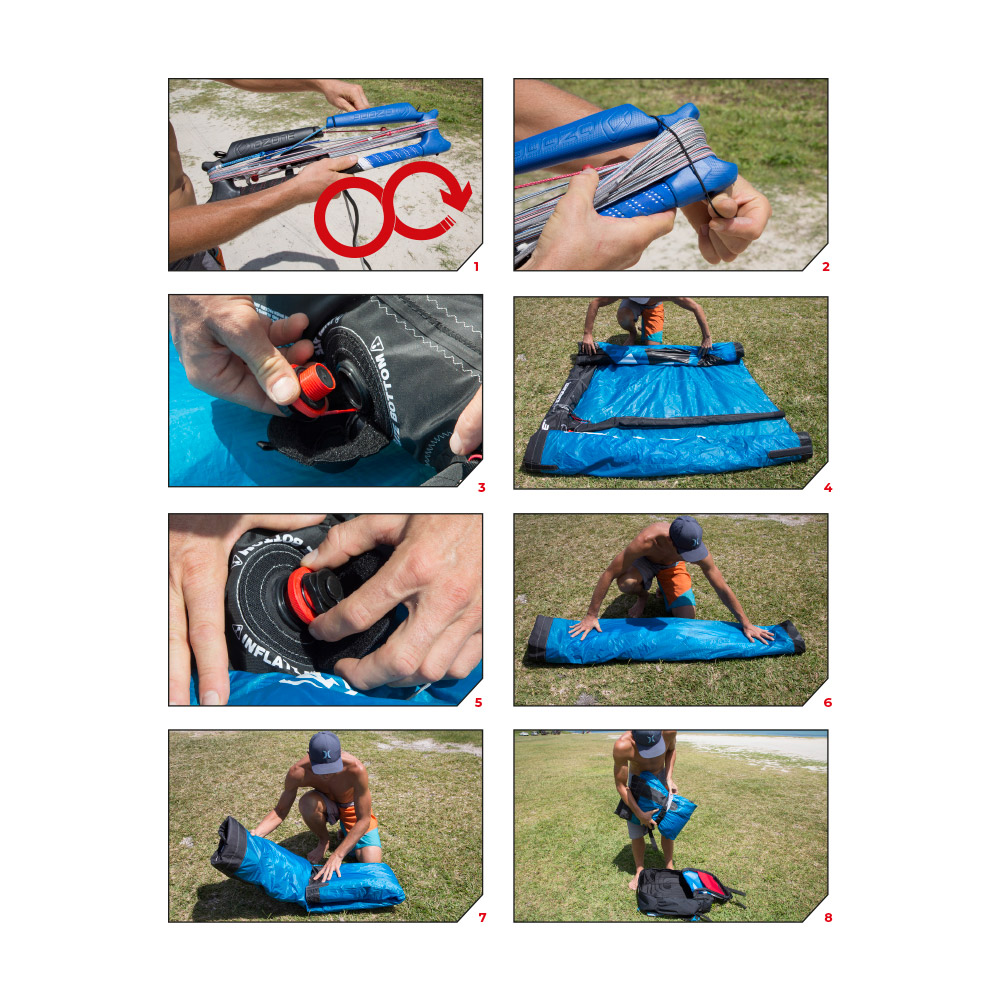
  • Detach the flying lines from the kite, and wrap them around the bar ends in a figure of eight. Use the elastic line retainers to keep them held in place
  • To deflate the kite first release all one pump plastic clips. Then gently open the OUT valve on the leading edge. This large valve dumps the air quickly from the kite.
  • Roll the upwind tip in to the centre. Then roll the opposite side.
  • Screw the inflate/deflate valve in and close the neoprene cover.
  • Fold the kite in 3 sections from trailing edge to fit in bag.

Care & Maintenance

Kites are very technical products and are used in the harsh marine environment. If you use common sense and care for your equipment it will look after you and keep its factory trim for hundreds of hours.

Never pump up your kite on a rough surface which may have sharp objects.

Be very careful with your flying lines. If you catch them on a rock or sharp object thoroughly check each one and we recommend you replace your lines. Also make sure there are no knots in the lines. Knots weaken the line by up to 50%.

Once you have pumped up secure your kite with sand or use sandbags  – Do not use heavy objects or even your board, the fins have been known to rip kites.

Never leave your kite on the beach un-used for long periods of time in the sun and wind. The trailing edge flapping and sand hitting the sail cloth will severely shorten the kite’s life. UV also shortens the lifespan of a kite so pack away when not using your kite.

Never pack away your kite wet, only when 100% dry – This will damage the cloth and its coatings and may lead to dye running. This is not valid for warranty.

Never leave your kite inside your car in direct sunlight.

Always clean your control system with fresh water after every session, and reload/release the Quick Release to check the system is functioning correctly. Store your control system with the Quick Release open. Reload the next time you set up your kite.

When inflating the bladders always inflate slowly and ensure the bladders are inflating correctly in the struts or leading edge. If you see a twist or something looks strange STOP pumping immediately and check bladders. They may need re-inserting to ensure they inflate properly.

Repairs

We supply a repair kit with the following contents:

1. A4 pieces of sail cloth

2. A4 piece of Dacron

3. 1 x length of 50mm wide sticky black repair tape

4. 6” x 3” Tear-Aid bladder repair patch

5. 2 Alcohol wipes

6. One pump clip / hose / hose retainer

If you have a major repair like a tear across panels, struts or the leading edge take the kite to your local sail repair shop. For minor tears and bladder punctures you can easily fix these yourself with the repair kit supplied with the kite.

Watch repair and maintenance videos

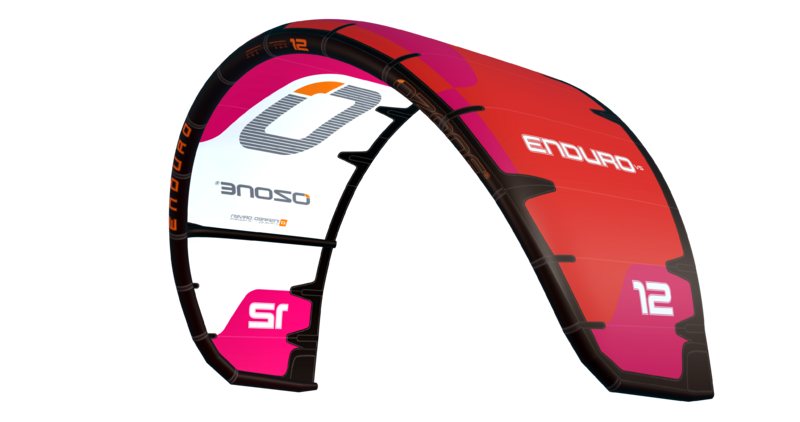
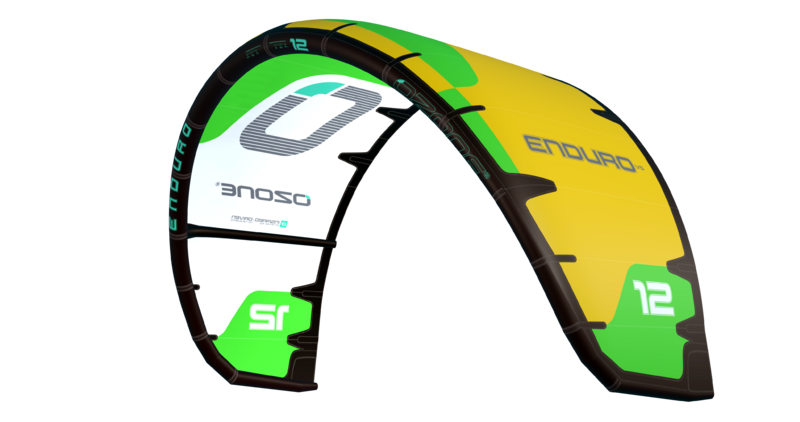
Current production colours

HOW WE WORK AND WHAT TO EXPECT?

All Ozone products are made to order in our own factory in Vietnam and sold through our trusted dealer network, who deliver excellent customer care and advice.

We don’t over produce and instead believe in a sustainable business model that respects people as well as the planet. Although you can't buy gear directly from us, we aim to be as transparent as possible with you about how long the production process takes.

HOW QUICKLY CAN YOU GET YOUR GEAR?

To try and give you the fastest service possible, scroll down to check if we currently have your preferred size and colour in our small factory stock that can be shipped to your dealer immediately.

STAND OUT FROM THE CROWD WITH A CUSTOM COLOUR OPTION

We also offer custom colours for all our kites and wings. Try your ideas out using the custom colour chooser further down this page. Once you’re happy with your design, copy the colour code and send it to your local dealer through this contact form. They will be in touch ASAP.

GOING ON A TRIP, OR IN NEED OF GEAR ASAP?

If you’re desperate to get your hands on a product as soon as possible, contact your nearest dealer to see if they're currently holding any stock. Click here to locate them and get in touch.

Custom Colours

We can make any combination of colours using the colour chooser below. The manufacturing time for these special kites is 30 days. Design your kite, share with your friends and ask your dealer to place your order.


Colour Chooser

If you want to order your amazing design then your dealer will need the colour codes to get it right. Please send them this code:

Thank you for purchasing this Ozone product. Our mission is to design and build quality products with cutting edge performance that are easy, fun and safe to use.

At Ozone we are passionate about sports, and it is this passion that drives our design team to perfect and develop products that we love to ride with. We are proud of the quality of our products, and are constantly searching for the best components and materials to use in our designs. We manufacture in our own high-quality production facility in Vietnam, which guarantees a build quality that we are proud to put the Ozone name on. A close look at one of our products reveals that same superior quality and construction that ensures that every Ozone product will enjoy a long life, with consistent performance and aesthetics. To view the factory video visit our website www.flyozone.com. Many dynamic action sports carry inherent risks but with common sense and education from qualified instructors means you can easily enjoy these incredible sports. Accidents generally happen due to a lack of experience, changing weather conditions or from using equipment not suited to the riders’ ability and/or conditions. Always take the time to learn safely with qualified instruction and you will progress far quicker. Ride safe Team Ozone

Release of Liability

OZONE KITESURF LTD / OZONE KITES LTD RELEASE OF LIABILITY, CLAIM WAVIER, ASSUMPTION OF RISK

By assembling and/or using this Ozone product, you agree that you have read and understood the entire Ozone product owners manual, including all instructions and warnings contained in that manual, prior to using the Ozone product in any way. You additionally agree that you will ensure any additional or subsequent user of your Ozone product will read and understand the entire Ozone product owners manual, including all instructions and warnings contained in that manual, prior to allowing that person to use your Ozone product.

ASSUMPTION OF RISK

Use of the Ozone product and any of its components involve certain risks, dangers, and hazards which can result in serious personal injury and death to both the user and to non-user third parties. In using this Ozone product, you freely agree to assume and accept any and all known and unknown risks of injury to you and third parties while using this equipment. The risks inherent in this sport can be greatly reduced by abiding by the warning guidelines listed in this owner manual and by using common sense.

RELEASE AND WAIVER OF CLAIMS

In consideration of the sale of the Ozone product to you, you herby agree to the fullest extent permitted by law, as follows;

TO WAIVE ANY AND ALL CLAIMS that you have or may in the future have against Ozone Kitesurf LTD or Ozone Kites LTD and all related parties resulting from use of the Ozone product and any of its components.

TO RELEASE Ozone Kitesurf LTD or Ozone Kites LTD and all related parties from any and all liability for any loss, damage, injury or expense that you or any users of you Ozone product may suffer, or that your next of kin may suffer, as a result of the use of the Ozone product, due to any cause whatsoever, including negligence or breach of contract on the part of Ozone Kitesurf LTD or Ozone Kites LTD and all related parties in the design or manufacture of the Ozone product and any of its components.

In the event of your death or incapacity, all provisions contained herein shall be effective and binding upon your heirs, next of kin, executors, administrators, assigns, and representatives. Ozone Kitesurf LTD or Ozone Kites LTD related parties have not made and expressly deny and oral or written representations other than what is set forth herein and the Ozone product owners manual.

Warranty

Ozone warrants this product according to the laws in force against any major manufacturing defect. This warranty is subject to the following limitations:

  • The warranty is valid only when the product is used for its intended use, and does not cover products used in rental or teaching operations.
  • Ozone will make the final warranty determination, which may require inspection and/or photos of the equipment, which clearly show the defect(s). If necessary, this information must be sent to the Ozone dealer, postage prepaid.
  • If a product is deemed to be defective by Ozone, the warranty covers the repair or replacement of the defective product only.
  • Ozone will not be responsible for any costs, losses, or damages incurred as a result of loss of use of this product. The warranty does not cover damage caused by misuse, abuse, neglect or normal wear and tear including but not limited to; assembling with other than Ozone components, damage due to excessive sun exposure, damage caused by improper handling or storage, and damage caused by anything other than defects in material and workmanship.
  • This warranty is voided if any unauthorized repair, change or modification has been made to any part of the equipment. The warranty for any repaired or replaced equipment is good from the date of the original purchase only. The original purchase receipt must accompany all warranty claims.
  • The name of the retailer and date of purchase must be clear and legible.
  • There are no warranties that extend beyond the warranty specified herein.

WARRANTY CLAIMS

  • Warranty claims must be sent to Ozone by an official Ozone dealer or country distributor.
  • Warranty claims must be processed and be issued a return authorization prior to shipping to the Ozone dealer the product was purchased from.

Warnings & Safety Precautions

This manual refers to the current product it comes with. No information contained herein applies to previous and/or other products or components. Always read and understand all warnings and instructions for any other product or component being used. To read previous product manuals go to www.flyozone.com

Read the following points before assembling and/or using this product:

General Warnings:

  • Before using this product you must take lessons from a certified instructor/school.
  • Always wear a Coast Guard approved Personal Flotation Device when using this product near or on the water.
  • Always carefully inspect all of your equipment before using it.
  • The use of this product exposes the user to many unavoidable and unexpected risks, dangers and hazards.
  • Always use extreme caution when using this product.
  • Misuse of this product can cause serious injury or death.
  • Only use this product if you are in good physical health.
  • Never act in a careless manner when using this product.
  • You are responsible for your own safety and the safety of others around you when using this product.
  • If you are under the age of 18 you should have your parents or legal guardian read all warnings and instructions. You should not use this product unless you are under proper guidance and supervision.
  • Do not use this product if you are under the influence of alcohol, drugs or medications.

Kite and Control System Warnings:

  • Always have a partner when launching and landing your kite.
  • Always learn to use a small trainer kite before attempting to use a larger power kite.
  • Never allow anyone who is not familiar with power kites to use this product.
  • Never use this product without a safety leash system. A loose kite is extremely dangerous.
  • The kite/control system is equipped with passive safety systems, which need to be activated by the user for them to work.
  • The leash system is not a permanent attachment to this product. Never permanently attach yourself to the kite or any of its components.
  • Never use this kite with another control system or safety leash. Only use the control system that is supplied with this kite. Other brands are not compatible with this design therefore and the safety system will not work.
  • Always wear protective equipment when using this product, for example; helmet, gloves, shoes, protective eyewear etc.
  • Always use a high quality and well maintained kite specific harness.
  • Get yourself used to the way all quick release devices work by testing them often in a non-emergency situation.
  • Rinse all quick release devices in fresh water after each use. Quick release devices have a limited lifetime and must be checked and replaced often.
  • Always activate and re-load all safety systems to familiarize yourself with how they work. This is the only way to be sure that you know how to use them in all situations, and that they are correctly loaded and safe for use.
  • The quick release trim loop and kite leash equipped with a quick release must be replacement after 250hours of use. Replace them before if you see any sign of wear. The wearing of quick release devices is not considered a warranty issue.
  • Never touch the flying lines when the kite is in use. Flying lines are extremely dangerous while under tension and can cause serious injury or death.
  • Never use this product with worn lines. A line that breaks while under tension can cause serious injury or death.
  • Always check your flying lines for knots before each use. Knots greatly reduce the strength of the lines.
  • Stay away from tangled flying lines unless the kite is secured to the ground. An unsecured kite can self launch unexpectedly, and can cause serious injury or death.
  • Never allow yourself, or anyone else, to get between the control bar and the kite when using this product.

Choose safe weather conditions and locations:

  • Be aware of the general risks associated with action sports.
  • Ensure you understand all weather forecasts and prepare for changes in weather.
  • Never learn to use this product in more than 10 knots of wind.
  • We highly recommend you purchase a wind speed indicator to be able to measure wind speeds. Study the wind guide to understand wind speeds.
  • Never use this product in high winds.
  • Never use this product in thunderstorm and lightning conditions.
  • Only use this product when you can remain in a standing position.
  • Never use this product in wind conditions that are above your ability level.
  • Never use this product near or on the water in offshore wind condition unless you are an expert swimmer.
  • Always observe local rules and regulations when using this product.
  • Never use this product near power lines, telephone poles, trees, bushes, roads, automobiles or airports.
  • Only use this product when you have at least 100m of clear space downwind, and on both sides of your launching position. The power of the kite can pull you downwind unexpectedly with great force.
  • Do not fly your kite over other people or pets. Spectators should remain upwind of you when using this product.
  • Never use this product on crowded beaches or fields.
  • Practice launching and landing procedures, and self rescue techniques before using this product near the water.


Set Up:

Attach The Lines To The Kite As Shown In These Diagrams.
View Is Of The Kite When Flying.

A: Pump Leash

B: Leading Edge

C: Trailing Edge

1 & 4: Back Lines

2&3: Front Lines

Set Up The Kite And Bar Face Down On The Beach With The Bar Downwind From The Kite.

1 & 4: Back Lines

2&3: Front Lines

A: Clamcleat Trimmer

B: Flag Out Line

C: De-Power Line

D: Quick Release Handle

E: Quick Release Loop

F: Flag-out Loop

G: Finger

Set Up

  • Attach the pump leash to the looped line at the centre of the leading edge.
  • Make sure all one-pump hose clips are open before you start inflating.
  • Inflate using the IN valve.
  • Refer to the recommended inflation pressure located next to the inflate/deflate valve.
  • Do not over inflate above the recommendation.
  • Do not under inflate or it will not perform as designed.
  • Close the top valve cap. Double check the valve is tightened firm and is sealing.
  • Close the protection cover.
  • Close all one-pump hose clips. This isolates each strut from the leading edge, so if you get a puncture in one part of the kite the rest of the kite will remain inflated.
  • Once the kite is fully inflated, turn the kite over and secure the kite using sand or sand bags on either side of the centre strut.
  • Never leave a kite unattended without sand or sand bags on the kite.

WARNING:

Do not ride the kite with the one pump clips undone. If you get a puncture the whole kite will deflate! Always close the one pump clips inside the neoprene covers after pumping up. Do not under inflate the kite or it will not perform to its designed trim and will not relaunch easily.

Attaching The Control Lines

  • With the kite on the sand and leading edge facing upwind start to unwind all the lines from the bar walking downwind.
  • Put your bar in the sand with red side of the bar on the right and start untangling the flying lines, walking upwind towards the kite.
  • We label each line with numbers which correspond to the same numbers on the kite. Use a larks head knot to attach the lines making sure the line label system matches >>  4 to 4; 3 to 3; 2 to 2; 1 to 1. The line labels are on the bar, lines and kite to make rigging stress free and easy.
  • The frontlines have stitched loop ends and the back lines have knots so it is very difficult for you to attach the lines incorrectly.

All line to kite connections are made using a “LARKS HEAD” knot.

Always double check your lines before launching. Wrongly attached lines will stop the kite flying correctly and could therefore mean you have no control of the kite putting yourself in a dangerous situation.

Security

Quick Release Connection

The Quick Release is the primary connection to the kite. Make sure you connect to the Quick Release using the finger as shown in the pictures.

Below the Bar Release (Recommended Mode)

All riders should attach their Kite Leash to the Flag Out System. This is the small eyelet on the Stainless Steel Swivel Ring.
When the release is activated, the kite will flag out and fall to the water/ground.

In all situations make sure that all lines are clear of all working release systems and the kite leash is connected in the right way.

Advanced Riders (Use at your own risk, not recommended) 

Riders performing unhooked tricks or who are more confident and have spent many hours Kiting can attach in Expert mode, where the loop part runs through the large eye of the steel ring. When letting go of the bar in Expert mode (without activating the release e.g. missed handle pass) the kite will depower but WILL NOT flag out.

Be aware in this situation, the Quick Release will be out of reach and can therefore not be released. When hooked in and activating the Quick Release the steel ring automatically slips off and the kite will flag out.

1st Stage of  Release

Activate the Quick Release as shown in the pictures. Providing your leash is attached to the flag out system the kite will 100% depower.

Reloading the Quick Release

Final Stage of Release (in an extreme emergency)

In the case of an extreme emergency where you need to completely release from the kite, use the quick release on the kite leash. This will completely detach the kite and control system from the user, and could therefore hit anything or anyone downwind causing damage, serious injury or death. RIDE RESPONSIBLY.

1st FLY 

WARNING:
NEVER LAUNCH A KITE DIRECTLY DOWNWIND OF YOU IN THE POWER ZONE!

Launching and Landing

Instruct your partner on how to handle the kite and agree on a sign together for the release and landing. They should hold the kite in the center of the leading edge at the edge of the window and double check that all lines are clear. It is possible for lines to get wrapped around the tip so make sure they understand that all lines must run clearly from each attachment point.

Before you give the signal to release make sure you are 100% confident that all lines are clear. Then give your pre-agreed signal for your partner to release the kite and gently launch the kite to the top of the window.   

Landing the kite use the same principles >> Most importantly keep your head clear, be smooth and controlled with the kite and land before you are too tired or overpowered.

WARNING:
Make sure you grab the correct side of the bar
– we colour code the bar red for left.

Water Relaunching

Once the kite is face down with the leading edge touching the water:

  1. Pull the bar in towards you to increase back line tension.
  2. Pull one of the rear lines (line attached to bar ends) towards your body with constant tension. Look at the kite as you pull the rear line and be ready to release some tension as the kite flips up onto its tip.
  3. Once on its tip the kite will work its way to the edge of the wind window. This requires some skill and finesse in order to not stall the kite backwards onto the water.
  4. When the kite is at the edge of the window make sure you have the bar pushed at least half de-powered and steer the kite gently to the top of the window.

NOTE: If the kite somehow lands nose down but with the tips facing away, pull one of the rear leader lines to help the kite blow around to the correct position then follow the steps above for getting the kite re-launched.

Self Rescue

If you get in trouble out in the water, there is a simple way to self rescue yourself.

Firstly kill the kite’s power with the flag out system by releasing the chicken loop. The kite will flag out and drop to the water.

Lines are dangerous in this situation so make sure you wind the flag out frontline around the bar at least 10x to disable the kite. Then wrap all the lines together onto the bar as you normally would. You will end up at the kite ideally with the lines wrapped tightly and neatly on the bar. Make a few half hitches to secure the lines.

Once you have got hold of the kite you can drop the bar. When you have reached the kite, take hold of the bridle lines at each wingtip. Hold both bridals to use the kite as a sail to get back to shore safely.

Clamcleat Trimmer

To release the line from the cleat teeth, first pull out and down to unlock the line from the teeth, then set the trimmer line to the desired amount.

Pull the trimmer line down to de-power the kite. This is needed if you are overpowered, for unhooked riding, or if you are walking on the beach or snow.

Release the trimmer line away from you to increase kite power.

1: FULL POWER

2: HALF POWER

3: FULL DEPOWER

Trimming For Line Stretch

All lines should be maintained as close to equal length as possible. Flying lines can stretch over time, generally the front lines stretch more as these take the majority of the load.

To check your lines, unwind the lines from the bar and have a partner hold the lines even at the bar end. Taking hold of the lines at the other end, pull on the lines to check they are even. If the lines are not even you may either;

1) Stretch out the shorter lines. Attach the shorter lines to a car hitch or something very solid. Then take hold of the bar and pull with enough force to stretch the line. Do this to any lines that are shorter and re-check that all 4 lines are equal length.

2) Use the Leader Line trimming knots located underneath the bar ends.
Packing

  • Detach the flying lines from the kite, and wrap them around the bar ends in a figure of eight. Use the elastic line retainers to keep them held in place
  • To deflate the kite first release all one pump plastic clips. Then gently open the OUT valve on the leading edge. This large valve dumps the air quickly from the kite.
  • Roll the upwind tip in to the centre. Then roll the opposite side.
  • Screw the inflate/deflate valve in and close the neoprene cover.
  • Fold the kite in 3 sections from trailing edge to fit in bag.

Care & Maintenance

Kites are very technical products and are used in the harsh marine environment. If you use common sense and care for your equipment it will look after you and keep its factory trim for hundreds of hours.

Never pump up your kite on a rough surface which may have sharp objects.

Be very careful with your flying lines. If you catch them on a rock or sharp object thoroughly check each one and we recommend you replace your lines. Also make sure there are no knots in the lines. Knots weaken the line by up to 50%.

Once you have pumped up secure your kite with sand or use sandbags  – Do not use heavy objects or even your board, the fins have been known to rip kites.

Never leave your kite on the beach un-used for long periods of time in the sun and wind. The trailing edge flapping and sand hitting the sail cloth will severely shorten the kite’s life. UV also shortens the lifespan of a kite so pack away when not using your kite.

Never pack away your kite wet, only when 100% dry – This will damage the cloth and its coatings and may lead to dye running. This is not valid for warranty.

Never leave your kite inside your car in direct sunlight.

Always clean your control system with fresh water after every session, and reload/release the Quick Release to check the system is functioning correctly. Store your control system with the Quick Release open. Reload the next time you set up your kite.

When inflating the bladders always inflate slowly and ensure the bladders are inflating correctly in the struts or leading edge. If you see a twist or something looks strange STOP pumping immediately and check bladders. They may need re-inserting to ensure they inflate properly.

Repairs

We supply a repair kit with the following contents:

1. A4 pieces of sail cloth

2. A4 piece of Dacron

3. 1 x length of 50mm wide sticky black repair tape

4. 6” x 3” Tear-Aid bladder repair patch

5. 2 Alcohol wipes

6. One pump clip / hose / hose retainer

If you have a major repair like a tear across panels, struts or the leading edge take the kite to your local sail repair shop. For minor tears and bladder punctures you can easily fix these yourself with the repair kit supplied with the kite.
Watch repair and maintenance videos

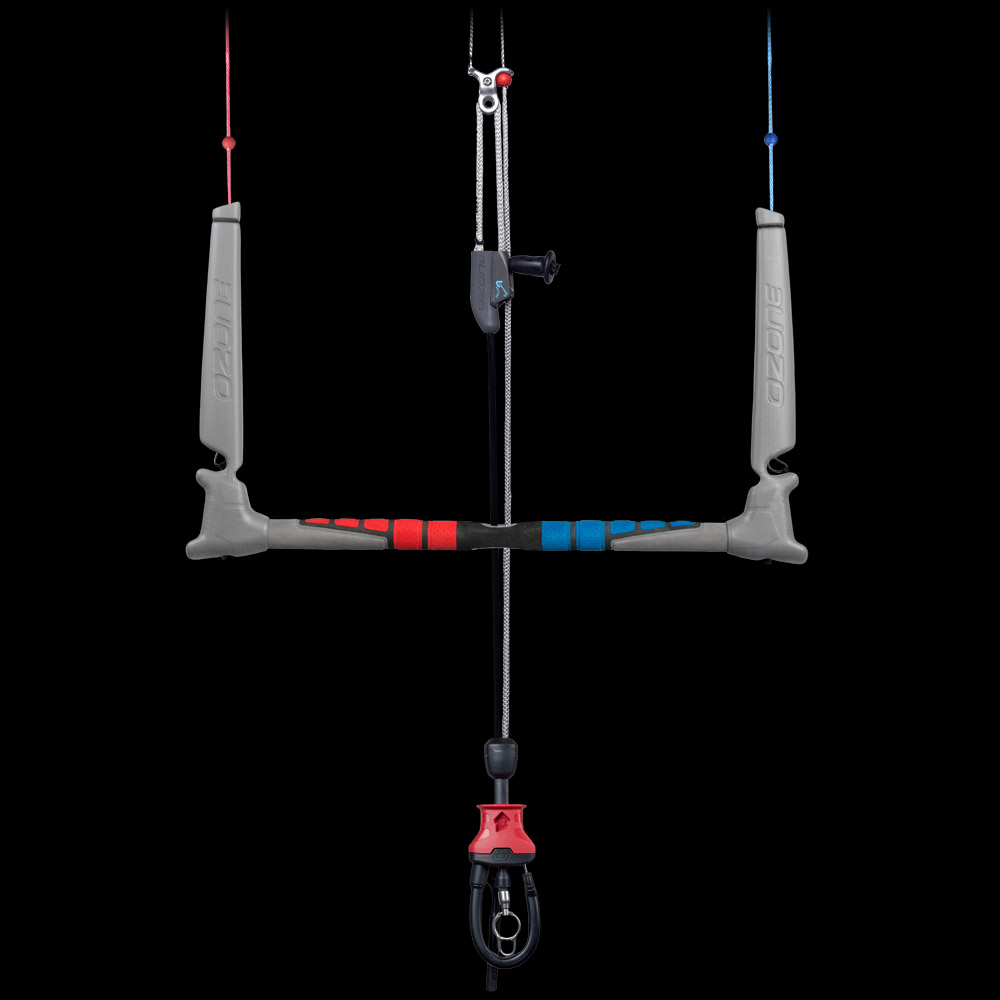
A clean and simple design, featuring an easy-to-use trim system and our innovative Click-In Loop Quick Release.

Find a dealer