Explore V3

Explore V3

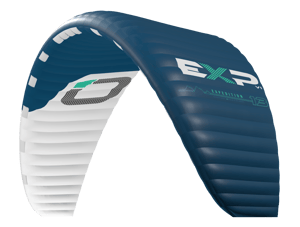
Accessible, single surface performance snowkite

Designed for both rookie snowkiters and seasoned backcountry adventurers, the Explore V3 is the perfect companion for all skill levels

Encontrar una tienda
Estimated current manufacturing time: 15 days

EXPLORE V3- THE MASTER OF ACCESSIBILITY

Start your adventure today! 

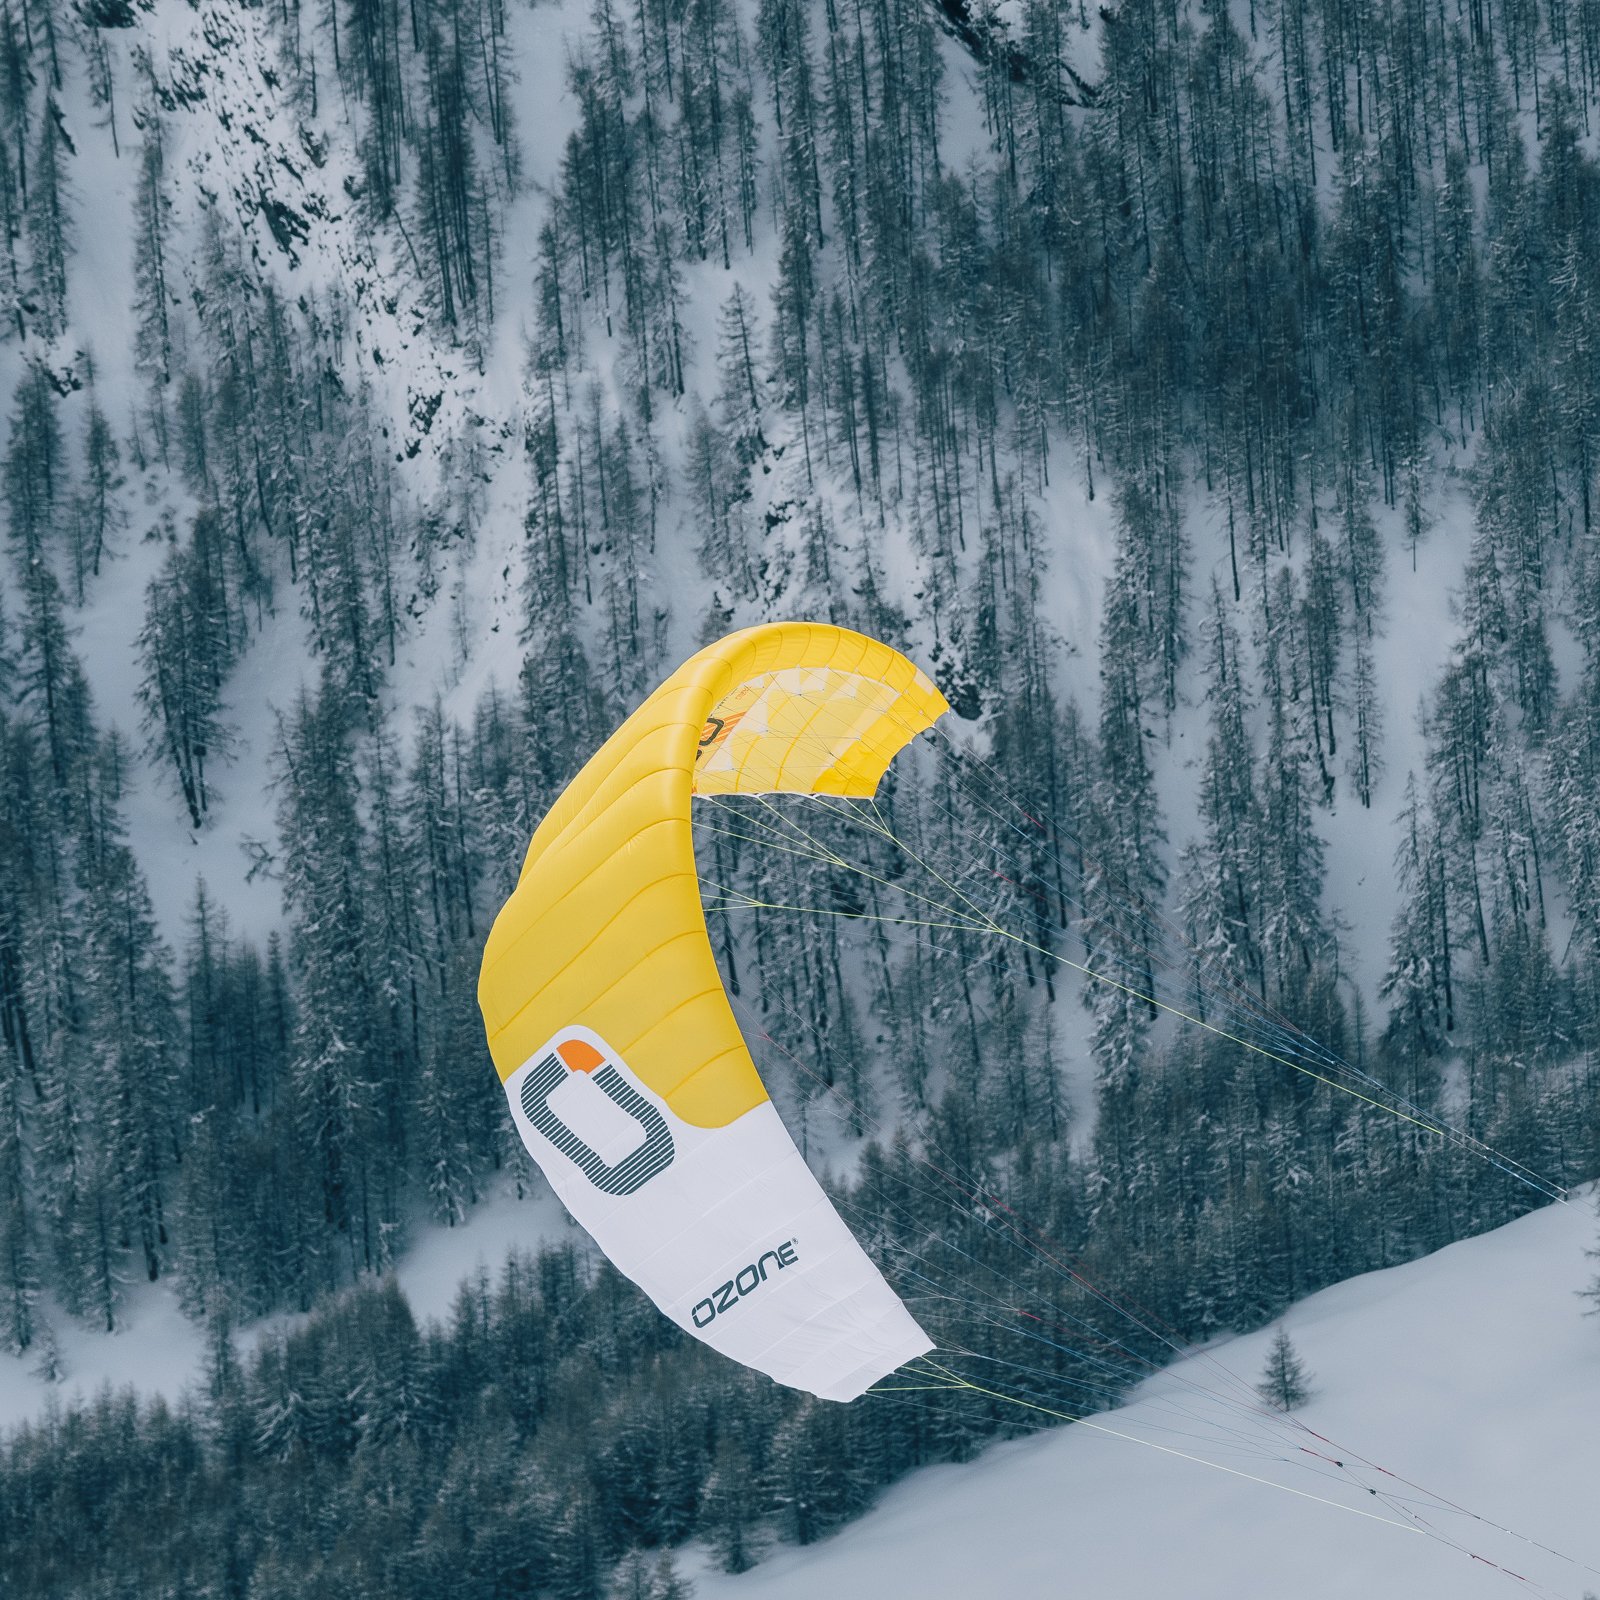
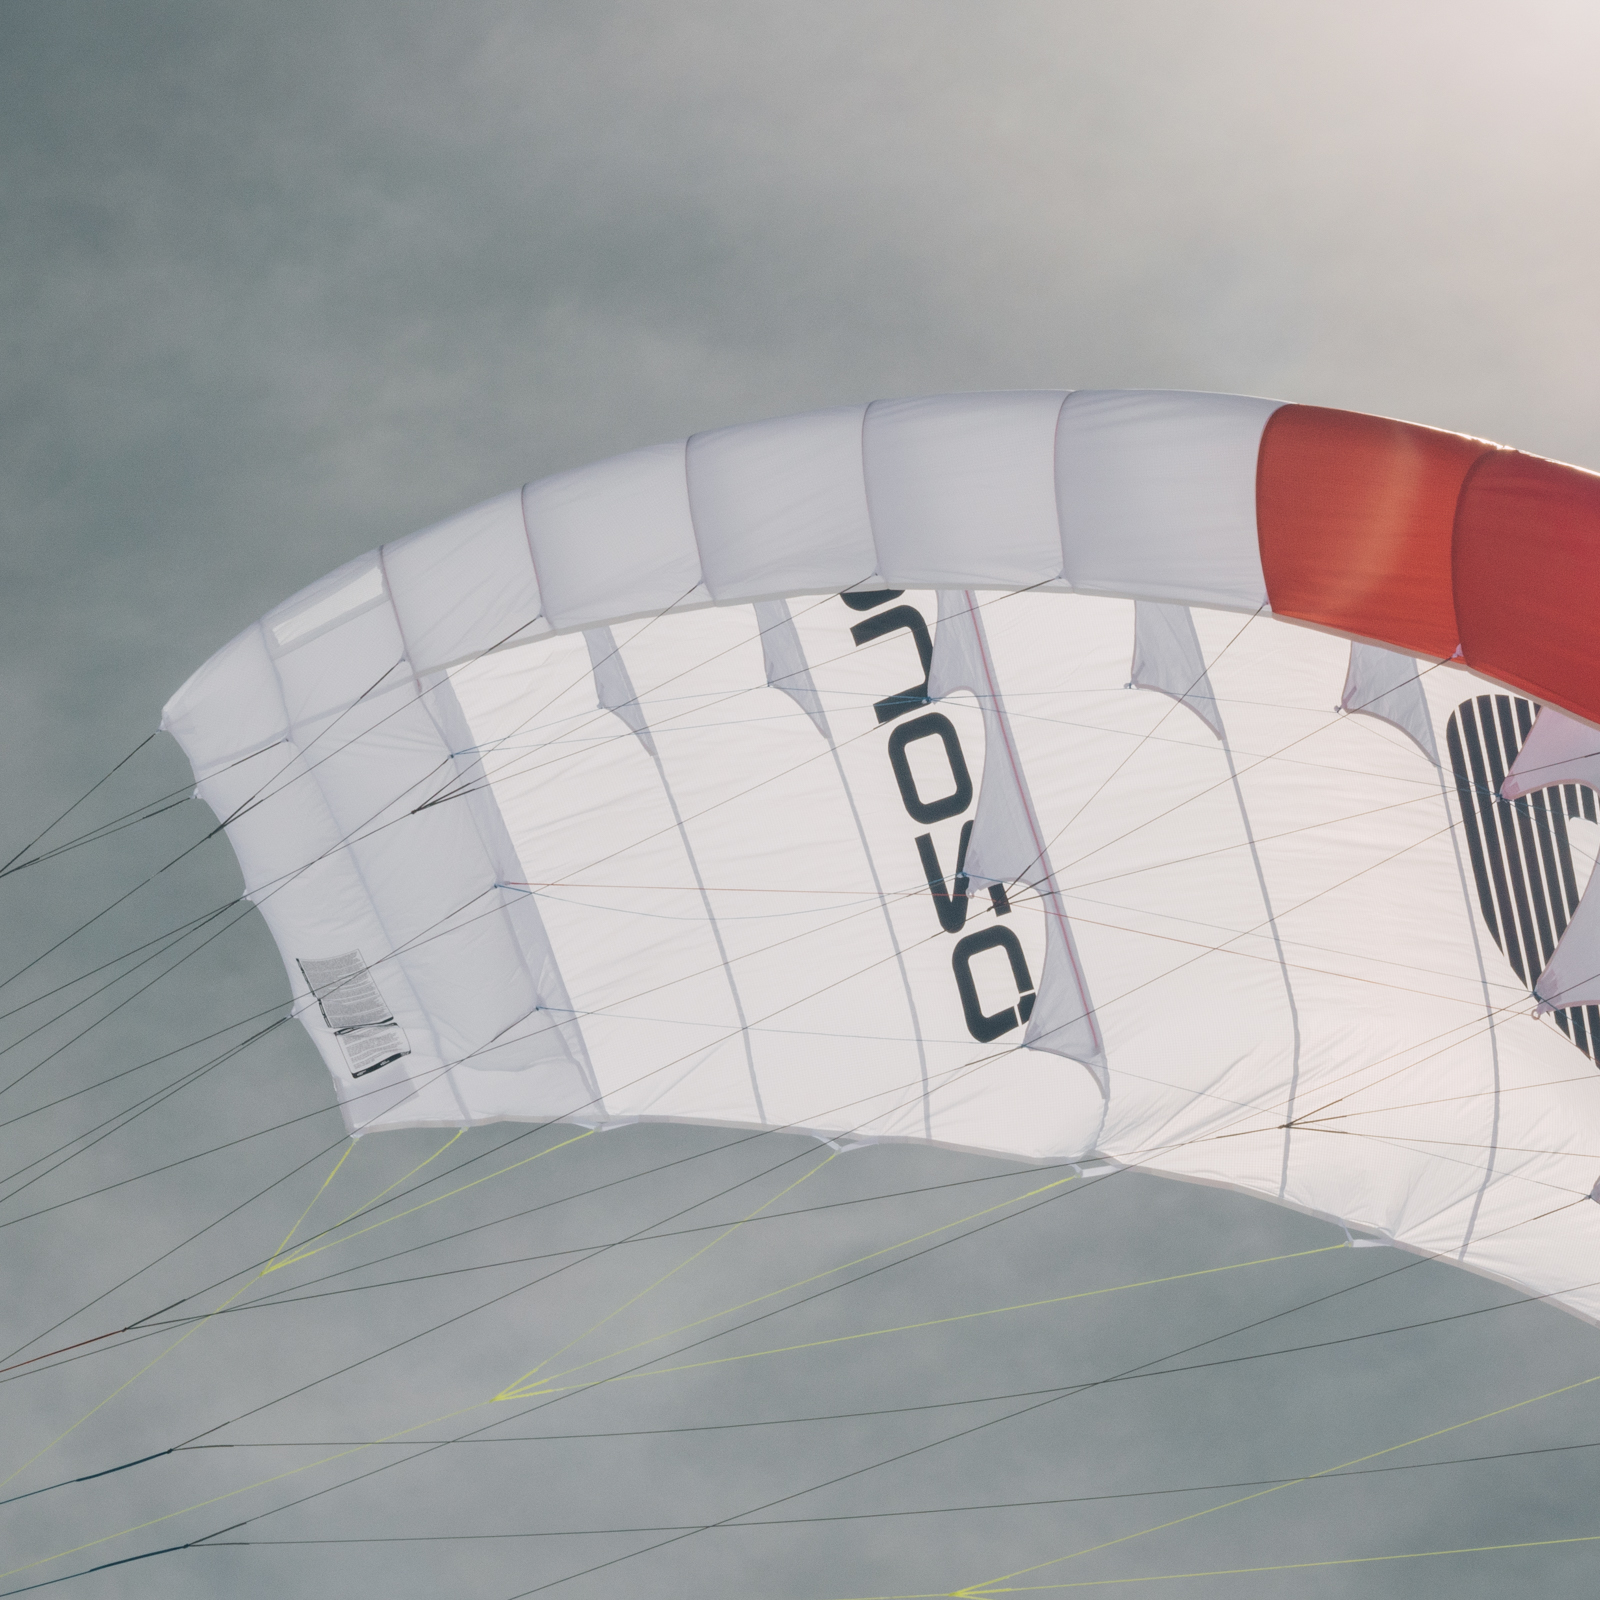
Designed for both rookie snowkiters and seasoned backcountry adventurers, the Explore V3’s easy-to-manage, single-surface design makes it the perfect companion for all skill levels.

  • Single surface dedicated snowkite
  • Lightweight and ultra compact, perfect for touring
  • Entry level to expert riders
  • Simple and very intuitive to set-up and ride
  • Super reliable for self-landing, resting and then relaunching
  • Industry leading internal Re-Ride release system

WARNINGS

Snowkites are not for flying or soaring and all Ozone harnesses are not designed for flying. Keep your skis on the snow.

We highly recommend packing the kite away using the concertina method in order to prolong its life. If you can’t do straight after your session, pack it away as carefully as you can, and remember to re-pack it in the concertina method when convenient. Do not store your kite with the Leading Edge battens deformed.


DESIGN HIGHLIGHTS & WHATS NEW?

The Explore V3 has the same cell count, planform and aspect-ratio as the V2, yet through careful refinements, the design team have managed to:

1. Further reduce drag

2. Deliver increased control

3. Improve overall stability

DESIGN HIGHLIGHTS & WHATS NEW?
The Explore V3 has the same cell count, planform and aspect-ratio

DESIGN HIGHLIGHTS & WHATS NEW?


• Improved upwind performance: The addition of full-length battens helps reduce drag, making the kite perform better when flying upwind in stronger conditions.

• Enhanced stability and smoother power control: Adjustments to the bridle layout, including fewer tabs and lines, along with repositioning of key tabs, provide extra stability, smoother power modulation and improved bar feel.

• Better canopy tension and control: A more accurate arc and optimised bridle layout result in improved canopy tension, leading to better overall control and efficiency.

• Cleaner trailing edge: ‘Shrink’ brake tabs reduce drag and create a smoother, cleaner trailing edge, improving overall aerodynamics.

DESIGN HIGHLIGHTS & WHATS NEW?
 
• Improved upwind performance: The addition of full-leng
DESIGN HIGHLIGHTS & WHATS NEW?
 
• Improved upwind performance: The addition of full-leng

FEEL PURE FREEDOM

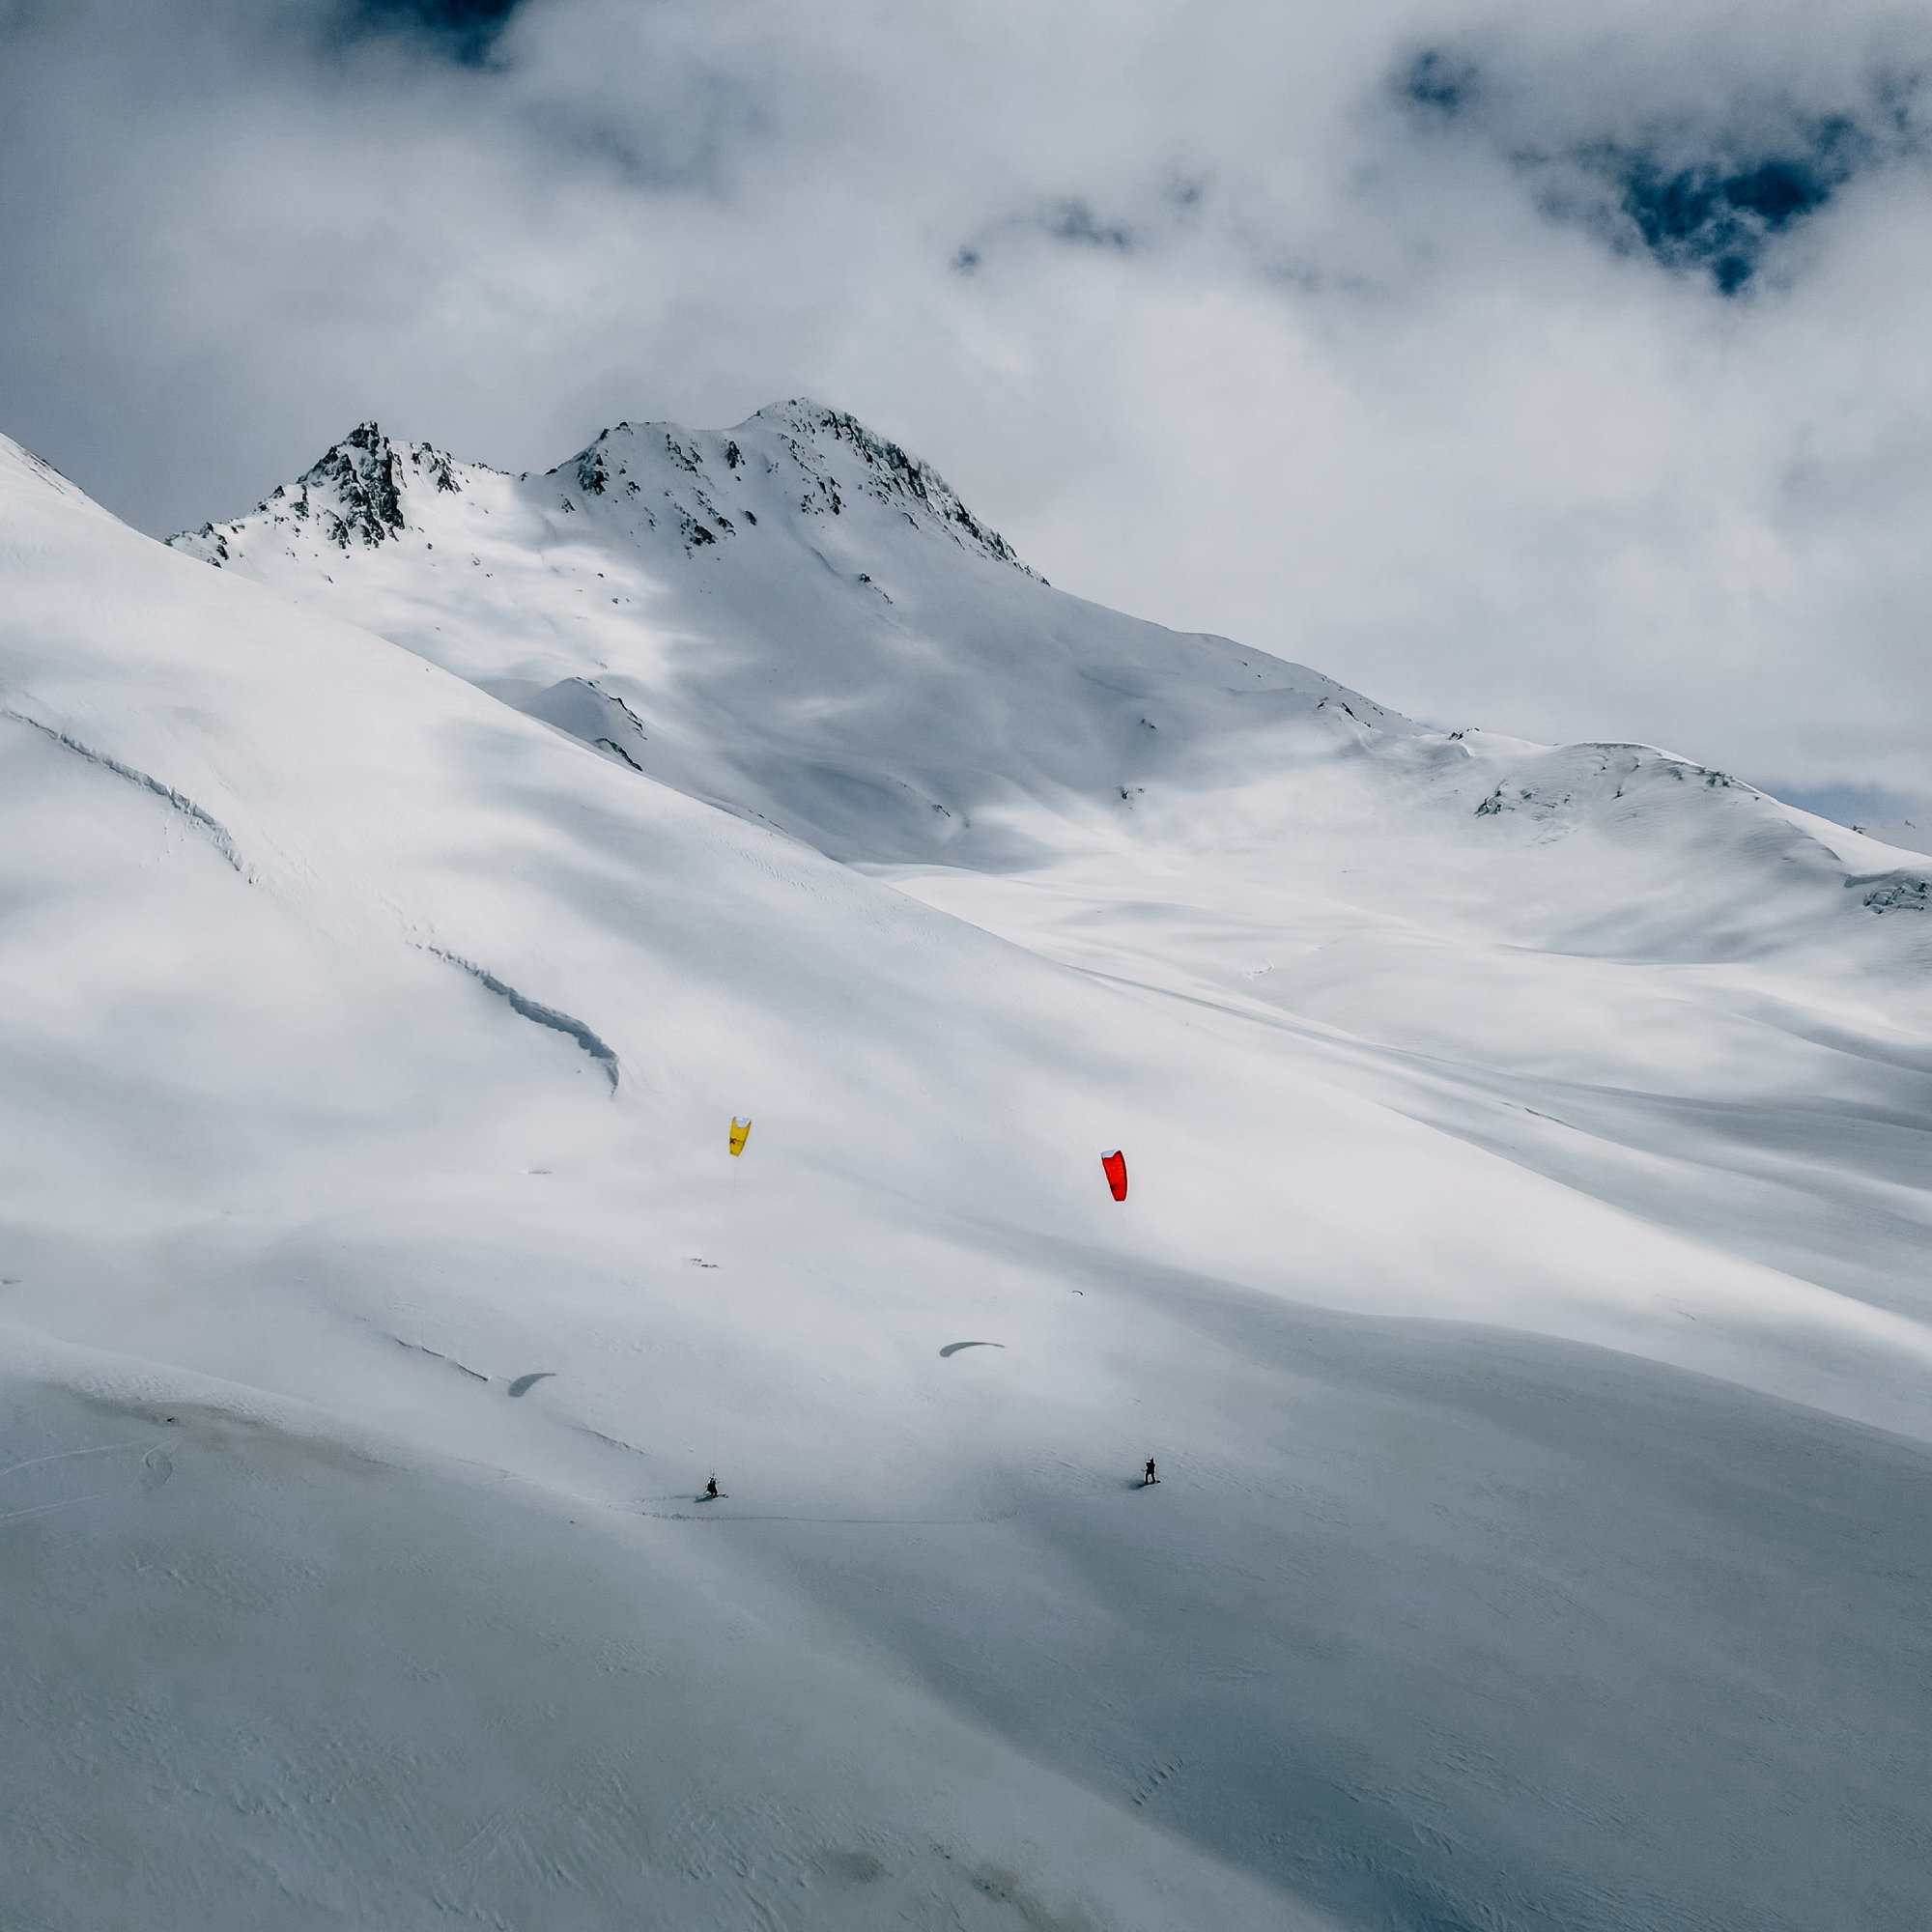
As a dedicated backcountry tourer himself, Ozone designer, Stu Yarrow, focused on further optimising the Explore’s accessible handling and practical ease to ensure sessions on the snow are hassle free.

Based in the snowkite wonderland of Norway, testing opportunities are endless.

The Explore V3’s inherent safety, tiny pack size and lightweight versatility really shine, but this is also a very capable kite and can easily get you up and back down steep hills with ease.

Downwinders are really fun here. We take the train upwind and then ride back over the hills, knowing we can cope with any situation. There’s nothing better.

EXPLORE V3 DESIGNER, STU YARROW

FEEL PURE FREEDOM
As a dedicated backcountry tourer himself, Ozone designer, Stu Yarrow, focused on

GO SOLO OR WITH FRIENDS WITH CONFIDENCE

The amount of depower that a single surface kite offers, and the speed that it’s applied, is unparalleled, especially in the Explore V3, which is tuned for the ultimate in self-reliance.

The balance in design was to deliver as much flying performance as possible while ensuring the near-instant depower feels as clean and smooth as possible.

The Explore V3’s optimised bridle layout and tab positions, as well as the new, longer plastic ribs, help the kite maintain a more forward and efficient flying position.

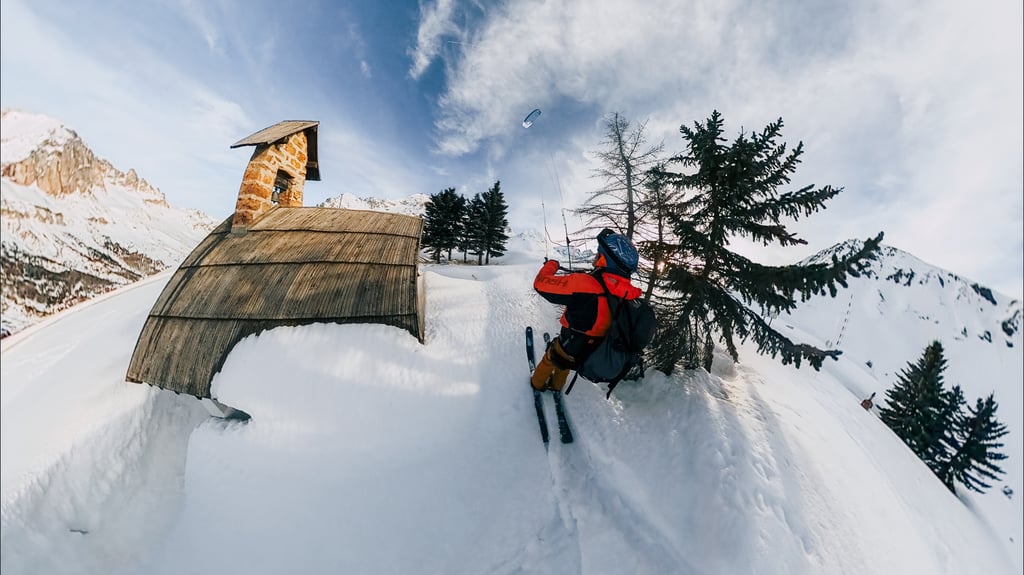
The unrivalled depower and huge sense of security will encourage you to go deeper into the backcountry. Adding to your confidence is the Explore V3’s crash-resistant build, super easy self landing / launching ability and the incredibly small size it packs down to.

GO SOLO OR WITH FRIENDS WITH CONFIDENCE
The amount of depower that a single surface kite offers, and

WHAT YOU FEEL 

The single surface Explore V3 makes snowkiting a real possibility for everyone.

Thanks to the lightweight materials and design, even in extremely light winds the kite feels incredibly stable overhead. The kite remains solid and won’t collapse, regardless of the force of the gusts, and no matter where the kite is in the window, as soon as you push the bar away, the power dies.

The Explore V3 is the kite I choose to teach my clients with and I’m 100% confident in it.


JOHANN CIVEL, OZONE TEAM RIDER, SNOWKITE GUIDE AND COACH

ADVENTUROUS

The Explore V3 is powerful in any size. Take advantage of the ultra smooth and constant pull and then depower the kite instantly, wherever it is in the window.

Self-landing is at its easiest with the Explore V3, while its compact and lightweight characteristics, along with its crash-resistant build will encourage you to venture further without fear of complication.

CAPABLE

Although massively accessible, the Explore V3 is capable of delivering huge riding potential to advanced riders who want to push their boundaries. The versatile handling can be used to steer the kite through tight and dynamic loops, or slower, wider arcs; both essential for navigating difficult terrain.

Introduced on the Explore V2, the closed cells in the tips reduce tip flutter when looping the kite, resulting in less noise and a smoother feeling. Riding down slopes with the kite de-powered up high in the window, or to the side, allows you to focus more on riding and less on the kite.

CAPABLE
Although massively accessible, the Explore V3 is capable of delivering huge riding potential

CONFIDENT

Super predictable flying characteristics add the really forgiving feel which inspires confidence in all situations. Even in an exposed position on a hill, you can just park the kite at the zenith without feeling intimidated.

CONFIDENT
Super predictable flying characteristics add the really forgiving feel which inspires conf

REVOLUTIONARY INTERNAL RE-RIDE RELEASE SYSTEM

Our unique Internal Re-Ride Release System is the market leading Snowkite release and landing system and features on both our snowkite-specific bars: the Contact Snow V5 and Snow EXP V5.

It has made mountain climbing and packing so much more enjoyable, safe, easy and quick for the user. When activated the kite de-powers instantly without tangling and will sit on the ground ready to re-launch whenever you are. If you need to, you can also completely release the kite.

REVOLUTIONARY INTERNAL RE-RIDE RELEASE SYSTEM
Our unique Internal Re-Ride Release System is the mark

DON’T FORGET TO STOP FOR A SNACK AND ADMIRE THE VIEWS

Another advantage of the Ozone Internal Re-Ride Release System is the land and secure option. To land the kite simply pull the 5th line until you reach the Secure Loop which can be found approximately two metres up from the control bar.

The kite will stall and fall to the ground without any pull. Use the Secure Loop in the 5th line to keep the kite on the ground – it can be hooked onto the kite leash clip, or slipped over the bar end. This makes landing and packing your kite safe and easy even in high winds.

The Brake Handle that spans between the back leader lines on the control system makes reverse launch and light wind landing easy.

DON’T FORGET TO STOP FOR A SNACK AND ADMIRE THE VIEWS
Another advantage of the Ozone Internal

SUMMARY: WHY CHOOSE A SINGLE SURFACE DESIGN? 

Here are some general differences when comparing single surface designs to ram-air foils and tube kites:

  • Single surface kites depower instantly for a very safe and easy feel.
  • They’re much lighter weight, which also means they can fly better in lighter winds. You can really work the low end of the Explore V3 very efficiently without worrying as much about keeping the kite in the sky.
  • The single surface design uses less cloth, so is not only lighter in weight, but also packs down to an ultra compact size, making it easy to pack multiple kites into your backpack, or to take a kite along on a ski mission ‘just in case’.
  • The Explore V3 is super easy to self-launch and land. Unlike other single surface kites it rarely gets tangled when landed with the 5th line re-ride system. It is easy to relaunch, even in strong conditions.
  • The Explore V3 build is very resistant to crashes. As a single surface design there is no internal pressure build up between the surfaces that could potentially cause the seams to explode if you tomahawk it hard into the ground.
Start your backcountry adventures today! | Ozone Explore V3

Start your backcountry adventures today! | Ozone Explore V3

Land the kite safely, wherever, whenever | Ozone Internal Re-Ride System

Land the kite safely, wherever, whenever | Ozone Internal Re-Ride System

Best trip ever! Snowkiting in New Zealand | Explore V3

Best trip ever! Snowkiting in New Zealand | Explore V3

"It's about adventuring and finding pockets of new snow" | Explore V3

Diseño monocapa

Diseño monocapa

El concepto de vela monocapa o de simple superficie, genera gran sustentación con velocidades-aire bajas, lo que da lugar a un mando fácil y que perdona errores, al tiempo que entrega la potencia necesaria para remontar pendientes fuertes. Además, ofrece unas características de vuelo únicas con vientos flojos, y un desventado instantáneo y eficiente dentro del recorrido de la barra. Con una sola capa, el peso y el volumen de la cometa plegada también se reducen, lo que es ideal para explorar terrenos remotos. El diseño monocapa, al ser abierto no alberga aire en el interior de la cometa, y eso le aporta una resistencia adicional, pues se dañará menos en caso de impactos.

Estudiada geometría de las bridas

Estudiada geometría de las bridas

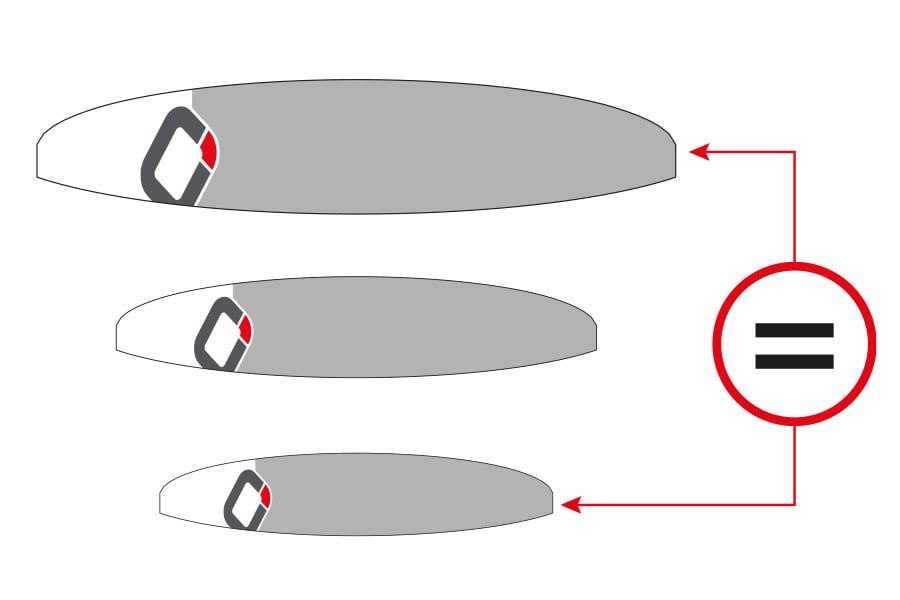
Trabajamos a fondo durante nuestro proceso de I+D en el desarrollo del rango de tamaños para que las sensaciones sean homogéneas. Cada cometa tiene una geometría de bridas propia, que se prueba de manera individual y se afina para maximizar las sensaciones que transmite y sus prestaciones.

Conectores de línea infalibles

Conectores de línea infalibles

Los conectores de línea infalibles evitan montar de manera incorrecta las líneas de vuelo de la cometa.

Materiales ultraligeros de altas prestaciones

Materiales ultraligeros de altas prestaciones

Los materiales ultraligeros de alta calidad se llevan empleando profusamente en nuestras cometas y parapentes desde 2011. El uso de materiales ultraligeros se traduce en un verdadero aumento del rendimiento: la cometa se infla más rápido, vuela más rápido y es más reactiva incluso con la brisa más ligera.

Líneas de brida con funda

Líneas de brida con funda

Líneas de Dyneema de alta calintensidad y bajo estiramiento, con funda que ofrecen máxima robustez y prestaciones. Son las mismas líneas que llevamos usando los 10 últimos años en nuestra gama de Snowkite.

Aperturas de vaciado en las puntas

Aperturas de vaciado en las puntas

Los cajones de las puntas llevan velcros que pueden abrirse para evacuar lo que haya entrado en la cometa. Limpia siempre tu cometa vaciando cualquier resto de nieve o suciedad, ya que esto prolongará su vida y contribuirá que vuele de la manera para la que fue diseñada.

Acelerador ligero de doble polea

Acelerador ligero de doble polea

Poleas ligeras y de baja fricción que reducen el desgaste al tiempo que mejoran la sensación de la barra y permiten una despotenciación suave y progresiva.

Refuerzos en el borde de ataque

Refuerzos en el borde de ataque

El borde de ataque está reforzado con varillas de plástico ligeras y flexibles que mantienen la forma del perfil durante cambios del ángulo de ataque y cuando el aire circula sobre el perfil de manera turbulenta. Esto mejora drásticamente el rendimiento general ya que el perfil se conserva su diseño de manera fiel.

Líneas de carga transversales

Líneas de carga transversales

Las líneas que transcurren a través de la parte inferior de la cometa sustituyen a las cintas de carga y a las diagonales internas en las cometas de doble superficie, y distribuyen la carga de las bridas de manera uniforme y eficaz. Esto evita que se transmita una tensión excesiva a la vela y permite controlar con mayor precisión su perfil e hinchado.

Diseñado con OZ-CAD

Diseñado con OZ-CAD

El futuro es ahora. Todas las cometas y velas Ozone están diseñadas con nuestro propio y avanzado software CAD personalizado que controlamos y modificamos con cada nuevo diseño de producto. Al permitir desarrollos técnicos específicamente adaptados, nuestros diseñadores pueden maximizar el rendimiento al tiempo que minimizan los residuos.

Ventaja de ser propietario de la fábrica

Ventaja de ser propietario de la fábrica

Ozone posee su propia fábrica donde se fabrican todas las cometas, velas, tablas, hidroalas, parapentes, speed wings y accesorios. Garantizando un control de calidad manual y los mejores materiales en cada paso, también hay excelentes condiciones de trabajo para los 1.000 empleados.

Internal Re-Ride Release System

Internal Re-Ride Release System

Our unique Internal Re-Ride Release System is the market leading Snowkite release and landing system. It has made mountain climbing and packing so much more enjoyable, safe, easy and quick for the user. When activated the kite de-powers instantly without tangling, and will sit on the ground ready to re-launch when you’re ready again.

Single-Layer Laser Cut

Single-Layer Laser Cut

Ozone kites and wings are crafted with exceptional precision using advanced laser technology to cut each panel individually in a single layer. This meticulous approach ensures consistent accuracy across all products, from entry level to high performance models. Our commitment to high standards in production reflects our dedication to delivering reliable, high-quality equipment for riders at every level.

Snow Kite Technical Mountain bag (Optional)

Snow Kite Technical Mountain bag (Optional)

  • A high spec technical mountain bag with loads of features and everything you’ll need for a big day out in the mountains
  • 60 litre size, enough volume to carry two kites plus extra equipment
  • Large front zip makes packing and finding items quick and easy
  • Large top pocket for smaller items
  • Two side pockets for bottles or telescopic ski poles within easy reach
  • Small pockets on the waist strap for quick access items such as a camera or phone
  • Straps for your skis or snowboard, or another kite on the outside
  • Fully adjustable shoulder, chest and waist straps 
  • The waist straps can easily be removed and the bag can be connected to the Connect harness directly saving weight and enhancing comfort
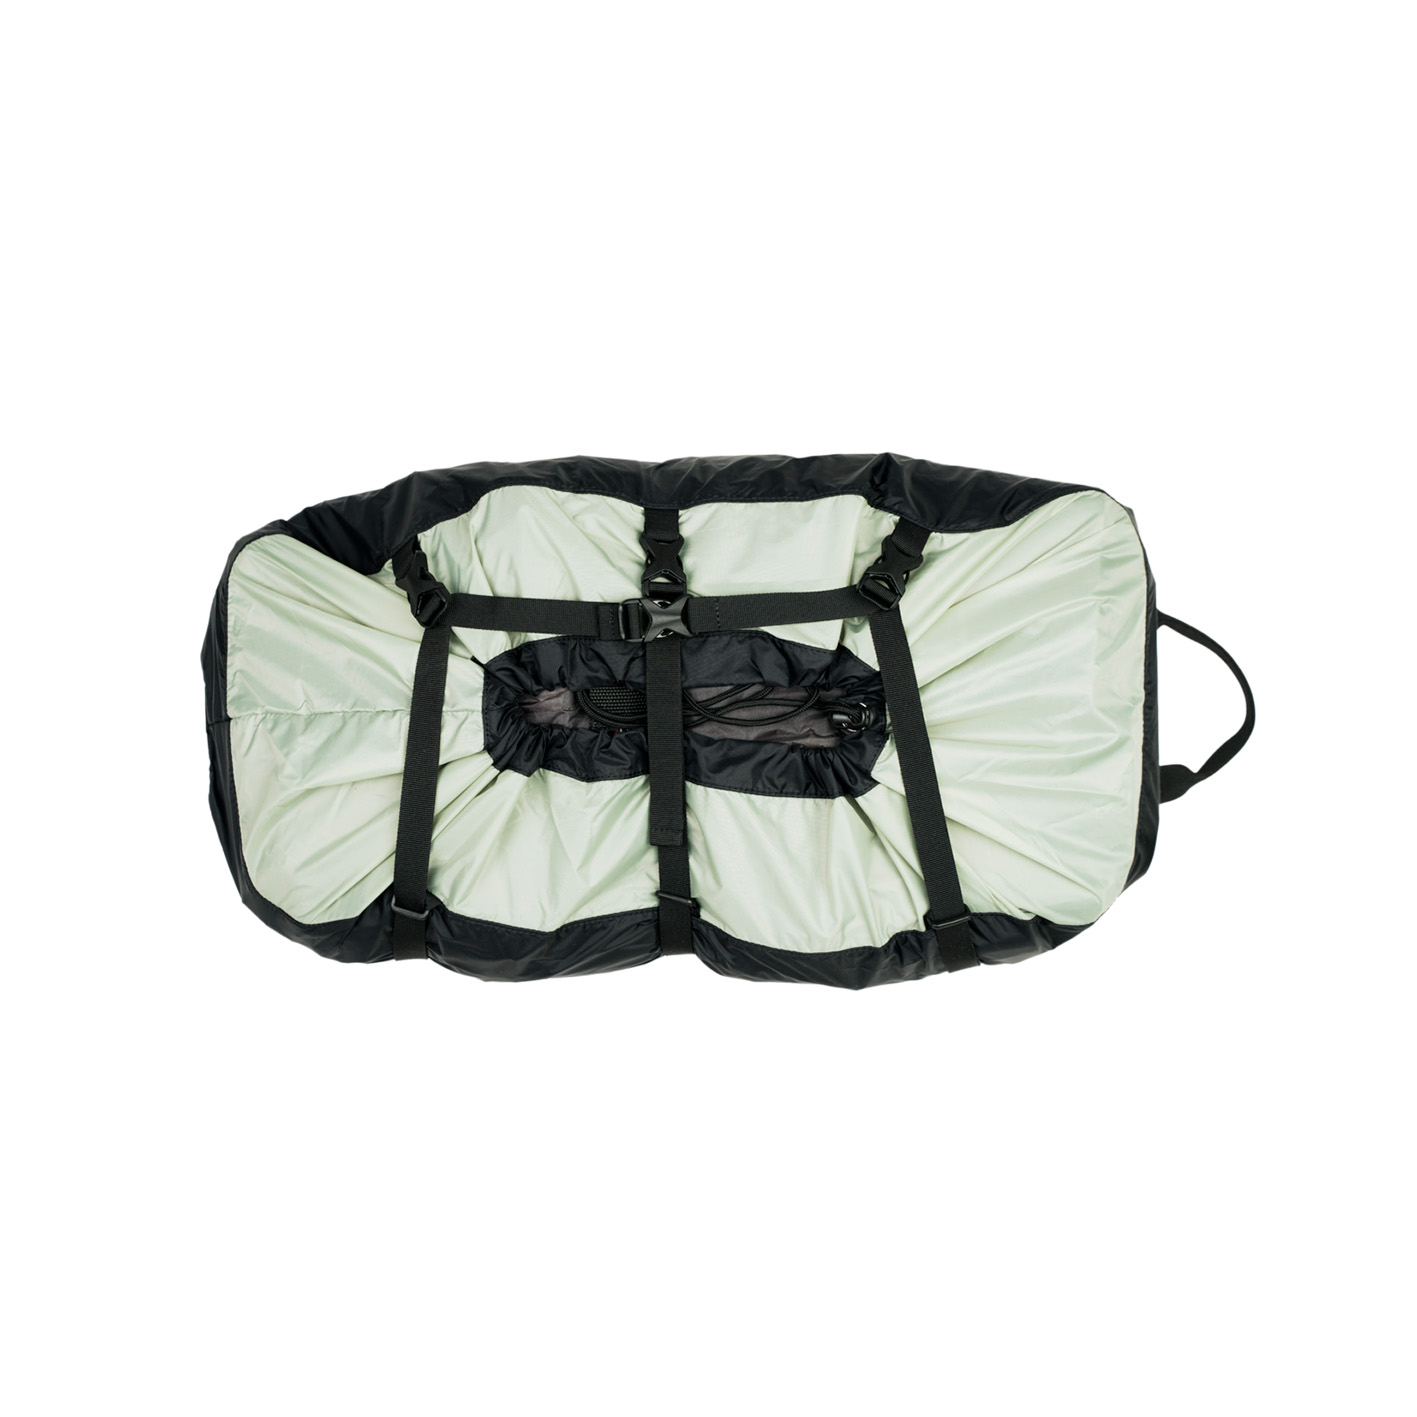
Snow Kite Compressor Bag

Snow Kite Compressor Bag

  • A simple, lightweight and efficient bag
  • Perfect for travelling and back country missions, less bulk and weight with good protection for your kite
  • Pack and compress to a minimal volume
  • Combine with the Technical Mountain Bag to carry multiple kites and all your essential gear on longer backcountry missions.

User Manual

Thank you for purchasing this Ozone product. Our mission is to design and build quality products with cutting edge performance that are easy, fun and safe to use.

At Ozone we are passionate about sports, and it is this passion that drives our design team to perfect and develop products that we love to ride with. We are proud of the quality of our products, and are constantly searching for the best components and materials to use in our designs. We manufacture in our own high-quality production facility in Vietnam, which guarantees a build quality that we are proud to put the Ozone name on. A close look at one of our products reveals that same superior quality and construction that ensures that every Ozone product will enjoy a long life, with consistent performance and aesthetics. To view the factory video visit our website www.flyozone.com. Many dynamic action sports carry inherent risks but with common sense and education from qualified instructors means you can easily enjoy these incredible sports. Accidents generally happen due to a lack of experience, changing weather conditions or from using equipment not suited to the riders’ ability and/or conditions. Always take the time to learn safely with qualified instruction and you will progress far quicker. Ride safe Team Ozone

Release of Liability

OZONE KITESURF LTD / OZONE KITES LTD RELEASE OF LIABILITY, CLAIM WAVIER, ASSUMPTION OF RISK

By assembling and/or using this Ozone product, you agree that you have read and understood the entire Ozone product owners manual, including all instructions and warnings contained in that manual, prior to using the Ozone product in any way. You additionally agree that you will ensure any additional or subsequent user of your Ozone product will read and understand the entire Ozone product owners manual, including all instructions and warnings contained in that manual, prior to allowing that person to use your Ozone product.

ASSUMPTION OF RISK

Use of the Ozone product and any of its components involve certain risks, dangers, and hazards which can result in serious personal injury and death to both the user and to non-user third parties. In using this Ozone product, you freely agree to assume and accept any and all known and unknown risks of injury to you and third parties while using this equipment. The risks inherent in this sport can be greatly reduced by abiding by the warning guidelines listed in this owner manual and by using common sense.

RELEASE AND WAIVER OF CLAIMS

In consideration of the sale of the Ozone product to you, you herby agree to the fullest extent permitted by law, as follows;

TO WAIVE ANY AND ALL CLAIMS that you have or may in the future have against Ozone Kitesurf LTD or Ozone Kites LTD and all related parties resulting from use of the Ozone product and any of its components.

TO RELEASE Ozone Kitesurf LTD or Ozone Kites LTD and all related parties from any and all liability for any loss, damage, injury or expense that you or any users of you Ozone product may suffer, or that your next of kin may suffer, as a result of the use of the Ozone product, due to any cause whatsoever, including negligence or breach of contract on the part of Ozone Kitesurf LTD or Ozone Kites LTD and all related parties in the design or manufacture of the Ozone product and any of its components.

In the event of your death or incapacity, all provisions contained herein shall be effective and binding upon your heirs, next of kin, executors, administrators, assigns, and representatives. Ozone Kitesurf LTD or Ozone Kites LTD related parties have not made and expressly deny and oral or written representations other than what is set forth herein and the Ozone product owners manual.

Warranty

Ozone warrants this product according to the laws in force against any major manufacturing defect. This warranty is subject to the following limitations:

  • The warranty is valid only when the product is used for its intended use, and does not cover products used in rental or teaching operations.
  • Ozone will make the final warranty determination, which may require inspection and/or photos of the equipment, which clearly show the defect(s). If necessary, this information must be sent to the Ozone dealer, postage prepaid.
  • If a product is deemed to be defective by Ozone, the warranty covers the repair or replacement of the defective product only.
  • Ozone will not be responsible for any costs, losses, or damages incurred as a result of loss of use of this product. The warranty does not cover damage caused by misuse, abuse, neglect or normal wear and tear including but not limited to; assembling with other than Ozone components, damage due to excessive sun exposure, damage caused by improper handling or storage, and damage caused by anything other than defects in material and workmanship.
  • This warranty is voided if any unauthorized repair, change or modification has been made to any part of the equipment. The warranty for any repaired or replaced equipment is good from the date of the original purchase only. The original purchase receipt must accompany all warranty claims.
  • The name of the retailer and date of purchase must be clear and legible.
  • There are no warranties that extend beyond the warranty specified herein.

WARRANTY CLAIMS

  • Warranty claims must be sent to Ozone by an official Ozone dealer or country distributor.
  • Warranty claims must be processed and be issued a return authorization prior to shipping to the Ozone dealer the product was purchased from.

Warnings & Safety Precautions

This manual refers to the current product it comes with. No information contained herein applies to previous and/or other products or components. Always read and understand all warnings and instructions for any other product or component being used. To read previous product manuals go to www.flyozone.com

Read the following points before assembling and/or using this product:

General Warnings:

  • Before using this product you must take lessons from a certified instructor/school.
  • Always wear a Coast Guard approved Personal Flotation Device when using this product near or on the water.
  • Always carefully inspect all of your equipment before using it.
  • The use of this product exposes the user to many unavoidable and unexpected risks, dangers and hazards.
  • Always use extreme caution when using this product.
  • Misuse of this product can cause serious injury or death.
  • Only use this product if you are in good physical health.
  • Never act in a careless manner when using this product.
  • You are responsible for your own safety and the safety of others around you when using this product.
  • If you are under the age of 18 you should have your parents or legal guardian read all warnings and instructions. You should not use this product unless you are under proper guidance and supervision.
  • Do not use this product if you are under the influence of alcohol, drugs or medications.

Kite and Control System Warnings:

  • Always have a partner when launching and landing your kite.
  • Always learn to use a small trainer kite before attempting to use a larger power kite.
  • Never allow anyone who is not familiar with power kites to use this product.
  • Never use this product without a safety leash system. A loose kite is extremely dangerous.
  • The kite/control system is equipped with passive safety systems, which need to be activated by the user for them to work.
  • The leash system is not a permanent attachment to this product. Never permanently attach yourself to the kite or any of its components.
  • Never use this kite with another control system or safety leash. Only use the control system that is supplied with this kite. Other brands are not compatible with this design therefore and the safety system will not work.
  • Always wear protective equipment when using this product, for example; helmet, gloves, shoes, protective eyewear etc.
  • Always use a high quality and well maintained kite specific harness.
  • Get yourself used to the way all quick release devices work by testing them often in a non-emergency situation.
  • Rinse all quick release devices in fresh water after each use. Quick release devices have a limited lifetime and must be checked and replaced often.
  • Always activate and re-load all safety systems to familiarize yourself with how they work. This is the only way to be sure that you know how to use them in all situations, and that they are correctly loaded and safe for use.
  • The quick release trim loop and kite leash equipped with a quick release must be replacement after 250hours of use. Replace them before if you see any sign of wear. The wearing of quick release devices is not considered a warranty issue.
  • Never touch the flying lines when the kite is in use. Flying lines are extremely dangerous while under tension and can cause serious injury or death.
  • Never use this product with worn lines. A line that breaks while under tension can cause serious injury or death.
  • Always check your flying lines for knots before each use. Knots greatly reduce the strength of the lines.
  • Stay away from tangled flying lines unless the kite is secured to the ground. An unsecured kite can self launch unexpectedly, and can cause serious injury or death.
  • Never allow yourself, or anyone else, to get between the control bar and the kite when using this product.

Choose safe weather conditions and locations:

  • Be aware of the general risks associated with action sports.
  • Ensure you understand all weather forecasts and prepare for changes in weather.
  • Never learn to use this product in more than 10 knots of wind.
  • We highly recommend you purchase a wind speed indicator to be able to measure wind speeds. Study the wind guide to understand wind speeds.
  • Never use this product in high winds.
  • Never use this product in thunderstorm and lightning conditions.
  • Only use this product when you can remain in a standing position.
  • Never use this product in wind conditions that are above your ability level.
  • Never use this product near or on the water in offshore wind condition unless you are an expert swimmer.
  • Always observe local rules and regulations when using this product.
  • Never use this product near power lines, telephone poles, trees, bushes, roads, automobiles or airports.
  • Only use this product when you have at least 100m of clear space downwind, and on both sides of your launching position. The power of the kite can pull you downwind unexpectedly with great force.
  • Do not fly your kite over other people or pets. Spectators should remain upwind of you when using this product.
  • Never use this product on crowded beaches or fields.
  • Practice launching and landing procedures, and self rescue techniques before using this product near the water.


Set Up:

1: Speed System

2: Line Label System

3: Back Lines

4: Front Lines

5: Brake handle

6: Clamcleat Trimmer

7: De-Power line

8: Flag-out Line

9: Quick Release Handle

10: Quick Release loop

11: Flag-out Loop

12: Finger

Kite Set Up

IMPORTANT: Set up your kite for the first time in wind less than 12kph  to ensure your safety and the safety of others.

  • Unfold the kite on the ground, in the direction of the wind.
  • Fold over the upwind wing tip and put some snow, sand, or your board on the tip to secure the kite.
  • Take the speed system from the Velcro retainer and lay out on the ground. Untangle if necessary.
  • Take the bar and unwind the lines at 90 deg to the kite. (Bars are delivered with the flying lines already connected.)
  • Connect the lines to the kite following the numbered label system ensuring all lines are free from each other.

Now you’re ready to fly!

Bar Set Up

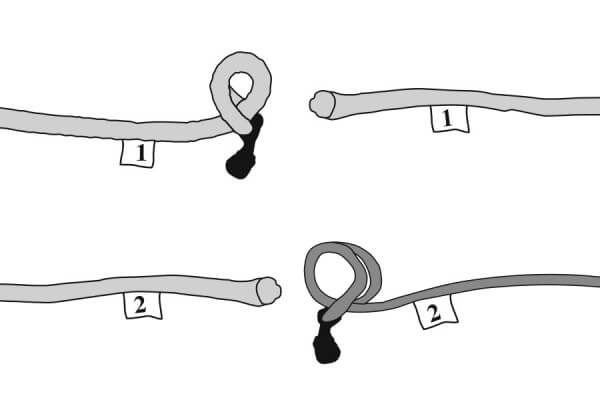
All line to kite connections are made using a “LARKS HEAD” knot.

Always double check your lines before launching. Wrongly attached lines will stop the kite flying correctly and could therefore mean you have no control of the kite putting yourself in a dangerous situation.

Security

IMPORTANT: All Ozone release systems require the user to operate them manually in the case of an emergency. It is imperative the kite is set-up as shown in the manual, incorrect setup will compromise the operation of the release system.  All lines and de-power systems must be tangle free and the kite leash connected in the right way, see pictures.

Quick Release Connection

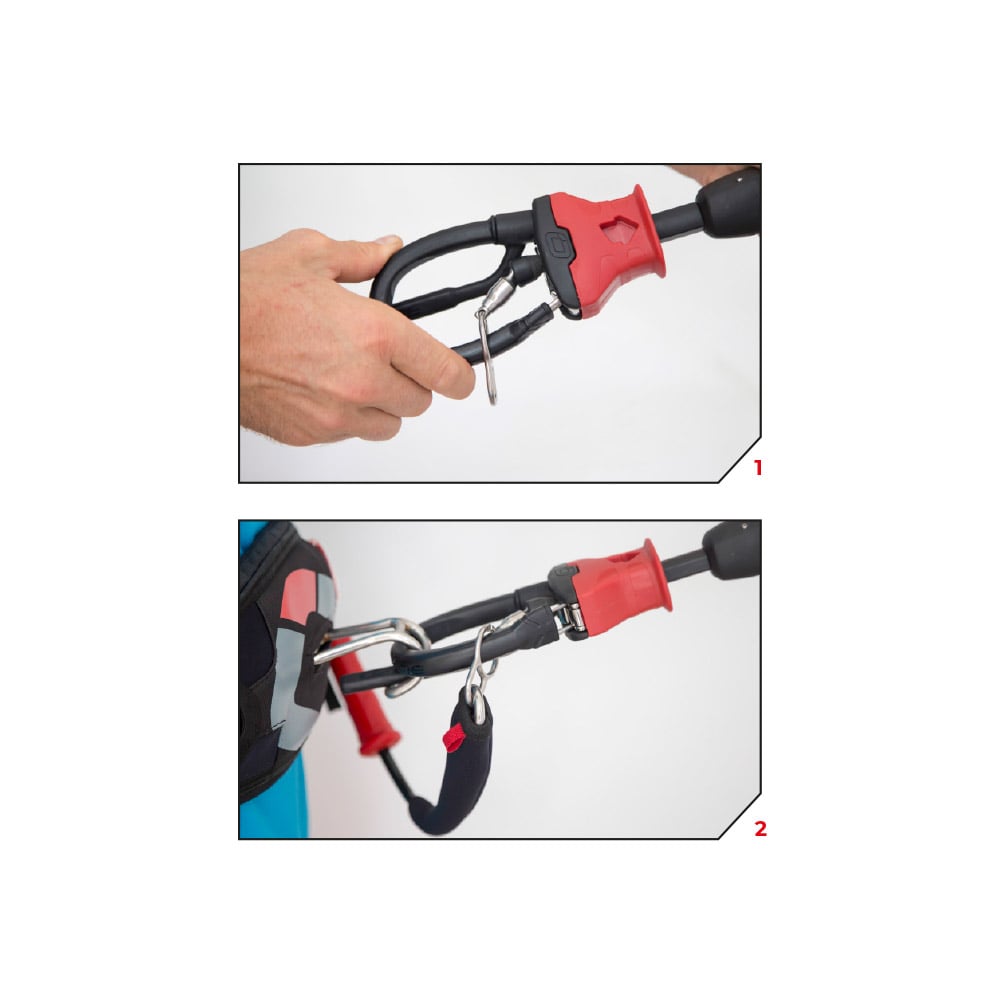
The Quick Release is the primary connection to the kite. Make sure you connect to the Quick Release using the finger as shown in the pictures.

Below the Bar Release (Recommended Mode)

All riders should attach their Kite Leash to the Flag Out System. This is the small eyelet on the Stainless Steel Swivel Ring.
When the release is activated, the kite will flag out and fall to the water/ground.

In all situations make sure that all lines are clear of all working release systems and the kite leash is connected in the right way.

Advanced Riders (Use at your own risk, not recommended) 

Riders performing unhooked tricks or who are more confident and have spent many hours Kiting can attach in Expert mode, where the loop part runs through the large eye of the steel ring. When letting go of the bar in Expert mode (without activating the release e.g. missed handle pass) the kite will depower but WILL NOT flag out.

Be aware in this situation, the Quick Release will be out of reach and can therefore not be released. When hooked in and activating the Quick Release the steel ring automatically slips off and the kite will flag out.

1st Stage of  Release

Activate the Quick Release as shown in the pictures. Providing your leash is attached to the flag out system the kite will 100% depower.

Reloading the Quick Release

Final Stage of Release (in an extreme emergency)

In the case of an extreme emergency where you need to completely release from the kite, use the quick release on the kite leash. This will completely detach the kite and control system from the user, and could therefore hit anything or anyone downwind causing damage, serious injury or death. RIDE RESPONSIBLY.

1st FLY 

WARNING: 
Never fly your kite in strong wind for the 1st time. Do not attempt to fly a kite without being taught by a certified kite instructor.

Light Winds

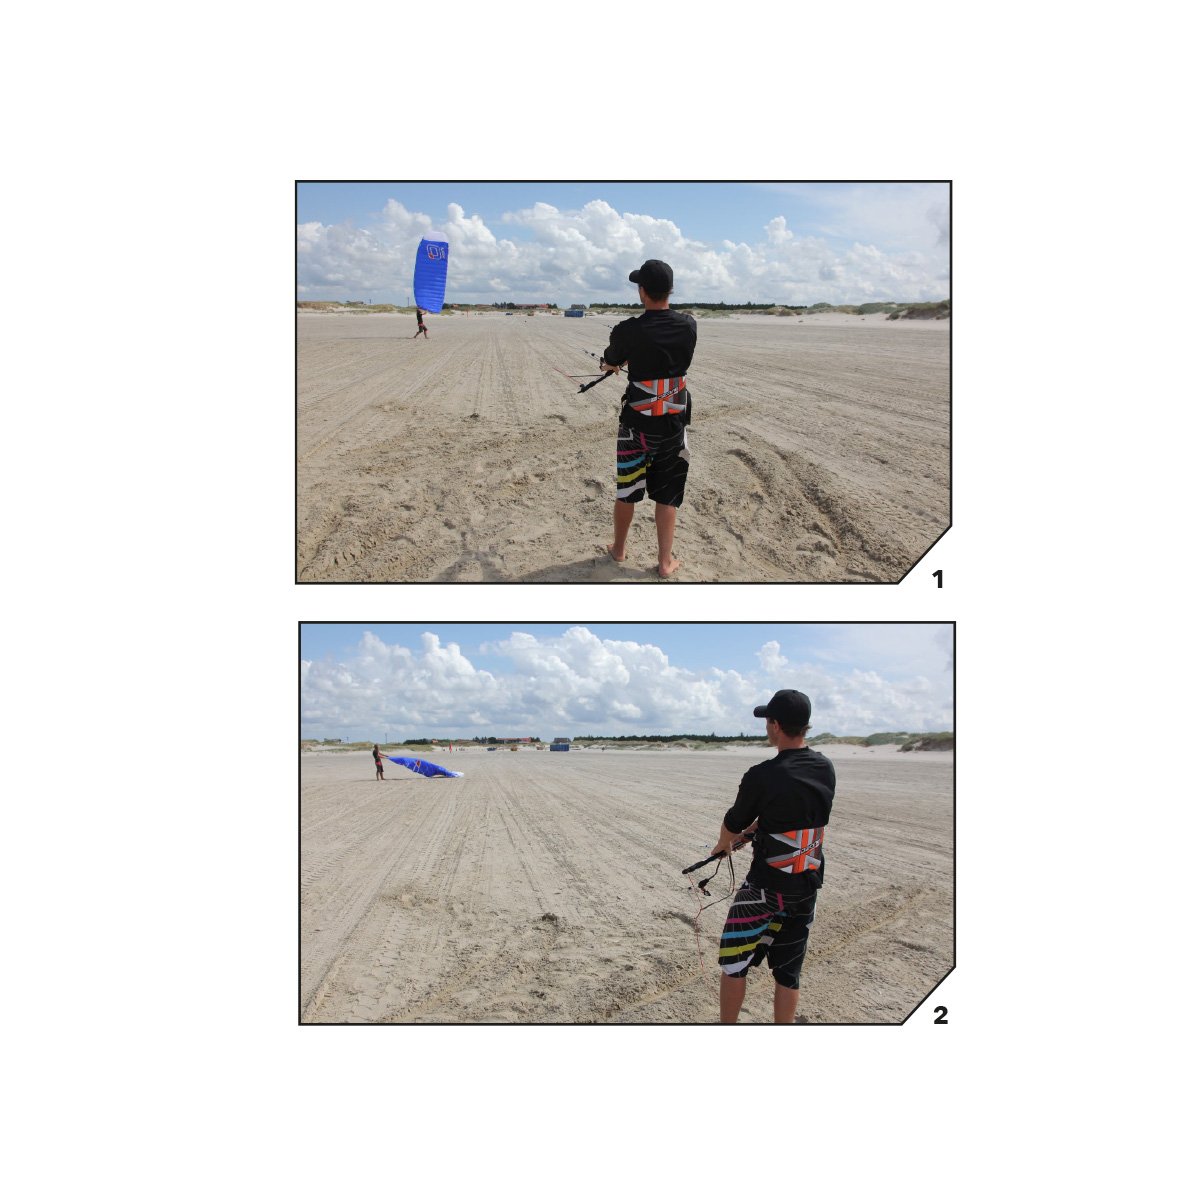
If the wind is light (less than 12 kph) lay trailing edge directly into the wind with sand/snow to secure kite. Place yourself directly in front of the kite. Hook into the Quick Release.

Step backwards while pushing the bar forward. The kite will inflate and take off.
In light winds, to assist launching, gently grab and pull on the front lines.

Strong Winds

If the wind is strong (more than 12 kph), lay kite directly downwind with sand/snow or board securing the upwind tip.

Place yourself at 45 deg to the kite upwind. Hook into the Quick Release. Step backwards while pulling the down wind side of the bar to ease kite into the air.  The kite will inflate and take off on the side of the wind window.

Landing

Option 1:

Release the Primary Security.

Ensure the safety leash is connected to the total flag out line (see pictures, this is the recommended safety option). Activate the Quick Release and the kite will flag out completely and fall to the ground. (see SECURITY)

Option 2:

Pull the 5th line quickly through the Quick Release for about 2m. The kite will loose its power and stall to the ground. The more you pull, the less power. To secure the kite on the ground, hook the loop you find in the 5th line about 2m up, into your spreader hook, ground stake or bar horn.

Option 3:

Grab the Brake Handle with one hand then pull it behind your back and HOLD.

  • The kite will stall evenly and reverse to the ground.
  • Take care not to release the Brake Handle until the kite has been secured with sand or snow.

Option 4:

Fly the kite to the edge of the window and lower it gently and controlled.

  • Have a friend catch and take control of the kite.
  • Run towards the kite to take all tension from the lines.

Reverse Relaunch

When the kite is landed face down, take the Brake Handle  firmly, pull and hold. The kite will reverse from the ground, turn over, and land leading edge up. The kite is now ready to launch normally.
See “LAUNCHING”.

Clamcleat Trimmer

To release the line from the cleat teeth, first pull out and down to unlock the line from the teeth, then set the trimmer line to the desired amount.

Pull the trimmer line down to de-power the kite. This is needed if you are overpowered, for unhooked riding, or if you are walking on the beach or snow.

Release the trimmer line away from you to increase kite power.

Triming for Line Stretch

All lines should be maintained as close to equal length as possible. Flying lines can stretch over time, generally the front lines stretch more as these take the majority of the load.

To check your lines, unwind the lines from the bar and have a partner hold the lines even at the bar end. Taking hold of the lines at the other end, pull on the lines to check they are even. If the lines are not even you may either;

1)
Stretch out the shorter lines. Attach the shorter lines to a car hitch or something very solid. Then take hold of the bar and pull with enough force to stretch the line. Do this to any lines that are shorter and re-check that all 4 lines are equal length.

2) Use the Leader Line trimming knots..

Packing

  • Land and safely secure your kite with sand, snow or your board.
  • Wind the lines around the bar horns. Secure the lines with the elastic.
  • Put the bar next to the trailing edge, and secure lines with velcro retainer.
  • Fold your kite from the tips to the centre.
  • Fold the sail from the trailing edge to the leading edge with the bar inside. Avoid folding close to the leading edge if your kite has plastic reinforcements there.
  • Fasten the webbing tie around the folded kite.

Maintenance

Speed System and Bridle lines should be regularly checked and maintained in the correct trim or the kite will not perform as designed. If they are worn or not to factory specification (+ or – 15mm) they must be replaced. How To videos and a Bridle Check PDF with all measurements can be found at www.ozonekites.com

You must inspect all your equipment before and after every use. Check the entire kite including upper and lower surfaces, line attachment points, speed system and bridles. Immediately replace any worn or damaged parts with original parts only.

Pre and post use check list.

  • Control System and Quick Release: Check for abrasion/wear, if any part is damaged replace it immediately. Reload/release the Quick Release to check the system is functioning correctly. Store your Control System with the Quick Release open. Reload the next time you set up your kite.
  • Lines: Check them every time you wind and unwind the lines. If one of them is damaged, change the corresponding pair.
  • Speed System: Check the pulleys and lines for abrasion, if any are damaged change them immediately.
  • Bridle Lines: Check the bridle lines for abrasion, if any are damaged change them immediately.
  • Sail: Check there are no holes or tears in the sail. If your sail is torn, you can repair it with the sticky cloth, provided in repair kit. To repair the sail, make sure it is clean and dry. Prepare two pieces of sticky cloth, one for each side of the damaged area. The patch should cover the hole by at least 2cm all round. Lay flat and stick on both sides.
  • Packing: Dry your kite after use away from the sun and direct heat. Never leave a wet kite in its bag. Store your kite in a dry place out of the sun. Never wash or clean it with detergent.

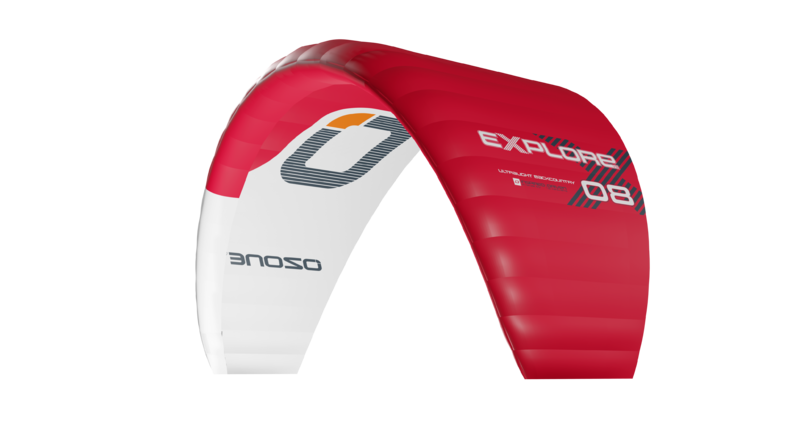
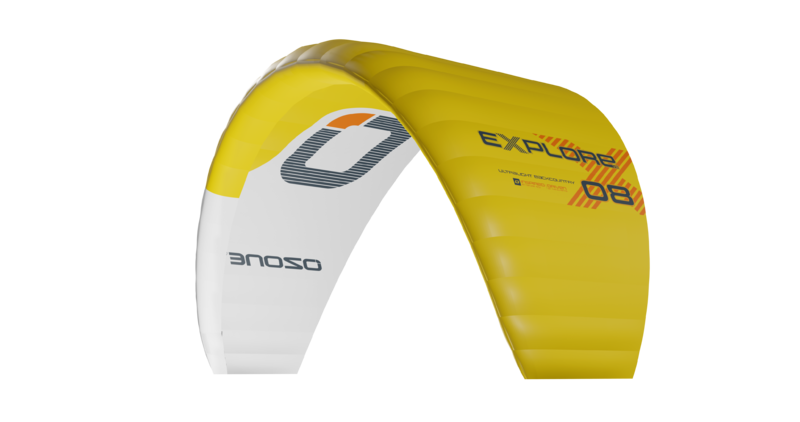
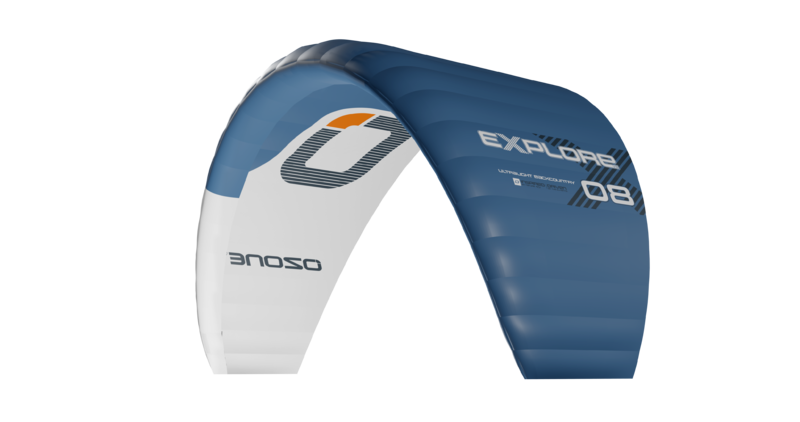
Current production colours

HOW WE WORK AND WHAT TO EXPECT?

All Ozone products are made to order in our own factory in Vietnam and sold through our trusted dealer network, who deliver excellent customer care and advice.

We don’t over produce and instead believe in a sustainable business model that respects people as well as the planet. Although you can't buy gear directly from us, we aim to be as transparent as possible with you about how long the production process takes.

HOW QUICKLY CAN YOU GET YOUR GEAR?

To try and give you the fastest service possible, scroll down to check if we currently have your preferred size and colour in our small factory stock that can be shipped to your dealer immediately.

STAND OUT FROM THE CROWD WITH A CUSTOM COLOUR OPTION

We also offer custom colours for all our kites and wings. Try your ideas out using the custom colour chooser further down this page. Once you’re happy with your design, copy the colour code and send it to your local dealer through this contact form. They will be in touch ASAP.

GOING ON A TRIP, OR IN NEED OF GEAR ASAP?

If you’re desperate to get your hands on a product as soon as possible, contact your nearest dealer to see if they're currently holding any stock. Click here to locate them and get in touch.

Custom Colours

We can make any combination of colours using the colour chooser below. The manufacturing time for these special kites is 30 days. Design your kite, share with your friends and ask your dealer to place your order.


Colour Chooser

If you want to order your amazing design then your dealer will need the colour codes to get it right. Please send them this code:

Anything is Possible…

Get your own branded kite – the ultimate advertising billboard

Millions of people go to the beach every year and kitesurfing is the most visually spectacular beach sport around, drawing the eyes of attention from everyone. Kites are huge and kites with a customized design can be amazing advertising spaces.

Flying up and down the beach, park or snow all day long, these spaces can be used to advertise local and international businesses, kite-schools or simply for your own kite with a design that suits you perfectly and makes you stand out a little more from the crowd. If you have your own company you can add your company logo to your kites which allows them to be written off as a business operating expense. How cool is that!

For mainstream companies the opportunity to invest in a flying Billboard is obvious at a fraction of the cost to normal advertising. So far we have worked with many of the World’s leading brands making them kites or making kites for riders sponsored by mainstream brands that see the benefit in Kite sports.

Check out some of the custom kite designs we’ve made for customers: custom kite gallery

Anything is Possible…
Get your own branded kite – the ultimate advertising billboard
Mil

How do I Order?

  • That’s easy, contact your nearest Ozone dealer or country importer by clicking the link below…
  • Our dealer will then email us the info and we will obtain a quote with 5 working days.
  • Once agreed you pay for the Kite & Logo cost so production of the kite can commence.
  • Your order will ship within 2-4 weeks (depending on how busy the factory is) from date payment is received.

FIND A DEALER

How do I Order?

That’s easy, contact your nearest Ozone dealer or country importer by clickin

What does it Cost?

Quotes vary depending on the complexity and size of the logo or design. We can only give a quote once we have the info (see above)

LOGO STUCK:

For logos to be stuck onto only 1-2 kites, we print the logo onto the white rip-stop sticky-back material. Then the logo is cut out and then stuck on the kite. The stickers typically stick very well however we cannot guarantee them for the life of the kite.

CUT INTO SAIL:

If the logo is not too complicated we can cut into the sail as its single surface (or both surfaces of foil kites). The logos look amazing and the light shines through beautifully. Price depends on the size and how complicated the logo is. Please note that we can only use our standard colour fabrics. Ask your local distributor for feasibility.

find your local distributor

Thank you for purchasing this Ozone product. Our mission is to design and build quality products with cutting edge performance that are easy, fun and safe to use.

At Ozone we are passionate about sports, and it is this passion that drives our design team to perfect and develop products that we love to ride with. We are proud of the quality of our products, and are constantly searching for the best components and materials to use in our designs. We manufacture in our own high-quality production facility in Vietnam, which guarantees a build quality that we are proud to put the Ozone name on. A close look at one of our products reveals that same superior quality and construction that ensures that every Ozone product will enjoy a long life, with consistent performance and aesthetics. To view the factory video visit our website www.flyozone.com. Many dynamic action sports carry inherent risks but with common sense and education from qualified instructors means you can easily enjoy these incredible sports. Accidents generally happen due to a lack of experience, changing weather conditions or from using equipment not suited to the riders’ ability and/or conditions. Always take the time to learn safely with qualified instruction and you will progress far quicker. Ride safe Team Ozone

Release of Liability

OZONE KITESURF LTD / OZONE KITES LTD RELEASE OF LIABILITY, CLAIM WAVIER, ASSUMPTION OF RISK

By assembling and/or using this Ozone product, you agree that you have read and understood the entire Ozone product owners manual, including all instructions and warnings contained in that manual, prior to using the Ozone product in any way. You additionally agree that you will ensure any additional or subsequent user of your Ozone product will read and understand the entire Ozone product owners manual, including all instructions and warnings contained in that manual, prior to allowing that person to use your Ozone product.

ASSUMPTION OF RISK

Use of the Ozone product and any of its components involve certain risks, dangers, and hazards which can result in serious personal injury and death to both the user and to non-user third parties. In using this Ozone product, you freely agree to assume and accept any and all known and unknown risks of injury to you and third parties while using this equipment. The risks inherent in this sport can be greatly reduced by abiding by the warning guidelines listed in this owner manual and by using common sense.

RELEASE AND WAIVER OF CLAIMS

In consideration of the sale of the Ozone product to you, you herby agree to the fullest extent permitted by law, as follows;

TO WAIVE ANY AND ALL CLAIMS that you have or may in the future have against Ozone Kitesurf LTD or Ozone Kites LTD and all related parties resulting from use of the Ozone product and any of its components.

TO RELEASE Ozone Kitesurf LTD or Ozone Kites LTD and all related parties from any and all liability for any loss, damage, injury or expense that you or any users of you Ozone product may suffer, or that your next of kin may suffer, as a result of the use of the Ozone product, due to any cause whatsoever, including negligence or breach of contract on the part of Ozone Kitesurf LTD or Ozone Kites LTD and all related parties in the design or manufacture of the Ozone product and any of its components.

In the event of your death or incapacity, all provisions contained herein shall be effective and binding upon your heirs, next of kin, executors, administrators, assigns, and representatives. Ozone Kitesurf LTD or Ozone Kites LTD related parties have not made and expressly deny and oral or written representations other than what is set forth herein and the Ozone product owners manual.

Warranty

Ozone warrants this product according to the laws in force against any major manufacturing defect. This warranty is subject to the following limitations:

  • The warranty is valid only when the product is used for its intended use, and does not cover products used in rental or teaching operations.
  • Ozone will make the final warranty determination, which may require inspection and/or photos of the equipment, which clearly show the defect(s). If necessary, this information must be sent to the Ozone dealer, postage prepaid.
  • If a product is deemed to be defective by Ozone, the warranty covers the repair or replacement of the defective product only.
  • Ozone will not be responsible for any costs, losses, or damages incurred as a result of loss of use of this product. The warranty does not cover damage caused by misuse, abuse, neglect or normal wear and tear including but not limited to; assembling with other than Ozone components, damage due to excessive sun exposure, damage caused by improper handling or storage, and damage caused by anything other than defects in material and workmanship.
  • This warranty is voided if any unauthorized repair, change or modification has been made to any part of the equipment. The warranty for any repaired or replaced equipment is good from the date of the original purchase only. The original purchase receipt must accompany all warranty claims.
  • The name of the retailer and date of purchase must be clear and legible.
  • There are no warranties that extend beyond the warranty specified herein.

WARRANTY CLAIMS

  • Warranty claims must be sent to Ozone by an official Ozone dealer or country distributor.
  • Warranty claims must be processed and be issued a return authorization prior to shipping to the Ozone dealer the product was purchased from.

Warnings & Safety Precautions

This manual refers to the current product it comes with. No information contained herein applies to previous and/or other products or components. Always read and understand all warnings and instructions for any other product or component being used. To read previous product manuals go to www.flyozone.com

Read the following points before assembling and/or using this product:

General Warnings:

  • Before using this product you must take lessons from a certified instructor/school.
  • Always wear a Coast Guard approved Personal Flotation Device when using this product near or on the water.
  • Always carefully inspect all of your equipment before using it.
  • The use of this product exposes the user to many unavoidable and unexpected risks, dangers and hazards.
  • Always use extreme caution when using this product.
  • Misuse of this product can cause serious injury or death.
  • Only use this product if you are in good physical health.
  • Never act in a careless manner when using this product.
  • You are responsible for your own safety and the safety of others around you when using this product.
  • If you are under the age of 18 you should have your parents or legal guardian read all warnings and instructions. You should not use this product unless you are under proper guidance and supervision.
  • Do not use this product if you are under the influence of alcohol, drugs or medications.

Kite and Control System Warnings:

  • Always have a partner when launching and landing your kite.
  • Always learn to use a small trainer kite before attempting to use a larger power kite.
  • Never allow anyone who is not familiar with power kites to use this product.
  • Never use this product without a safety leash system. A loose kite is extremely dangerous.
  • The kite/control system is equipped with passive safety systems, which need to be activated by the user for them to work.
  • The leash system is not a permanent attachment to this product. Never permanently attach yourself to the kite or any of its components.
  • Never use this kite with another control system or safety leash. Only use the control system that is supplied with this kite. Other brands are not compatible with this design therefore and the safety system will not work.
  • Always wear protective equipment when using this product, for example; helmet, gloves, shoes, protective eyewear etc.
  • Always use a high quality and well maintained kite specific harness.
  • Get yourself used to the way all quick release devices work by testing them often in a non-emergency situation.
  • Rinse all quick release devices in fresh water after each use. Quick release devices have a limited lifetime and must be checked and replaced often.
  • Always activate and re-load all safety systems to familiarize yourself with how they work. This is the only way to be sure that you know how to use them in all situations, and that they are correctly loaded and safe for use.
  • The quick release trim loop and kite leash equipped with a quick release must be replacement after 250hours of use. Replace them before if you see any sign of wear. The wearing of quick release devices is not considered a warranty issue.
  • Never touch the flying lines when the kite is in use. Flying lines are extremely dangerous while under tension and can cause serious injury or death.
  • Never use this product with worn lines. A line that breaks while under tension can cause serious injury or death.
  • Always check your flying lines for knots before each use. Knots greatly reduce the strength of the lines.
  • Stay away from tangled flying lines unless the kite is secured to the ground. An unsecured kite can self launch unexpectedly, and can cause serious injury or death.
  • Never allow yourself, or anyone else, to get between the control bar and the kite when using this product.

Choose safe weather conditions and locations:

  • Be aware of the general risks associated with action sports.
  • Ensure you understand all weather forecasts and prepare for changes in weather.
  • Never learn to use this product in more than 10 knots of wind.
  • We highly recommend you purchase a wind speed indicator to be able to measure wind speeds. Study the wind guide to understand wind speeds.
  • Never use this product in high winds.
  • Never use this product in thunderstorm and lightning conditions.
  • Only use this product when you can remain in a standing position.
  • Never use this product in wind conditions that are above your ability level.
  • Never use this product near or on the water in offshore wind condition unless you are an expert swimmer.
  • Always observe local rules and regulations when using this product.
  • Never use this product near power lines, telephone poles, trees, bushes, roads, automobiles or airports.
  • Only use this product when you have at least 100m of clear space downwind, and on both sides of your launching position. The power of the kite can pull you downwind unexpectedly with great force.
  • Do not fly your kite over other people or pets. Spectators should remain upwind of you when using this product.
  • Never use this product on crowded beaches or fields.
  • Practice launching and landing procedures, and self rescue techniques before using this product near the water.


Set Up:

1: Speed System

2: Line Label System

3: Back Lines

4: Front Lines

5: Brake handle

6: Clamcleat Trimmer

7: De-Power line

8: Flag-out Line

9: Quick Release Handle

10: Quick Release loop

11: Flag-out Loop

12: Finger

Kite Set Up

IMPORTANT: Set up your kite for the first time in wind less than 12kph  to ensure your safety and the safety of others.

  • Unfold the kite on the ground, in the direction of the wind.
  • Fold over the upwind wing tip and put some snow, sand, or your board on the tip to secure the kite.
  • Take the speed system from the Velcro retainer and lay out on the ground. Untangle if necessary.
  • Take the bar and unwind the lines at 90 deg to the kite. (Bars are delivered with the flying lines already connected.)
  • Connect the lines to the kite following the numbered label system ensuring all lines are free from each other.

Now you’re ready to fly!

Bar Set Up

All line to kite connections are made using a “LARKS HEAD” knot.

Always double check your lines before launching. Wrongly attached lines will stop the kite flying correctly and could therefore mean you have no control of the kite putting yourself in a dangerous situation.

Security

IMPORTANT: All Ozone release systems require the user to operate them manually in the case of an emergency. It is imperative the kite is set-up as shown in the manual, incorrect setup will compromise the operation of the release system.  All lines and de-power systems must be tangle free and the kite leash connected in the right way, see pictures.

Quick Release Connection

The Quick Release is the primary connection to the kite. Make sure you connect to the Quick Release using the finger as shown in the pictures.

Below the Bar Release (Recommended Mode)

All riders should attach their Kite Leash to the Flag Out System. This is the small eyelet on the Stainless Steel Swivel Ring.
When the release is activated, the kite will flag out and fall to the water/ground.

In all situations make sure that all lines are clear of all working release systems and the kite leash is connected in the right way.

Advanced Riders (Use at your own risk, not recommended) 

Riders performing unhooked tricks or who are more confident and have spent many hours Kiting can attach in Expert mode, where the loop part runs through the large eye of the steel ring. When letting go of the bar in Expert mode (without activating the release e.g. missed handle pass) the kite will depower but WILL NOT flag out.

Be aware in this situation, the Quick Release will be out of reach and can therefore not be released. When hooked in and activating the Quick Release the steel ring automatically slips off and the kite will flag out.

1st Stage of  Release

Activate the Quick Release as shown in the pictures. Providing your leash is attached to the flag out system the kite will 100% depower.

Reloading the Quick Release

Final Stage of Release (in an extreme emergency)

In the case of an extreme emergency where you need to completely release from the kite, use the quick release on the kite leash. This will completely detach the kite and control system from the user, and could therefore hit anything or anyone downwind causing damage, serious injury or death. RIDE RESPONSIBLY.

1st FLY 

WARNING: 
Never fly your kite in strong wind for the 1st time. Do not attempt to fly a kite without being taught by a certified kite instructor.

Light Winds

If the wind is light (less than 12 kph) lay trailing edge directly into the wind with sand/snow to secure kite. Place yourself directly in front of the kite. Hook into the Quick Release.

Step backwards while pushing the bar forward. The kite will inflate and take off.
In light winds, to assist launching, gently grab and pull on the front lines.

Strong Winds

If the wind is strong (more than 12 kph), lay kite directly downwind with sand/snow or board securing the upwind tip.

Place yourself at 45 deg to the kite upwind. Hook into the Quick Release. Step backwards while pulling the down wind side of the bar to ease kite into the air.  The kite will inflate and take off on the side of the wind window.

Landing

Option 1:

Release the Primary Security.

Ensure the safety leash is connected to the total flag out line (see pictures, this is the recommended safety option). Activate the Quick Release and the kite will flag out completely and fall to the ground. (see SECURITY)

Option 2:

Pull the 5th line quickly through the Quick Release for about 2m. The kite will loose its power and stall to the ground. The more you pull, the less power. To secure the kite on the ground, hook the loop you find in the 5th line about 2m up, into your spreader hook, ground stake or bar horn.

Option 3:

Grab the Brake Handle with one hand then pull it behind your back and HOLD.

  • The kite will stall evenly and reverse to the ground.
  • Take care not to release the Brake Handle until the kite has been secured with sand or snow.

Option 4:

Fly the kite to the edge of the window and lower it gently and controlled.

  • Have a friend catch and take control of the kite.
  • Run towards the kite to take all tension from the lines.

Reverse Relaunch

When the kite is landed face down, take the Brake Handle  firmly, pull and hold. The kite will reverse from the ground, turn over, and land leading edge up. The kite is now ready to launch normally.
See “LAUNCHING”.

Clamcleat Trimmer

To release the line from the cleat teeth, first pull out and down to unlock the line from the teeth, then set the trimmer line to the desired amount.

Pull the trimmer line down to de-power the kite. This is needed if you are overpowered, for unhooked riding, or if you are walking on the beach or snow.

Release the trimmer line away from you to increase kite power.

Triming for Line Stretch

All lines should be maintained as close to equal length as possible. Flying lines can stretch over time, generally the front lines stretch more as these take the majority of the load.

To check your lines, unwind the lines from the bar and have a partner hold the lines even at the bar end. Taking hold of the lines at the other end, pull on the lines to check they are even. If the lines are not even you may either;

1)
Stretch out the shorter lines. Attach the shorter lines to a car hitch or something very solid. Then take hold of the bar and pull with enough force to stretch the line. Do this to any lines that are shorter and re-check that all 4 lines are equal length.

2) Use the Leader Line trimming knots..

Packing

  • Land and safely secure your kite with sand, snow or your board.
  • Wind the lines around the bar horns. Secure the lines with the elastic.
  • Put the bar next to the trailing edge, and secure lines with velcro retainer.
  • Fold your kite from the tips to the centre.
  • Fold the sail from the trailing edge to the leading edge with the bar inside. Avoid folding close to the leading edge if your kite has plastic reinforcements there.
  • Fasten the webbing tie around the folded kite.

Maintenance

Speed System and Bridle lines should be regularly checked and maintained in the correct trim or the kite will not perform as designed. If they are worn or not to factory specification (+ or – 15mm) they must be replaced. How To videos and a Bridle Check PDF with all measurements can be found at www.ozonekites.com

You must inspect all your equipment before and after every use. Check the entire kite including upper and lower surfaces, line attachment points, speed system and bridles. Immediately replace any worn or damaged parts with original parts only.

Pre and post use check list.

  • Control System and Quick Release: Check for abrasion/wear, if any part is damaged replace it immediately. Reload/release the Quick Release to check the system is functioning correctly. Store your Control System with the Quick Release open. Reload the next time you set up your kite.
  • Lines: Check them every time you wind and unwind the lines. If one of them is damaged, change the corresponding pair.
  • Speed System: Check the pulleys and lines for abrasion, if any are damaged change them immediately.
  • Bridle Lines: Check the bridle lines for abrasion, if any are damaged change them immediately.
  • Sail: Check there are no holes or tears in the sail. If your sail is torn, you can repair it with the sticky cloth, provided in repair kit. To repair the sail, make sure it is clean and dry. Prepare two pieces of sticky cloth, one for each side of the damaged area. The patch should cover the hole by at least 2cm all round. Lay flat and stick on both sides.
  • Packing: Dry your kite after use away from the sun and direct heat. Never leave a wet kite in its bag. Store your kite in a dry place out of the sun. Never wash or clean it with detergent.