R1 V4

R1 V4

Las prestaciones deben ser accesibles para ser auténticas

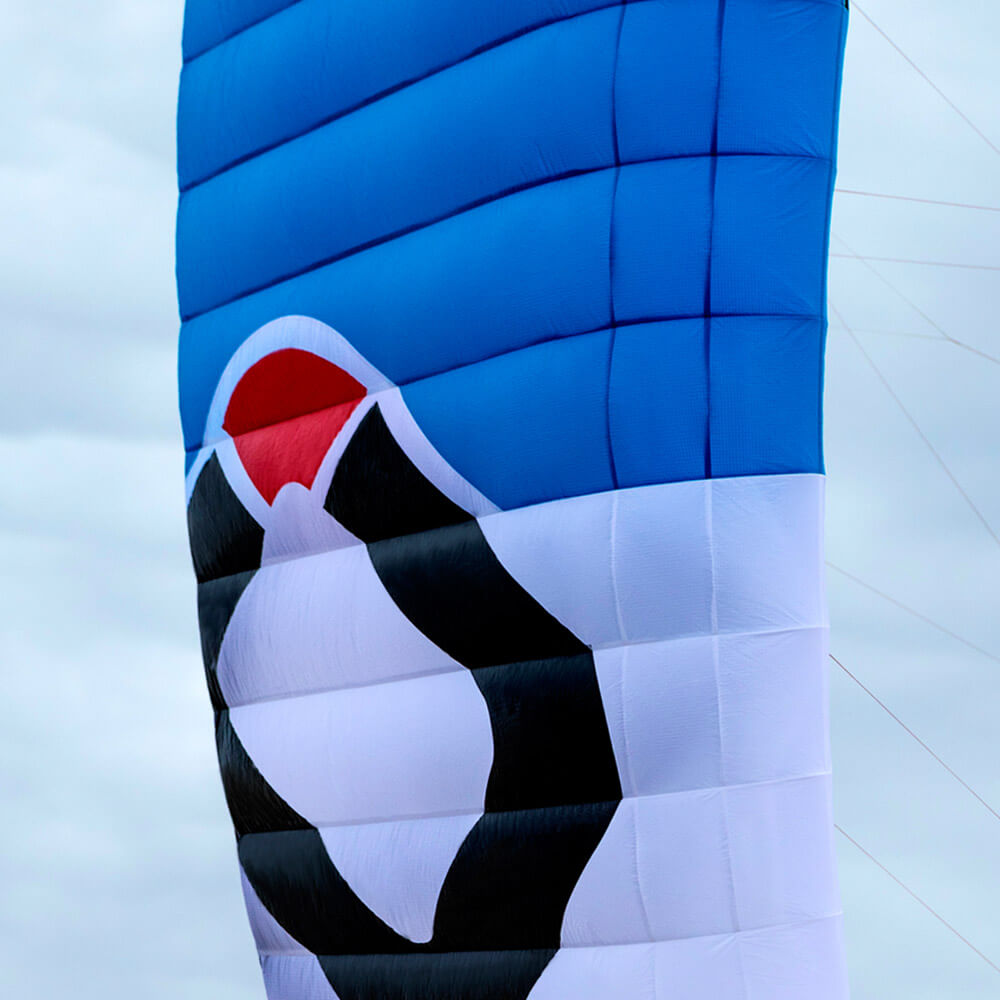
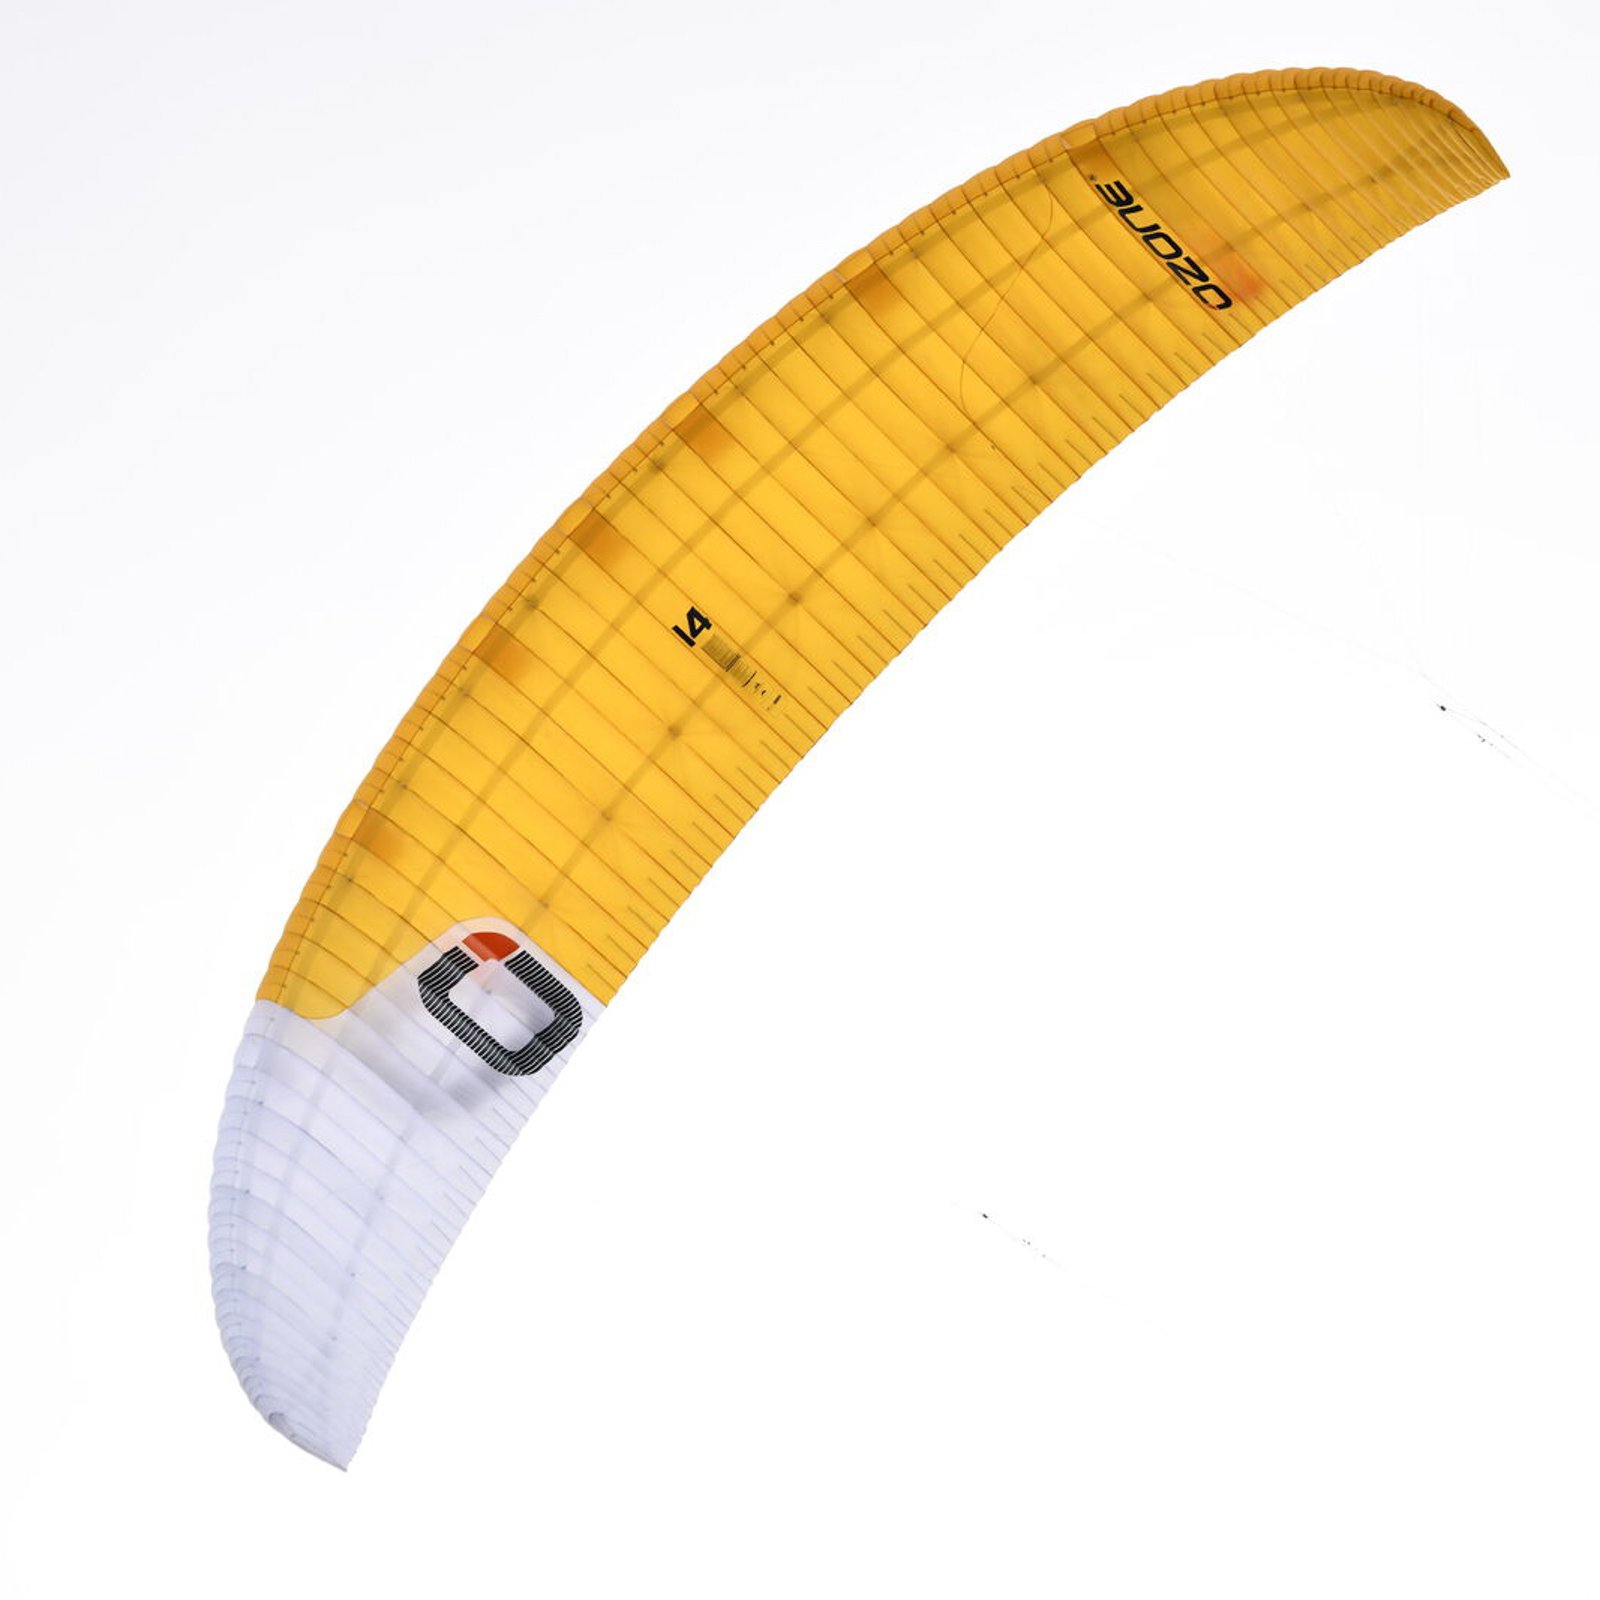
La R1 V4 deriva de las exitosísimas R1 V2 y V3, que establecieron el punto de referencia en regatas de kite. El diseño V4 la eleva al siguiente nivel, ofreciendo unas prestaciones impresionantes al tiempo que conserva la célebre accesibilidad y facilidad de uso de la R1.

  • Cometa específica para regatas
  • Prestaciones extraordinarias
  • Tecnología de vanguardia
  • Únicamente para rides avanzados
Encontrar una tienda
OZONE R1-V4 - Product video

OZONE R1-V4 - Product video

Productos Ozone excepcionales elaborados en fábrica propia

Productos Ozone excepcionales elaborados en fábrica propia

Productos de máxima calidad mundial, hechos en nuestra propia planta, confeccionados con los mejores materiales y sometidos en cada fase de fabricación a una rigurosa inspección manual. La fábrica Ozone también produce nuestra gama de velas de parapente, paramotor, speed flying y speed riding; todos nuestros productos pasan los mismos procesos de control de calidad.


Diseñada con OZ-CAD

Diseñada con OZ-CAD

El FUTURO es AHORA - Todas las cometas y velas Ozone están diseñadas y desarrolladas usando nuestro propio y vanguardista software CAD. Nuestros diseñadores conocen muy bien las características específicas que precisan las formas y estructuras de las velas, cometas inflables y foils que desarrollamos. Parte de nuestro equipo de diseño se dedica a la mejora constante del programa CAD, así como a añadir nuevos módulos y funciones al programa a medida que continuamos desarrollando nuestros productos.

Materiales ultraligeros de altas prestaciones

Materiales ultraligeros de altas prestaciones

Los materiales ultraligeros de alta calidad se llevan empleando profusamente en nuestras cometas y parapentes desde 2011. El uso de materiales ultraligeros se traduce en un verdadero aumento del rendimiento: la cometa se infla más rápido, vuela más rápido y es más reactiva incluso con la brisa más ligera.

Doble costura transversal en el borde de ataque

Doble costura transversal en el borde de ataque

La doble costura transversal en el borde de ataque permite una superficie más limpia en la zona más importante del perfil, lo que se traduce en una circulación menos turbulenta y que el flujo se mantenga más tiempo sin desprenderse del perfil, y eso afecta de manera positiva el planeo y por tanto las prestaciones.

Alto número de celdas

Alto número de celdas

Un gran número de celdas reduce el abombamiento entre las costillas, lo que mantiene la forma de la velocidad y las superficies diseñadas quedan más lisas y precisas. Esto reduce el flujo de aire turbulento, lo que proporciona más eficiencia, velocidad y despotenciación para que el rendimiento general sea mejor.

Bocas de cajón optimizadas

Bocas de cajón optimizadas

Unas válvulas de entrada de aire situadas de manera precisa a lo largo del borde de ataque aumentan la estabilidad en todos los ángulos. El inflado es fácil y seguro ya que la vela se llena de aire rápidamente.

Refuerzos en el borde de ataque

Refuerzos en el borde de ataque

El borde de ataque está reforzado con varillas de plástico ligeras y flexibles que mantienen la forma del perfil durante cambios del ángulo de ataque y cuando el aire circula sobre el perfil de manera turbulenta. Esto mejora drásticamente el rendimiento general ya que el perfil se conserva su diseño de manera fiel.

Diagonales internas y cintas de carga

Diagonales internas y cintas de carga

Unas cintas de carga internas trabajan junto a costillas diagonales optimizadas, distribuyendo la carga desde las bridas de manera uniforme y eficaz. Esto mejora el equilibrio estructural interno que ayuda a controlar el elevado alargamiento de la cometa, al tiempo que permite que extradós e intradós mantengan el perfil sin deformarse por tensiones o cargas indirectas.

Pro-Tune Speed System

Pro-Tune Speed System

El nuevo Pro-Tune Speed System de la R1 V4 es ligero y ofrece poca resistencia parásita al emplear líneas de diámetros pequeños, y el trimado resulta increíblemente sencillo gracias a que el cordino va embutido y se autobloquea en la longitud deseada. El duradero material de los cordinos reduce el desgaste de las líneas de polea, y su mayor resistencia a estirarse o encogerse alarga su vida útil. El sistema de acelerador lleva dos poleas Ronstan Orbit de baja fricción. NOTA: Debes ver el video de How To antes de ajustar la configuración del acelerador.

Líneas de brida de altas prestaciones

Líneas de brida de altas prestaciones

Las líneas de brida Technora de altas prestaciones ofrecen baja resistencia parásita, y son un componente clave para el excelente rendimiento de la R1. El Technora es ultraresistente, con unas características de estiramiento y encogimiento insuperables para mantener el trimado de alto rendimiento de la cometa.

Canales de drenaje de agua

Canales de drenaje de agua

El extremo de cada celda lleva un canal interno a lo largo del borde de fuga. Esto permite que la arena suelta o el agua corran entre las celdas y salgan por las puntas durante el vuelo. Los cajones de las puntas van cerrados con velcro que puede abrirse para limpiar la cometa Limpia siempre tu cometa vaciando cualquier resto de agua, arena o suciedad, ya que esto prolongará su vida y contribuirá que vuele de la manera para la que fue diseñada.

Cremallera de desinflado estanca

Cremallera de desinflado estanca

Inteligentemente ubicada para desinflar y guardar la cometa de manera fácil.

Bolsa técnica para cometa de celda cerrada (opcional)

Bolsa técnica para cometa de celda cerrada (opcional)

Bolsa técnica muy espaciosa, con bolsillo interno y bolsillo externo para la barra. Las hombreras ajustables y el acolchado proporcionan confort adicional.

Bolsa Kompressor para cometas de celda cerrada (opcional)

Bolsa Kompressor para cometas de celda cerrada (opcional)

Para plegar la cometa de manera que se mantenga la forma de las varillas de plástico del borde de ataque. Materiales ligeros, cintas de compresión internas y un forro de malla transpirable mantienen el peso y el tamaño del equipaje al mínimo, ideal cuando se viaja con varias cometas. Combínala con the mochila para meter varias cometas dentro de una sola bolsa.

Current production colours

HOW WE WORK AND WHAT TO EXPECT?

All Ozone products are made to order in our own factory in Vietnam and sold through our trusted dealer network, who deliver excellent customer care and advice.

We don’t over produce and instead believe in a sustainable business model that respects people as well as the planet. Although you can't buy gear directly from us, we aim to be as transparent as possible with you about how long the production process takes.

HOW QUICKLY CAN YOU GET YOUR GEAR?

To try and give you the fastest service possible, scroll down to check if we currently have your preferred size and colour in our small factory stock that can be shipped to your dealer immediately.

STAND OUT FROM THE CROWD WITH A CUSTOM COLOUR OPTION

We also offer custom colours for all our kites and wings. Try your ideas out using the custom colour chooser further down this page. Once you’re happy with your design, copy the colour code and send it to your local dealer through this contact form. They will be in touch ASAP.

GOING ON A TRIP, OR IN NEED OF GEAR ASAP?

If you’re desperate to get your hands on a product as soon as possible, contact your nearest dealer to see if they're currently holding any stock. Click here to locate them and get in touch.

Custom Colours

We can make any combination of colours using the colour chooser below. The manufacturing time for these special kites is 30 days. Design your kite, share with your friends and ask your dealer to place your order.


Colour Chooser

If you want to order your amazing design then your dealer will need the colour codes to get it right. Please send them this code:

Anything is Possible…

Get your own branded kite – the ultimate advertising billboard

Millions of people go to the beach every year and kitesurfing is the most visually spectacular beach sport around, drawing the eyes of attention from everyone. Kites are huge and kites with a customized design can be amazing advertising spaces.

Flying up and down the beach, park or snow all day long, these spaces can be used to advertise local and international businesses, kite-schools or simply for your own kite with a design that suits you perfectly and makes you stand out a little more from the crowd. If you have your own company you can add your company logo to your kites which allows them to be written off as a business operating expense. How cool is that!

For mainstream companies the opportunity to invest in a flying Billboard is obvious at a fraction of the cost to normal advertising. So far we have worked with many of the World’s leading brands making them kites or making kites for riders sponsored by mainstream brands that see the benefit in Kite sports.

To find out more of what we can offer click View Custom Kite Designs

How do I Order?

  • Thats easy, contact your nearest Ozone dealer or country Importer by clicking the link below…
  • Our dealer will then email us the info and we will obtain a quote with 5 working days.
  • Once agreed you pay for the Kite & Logo cost so production of the kite can commence.
  • Your order will ship within 2-4 weeks (depending on how busy the factory is) from date payment is received.

FIND A DEALER

What does it Cost?

Quotes vary depending on the complexity and size of the logo or design. We can only give a quote once we have the info (see above)

LOGO STUCK:

For logos to be stuck onto only 1-2 kites, we print the logo onto the white rip-stop sticky-back material. Then the logo is cut out and then stuck on the kite. The stickers typically stick very well however we cannot guarantee them for the life of the kite.

CUT INTO SAIL:

If the logo is not too complicated we can cut into the sail as its single surface (or both surfaces of foil kites). The logos look amazing and the light shines through beautifully. Price depends on the size and how complicated the logo is. Please note that we can only use our standard colour fabrics. Ask your local distributor for feasibility.

find your local distributor

The R1 Pit Stop is an invaluable resource from Ozone. It is a vital tool-kit that enables you, as athletes, to keep both your kites and yourselves at peak performance for the race track. As such, it represents our on-going commitment to help you reach your ambitions.

The Reference to Formula 1 is No Accident.

Striving for excellence and ceaseless attention to detail are key elements that define the pinnacle of motorsport, qualities that are central to our core values.


Photo: Ozone R1 co-designer Rob Whittall racing at the Isle Of Man TT
The Reference to Formula 1 is No Accident.
Striving for excellence and ceaseless attention to detail

Performance and Racing are Deep in Ozone’s DNA.

Our racing expertise encompasses a broad span: hang-gliding, paragliding, motorcycling, cycling, kite buggy racing and snow-kiting. Within our strong design team, we boast World and European champions.

Performance and Racing are Deep in Ozone’s DNA.
Our racing expertise encompasses a broad span: han

The R1 V4

That wealth of experience and hard-won knowledge derived from competing and winning at the highest levels enabled us to create the category-leading R1 V4.

It is one of the fastest kites on the market. Paired with its unmatched accessibility, it is very effective in all areas of the race course. But as with any high-performance equipment built to win, the R1 V4 must be well-maintained to maximise its durability and extend its peak performance as long as possible. On the following pages you will find crucial tips and tricks to keep your R1 V4 kites at the top of their game for as many training sessions and races as possible.


Looking After Your Kite…

The testing combination of wind, sun, sand and salt are among the harshest challenges a high-performance wing can face.

By contrast, of course, that is often the very environment that is ideal for kiting. Kites used only on fresh-water lakes, and launched and landed on grassy areas, show little wear compared to those flown on the sea. But wherever the kite is flown, the more it is cared for, the longer it will last and perform at its best.

Download R1 Care pdf

Looking After Your Kite…
The testing combination of wind, sun, sand and salt are among the har

Canopy Material Wear

The kite’s upper and lower surfaces suffer most, as they are exposed to the elements.

The upper surface in particular endures abrasion from sand on the beach. Moving a kite on the beach is essentially like rubbing the surface with sandpaper. Lightweight sail material does not respond well to that kind of treatment.

To improve durability without compromising performance unduly, the R1 V4 uses a heavier and more robust material on the upper surface.

We opted for the lightest material available for the underside as it is rarely in contact with the sand. This combination of the two strikes the best balance between lightness and longevity.

As your kite ages, the canopy will inevitably lose crispness. It will get softer and may feel like a handkerchief between your fingers. Porosity will increase, and it will have more stretch as the coating wears off. The kite will have less response, power and overall performance compared to a new, well-treated kite.

Bridle Lines Out Of Spec

Due to the heavy load racers put through kites, some bridle lines are prone to stretching more than others.

As a starting point, we have a side view of a kite profile section. From it is suspended three rows of bridle lines, plus brake lines, just as we currently have on the R1 V4.

The A lines are attached near the Leading Edge (LE) of the kite

The B lines are behind the A lines going towards the Trailing Edge (TE)

The C lines are behind the B lines

The K lines (brakes) are attached closest to the TE

Bridle Lines Out Of Spec

Due to the heavy load racers put through kites, some bridle lines are pron

Generally, most load goes through the A bridles. The most loaded area there, is the centre, suspended by AR1.
The load decreases as we go out towards the tips and towards the Trailing Edge.

Generally, most load goes through the A bridles. The most loaded area there, is the centre, suspende

This Graphic Below Shows the Ordering of the Bridle Lines in a 2D View.

As you can see in the 2D view, AR1 is splitting into AM1 and AM2, which again split into A1, A2, A3 and A4. Those few lines have to sustain the highest loaded (or working) area of the kite. The further we go towards the tips or the trailing edge, the less lift the wing creates and the less load there is on the bridle lines.

To Check the Bridle Line Trim

Level the lower end of all bridle lines (the point where they attach to the Speedsystem) using a ground stake, screwdriver or having a person holding all points at the same level.

To Check the Bridle Line Trim
Level the lower end of all bridle lines (the point where they attach t

Symmetry Check

Get someone to hold all A bridle lines (left and right) on the lower end at the same level. Check bridle attachment points; for example, A1 left and right on the canopy have the same distance from the lower end. Repeat for A2, A3, A4. Perform same test for B and C level.

Symmetry Check
 Get someone to hold all A bridle lines (left and right) on the lower end at the same

Level Check

have someone hold all bridle lines of one side at their lower end. The lines of A, B, C should have the same length up to where they split to the very upper lines that attach to the canopy.

Level Check
have someone hold all bridle lines of one side at their lower end. The lines of A, B, C

How to to shorten a bridle line using the double loop technique:

In particular, AR1 is prone to stretching as it is the most loaded line. It can be shortened by using a larks head, or double, triple loop, on to the Speedsystem line as shown:

1: Lay out the speedsystem as you would for set up

2: Disconnect the front (#2 or #3) pigtail

3: Remove PA1 from PA2 and PB2

4: Remove PA2 from bridle lines AR1, AR2, AR3

5: Put the bridle lines that are not effected back onto PA2 (AR2, AR3 in sample)

6: Put effected bridle line onto PA2 using a double loop as shown. This will shorten the line length by around 1cm to 1.5cm depending on the line thickness. If the effected line needs shortening even more add another loop. If the line is off spec more than you can compensate with the double loop we recommend to replace or re-splice to the spec length

7: Tighten the double loop onto PA2 and measure length of effected line to check if modification brought it back to spec length

8: Close the loop to loop connection on upper end of PA2 by looping lower end of PA2 through its upper loop (reverse way from opening)

9: Connect PA2 and PB2 with PA1

10: Connect PA1 with PB2 with front pigtail

11: Repeat for other side or any other effected line.9

Download pdf here


Bridle Line Lengths and Rigging Diagrams

View pdf for more detailed information

Bridle Line Lengths and Rigging Diagrams
View pdf for more detailed information

Speedsystem Trim

The Speedsystem allows us to change the Angle of Attack (AoA) of a kite in flight. It sits between the bridle and flying lines. It is permanently connected to the kite’s bridles and is controlled by the back flying lines running from the bar ends to the kite. It allows us to rotate B, C and K lines around our fixed bridle line point A and therefore change not only the AoA,  but also the camber of the kite.

Speedsystem Trim
The Speedsystem allows us to change the Angle of Attack (AoA) of a kite in flight.

Here is a side view of a profile section set at a low AoA when the bar is pushed away from the rider.

Here is a side view of a profile section set at a low AoA when the bar is pushed away from the rider

This view shows a profile section with a high AoA when the bar is pulled in towards the rider.

This view shows a profile section with a high AoA when the bar is pulled in towards the rider.

With the Speedsystem we are moving B, C, K with a ratio of B 1:4, C 1:2, K 1:1 compared to the travel/throw on the bar.

This way the profile also gets more camber as the AoA increases, which creates more lift at a lower speed. That helps when going deep on downwind angles, adding lift for the manoeuvres and giving a very responsive feel on the bar.


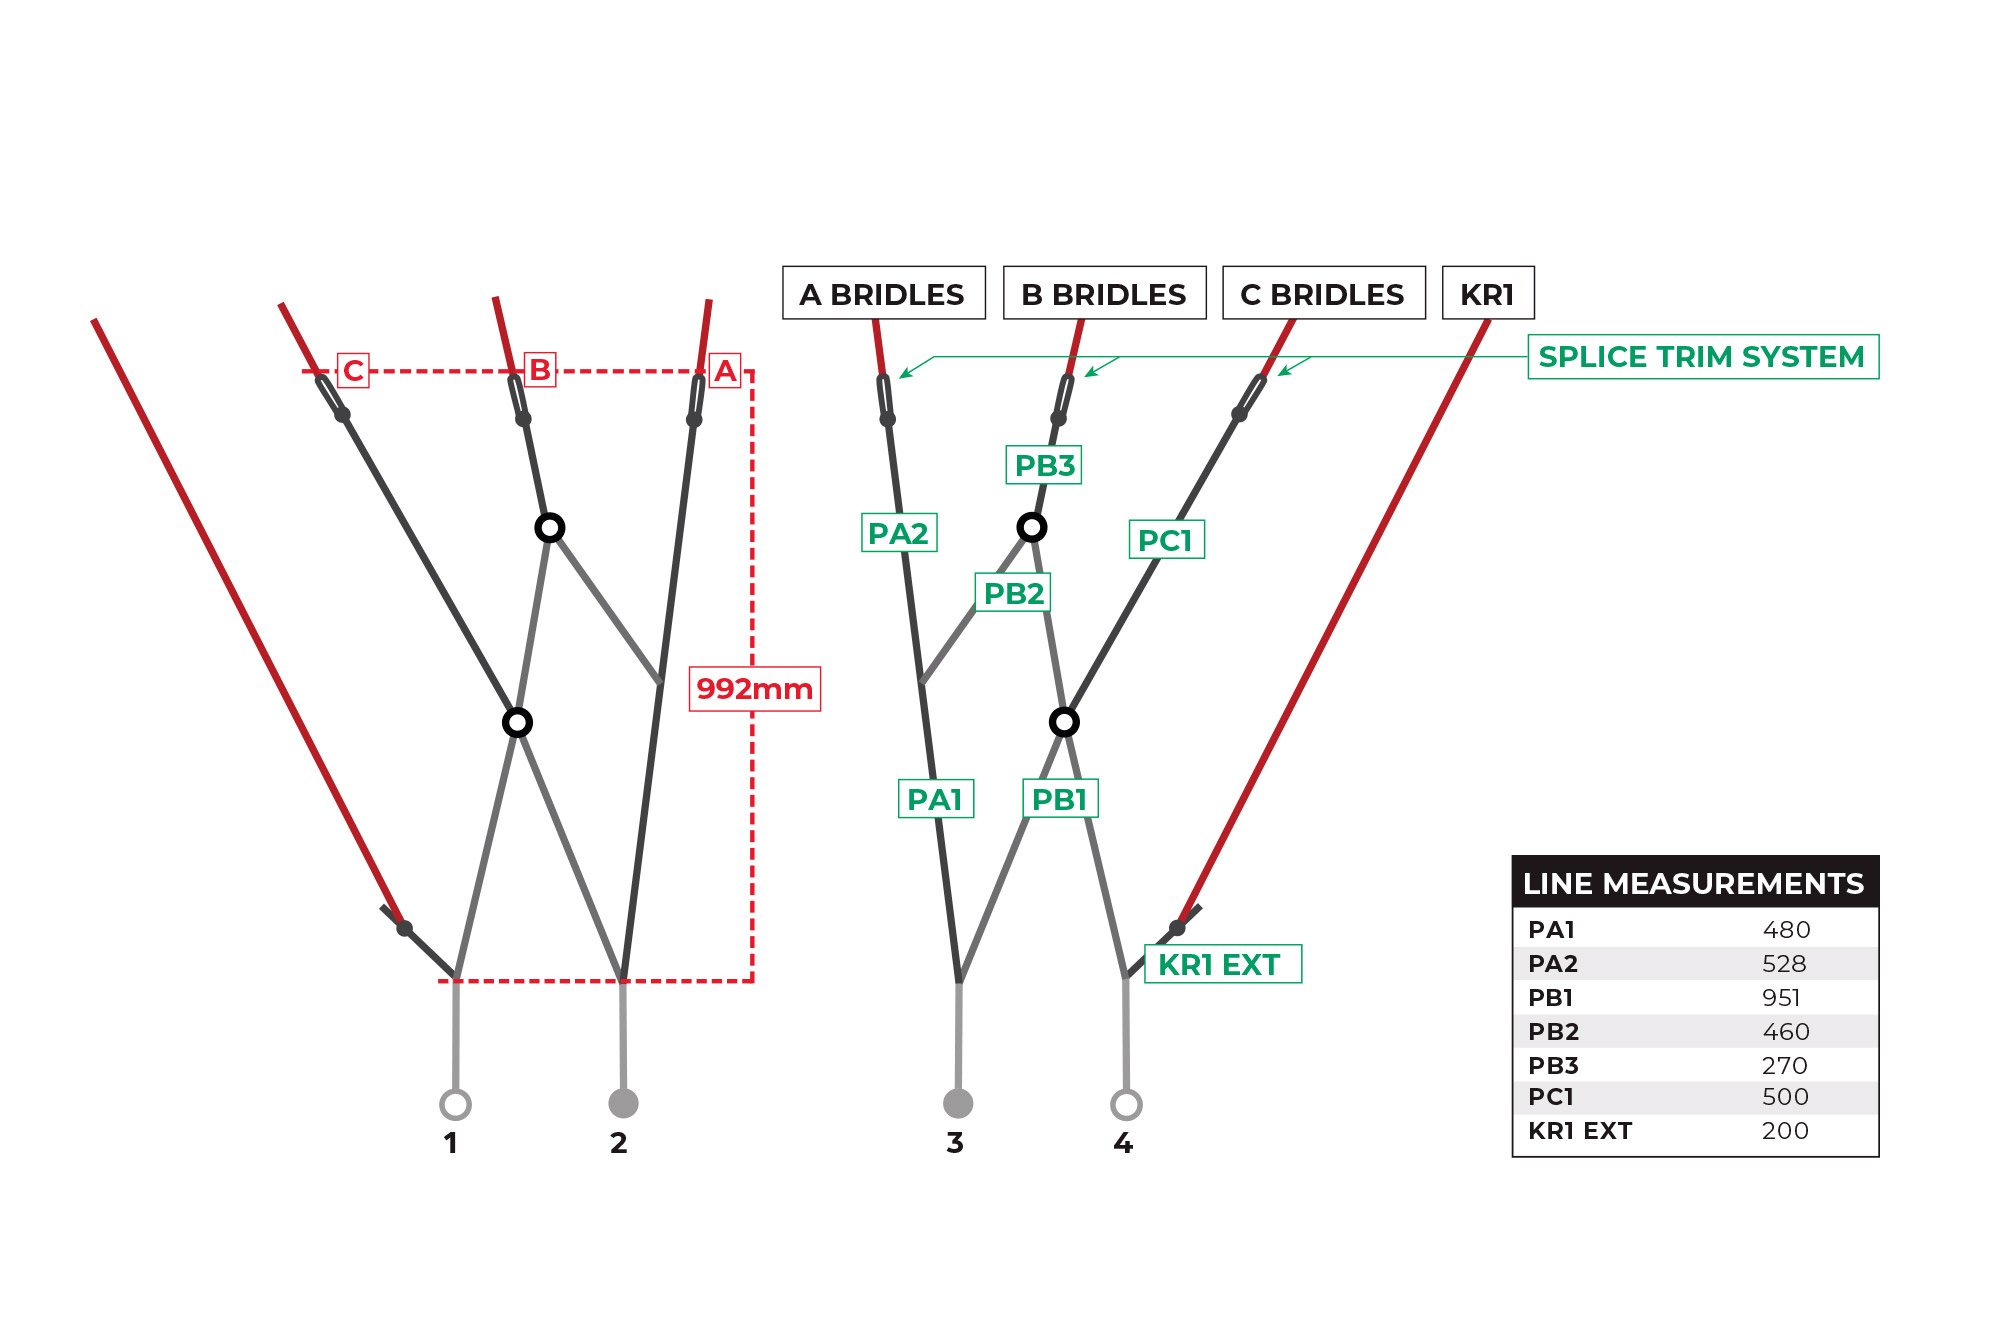
The Speedsystem is set to an overall length of 992mm from where it attaches to the bridle line down to the flying line connectors (pigtails).

With the Speedsystem we are moving B, C, K with a ratio of B 1:4, C 1:2, K 1:1 compared to the trave

R1 V4 Pro-Tune Speed System

Make sure you keep the trim of the Speedsystem as per spec. You can use the splice trim system on the upper end of the Speedsystem to adjust it.

Speedsystem level: check A, B, C are set to the correct length of 992mm.

R1 V4 Pro-Tune Speed System
Make sure you keep the trim of the Speedsystem as per spec. You can use

EXAMPLE 1:
If measurement point A is 20mm longer than the factory standard spec of 992mm, move the knot under the heat shrink down 40mm and adjust the A bridles connection to the loop of PA2.

EXAMPLE 2:
If measurement point B is 10mm shorter than the factory standard spec of 992mm, move the knot under the heat shrink up 20mm and adjust the B bridles connection to the loop of PB3.

EXAMPLE 3:
If measurement point C is 10mm shorter than the factory standard spec of 992mm, move the knot under the heat shrink up 20mm and adjust the C bridles connection to the loop of PC1. Then move the knot in KR1 EXT up by 10mm.

EXAMPLE 4:
If measurement point C is 20mm longer than the factory standard spec of 992mm, move the knot under the heat shrink down 40mm and adjust the C bridles connection to the loop of PC1. Then move the knot in KR1 EXT down by 20mm.

Some riders prefer to have C shorter than A and B by 10-15mm without changing the KR1 EXT knot. The Speedsystem will approximately stretch out to that setting after the first ride.

Speedsystem pulley lines PB1, PB2 shrink as they are running through the pulleys

Speedsystem pulley lines (sheathed grey thick lines) need to be checked regularly.

Some riders prefer to have C shorter than A and B by 10-15mm without changing the KR1 EXT knot. The

Pro-Tune Speed System Pulley Line Replacement

Step-by-step instructions. Refer to the R1 V4 Pro-Tune Speed System Diagram and Photos.

1. Disconnect the flying lines and lay the Speed System out in an open area.

2. Disconnect the front (#2 or #3) and back (#1 or #4) pigtails.

3. Remove PB1 from the lower pulley.

4. Disconnect PA1 from PA2 and PB2.

5. Remove PB2 from the upper pulley.

6. Disconnect PB2 and PC1 from the pulley – loosen the loop-to-loop connection and feed the pulley through the end loops of PB2 and PC1.

7. Take the replacement PB2 and PC1 and re-connect with the pulley. The pulley goes through the end loops of PB2 and PC1 i.e. reverse the previous steps.

8. Feed the replacement PB2 line through the upper pulley.

9. Connect replacement PB2 and PA2 with PA1.

10. Take the PB1 replacement line and feed it through the lower pulley.

11. Connect PB1 and PA1 to the front line pigtail (#2 or #3).

12. Connect the other end of PB1 and KR1 EXT to the back pigtail (#1 or #4).

13. Repeat the same process for the other speed system side. Always check your speed system and replace lines when excessive wear shows.

Care and Maintenance in General

Having your equipment maintained, cleaned and set up to the best possible state will give you trust and confidence to focus fully on the race. Regularly check, trim and replace your equipment and have it in a race-worthy state when going to events.

Now that we have shown how to maintain, care for and put the kite back to its factory trim, you can be reassured it will perform like the first day. To maximise your performance further, here are some more aspects to consider.

Care and Maintenance in General

Having your equipment maintained, cleaned and set up to the best po

How to be a Performance Athlete

You, as the athlete, are the critical link between the power generated by the wind in your kite and the wing under the water that allows you to fly.

You need to become the best version of yourself to succeed. That requires deep reserves of physical and mental resilience, paired with steely discipline.

How to be a Performance Athlete 
You, as the athlete, are the critical link between the power genera

Physical:

Your body must be a high-performance machine in peak condition for racing. Ensure it meets the required specs: strength, endurance and power. You must have enough energy on tap at any given moment. To be tired after two races and have to drag yourself through the day’s other three races is falling short. A soccer player who can last a game of 90 minutes, but breaks down when it goes to extra time will struggle. Learn to deal with pain if you know where it comes from. Your legs might feel tired, but there are more reserves of power than you realise. Learn to enjoy the pain and keep pushing.

Physical: 
Your body must be a high-performance machine in peak condition for racing. Ensure it meet

Educate Yourself:

Or get help, on how to become fitter. Refine your diet to make sure you are getting sufficient nutrition. After racing, or training, be kind to your body. Massages, stretching, re-hydration and good food are essential. Give your body time to recover. Get good sleep, avoid alcohol, nicotine and other drugs. There are times for those things. But they should be limited and controlled as much as you can. Certainly not before, or during, a competition.

Educate Yourself:
 Or get help, on how to become fitter. Refine your diet to make sure you are getti

Mental:

An athlete’s mental strength is just as important as physical strength. Train your mind as well as your body. Problems that might bug or bother you—work on them. Seek professional help if necessary. Don’t be shy about it—we are all a little crazy, one way or the other.

In the end, you should be focused, but relaxed. Enjoy what you are doing, and remember nobody is forcing you. You are privileged to do what you love. It is all about having fun.

Mental: 
An athlete’s mental strength is just as important as physical strength. Train your mi

Drag

An Unwanted Necessity

Drag is created everywhere on moving obstacles. It can be beneficial.

On an aerofoil, it creates lift in the air as well as underwater. Equally, you want to cut non-beneficial parasitic drag to a minimum. The bridle and flying lines, bars, boards, mast, fuselage, stabiliser and riders themselves are all “dragging” through the air. But they are not creating lift and therefore are not beneficial. They are, nonetheless, necessary to control the ride.

Drag increases by the velocity squared—this means if you are trying to be twice as fast, your drag coefficient is four times higher. A good example is a bicycle: if you ride at 15kph, it is relatively easy. Drag comes from rolling resistance of your tyres, chain, bearings, pedals—basically all the moving parts. Aerodynamic drag is relatively low when moving slowly. To ride at 30kph, you will get a good sweat on. Your rolling resistance and the other parts are still creating the same drag, but your aerodynamic drag is four times higher than at 15kph.

Kitefoil racers are riding at speeds where aerodynamic drag is significant. So, it is essential to reduce parasitic drag to a minimum. Flying lines should be strong enough to withstand heavy loads, but not over-sized in diameter. Ozone’s race lines have 300kg breaking strength at a 0.9mm diameter for the front lines. You can also get lines with the same breaking strength, but twice the diameter. Again, that adds parasitic drag—lowering your performance.

Make yourself as aerodynamically clean as possible. Clothing, hair, anything flapping in the wind will create additional drag. Open face helmets with air vents, clutter on the harness, big flapping bibs—all slow you down.

A good example can be seen in the road cycling industry over recent years. Bike manufacturers moved all cables for brakes and gears into the handlebars and frames to become more aerodynamic. The frames, forks, rims are all designed to have low aerodynamic drag. Jerseys became very tight with no flutter. Helmets are designed to be low drag.

Kitefoil racers are riding at speeds where aerodynamic drag is significant. So, it is essential to r

Aerodynamic Drag

Performance comes not only from the wings that create lift underwater and in the air, but it also comes from what you are dragging through the air. The less, the better.

Here is an excellent example of how much you can gain by reducing aerodynamic drag. Pay attention to how much the other riders are still pedalling even on the downhill.

We wish you loads of fun, good times and success with our products. We hope you enjoy them as much as we do creating them.
Team Ozone

The ultimate Kite Racing control system featuring a double pulley trim system, a removable brake handle to make inflation, self-landing and reverse re-launch easier and our innovative Click-In Loop Quick Release.

  • Cometa específica para regatas
  • Prestaciones extraordinarias
  • Tecnología de vanguardia
  • Únicamente para rides avanzados
Encontrar una tienda