Important Notes:
• The R1 V4 is for advanced riders only who have previous foil kite experience. It is not difficult to fly but there are techniques required to fly a high aspect ratio foil kite.
See R1V4 Manual
• The R1 V4 materials have been used extensively on our Ultra Light Kites and Paragliders since 2011. The kite must be carefully looked after, it needs an experienced rider who knows how to keep the kite up in the air and how to handle it gently on the ground.
• The kite is water re-launchable, but we recommend that you keep it flying and out of the water if possible! A drainage system on the wing tip allows any water that may have entered the kite to drain out. Do not use the kite in waves.
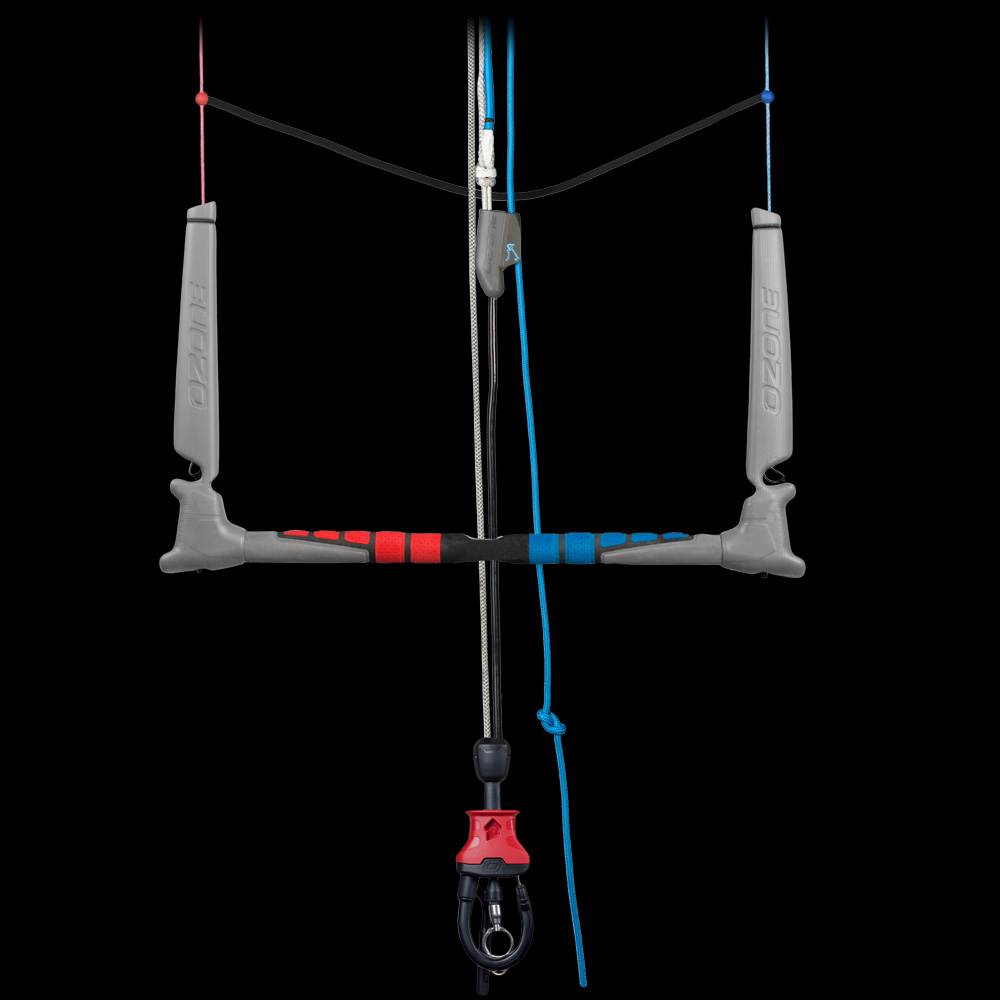
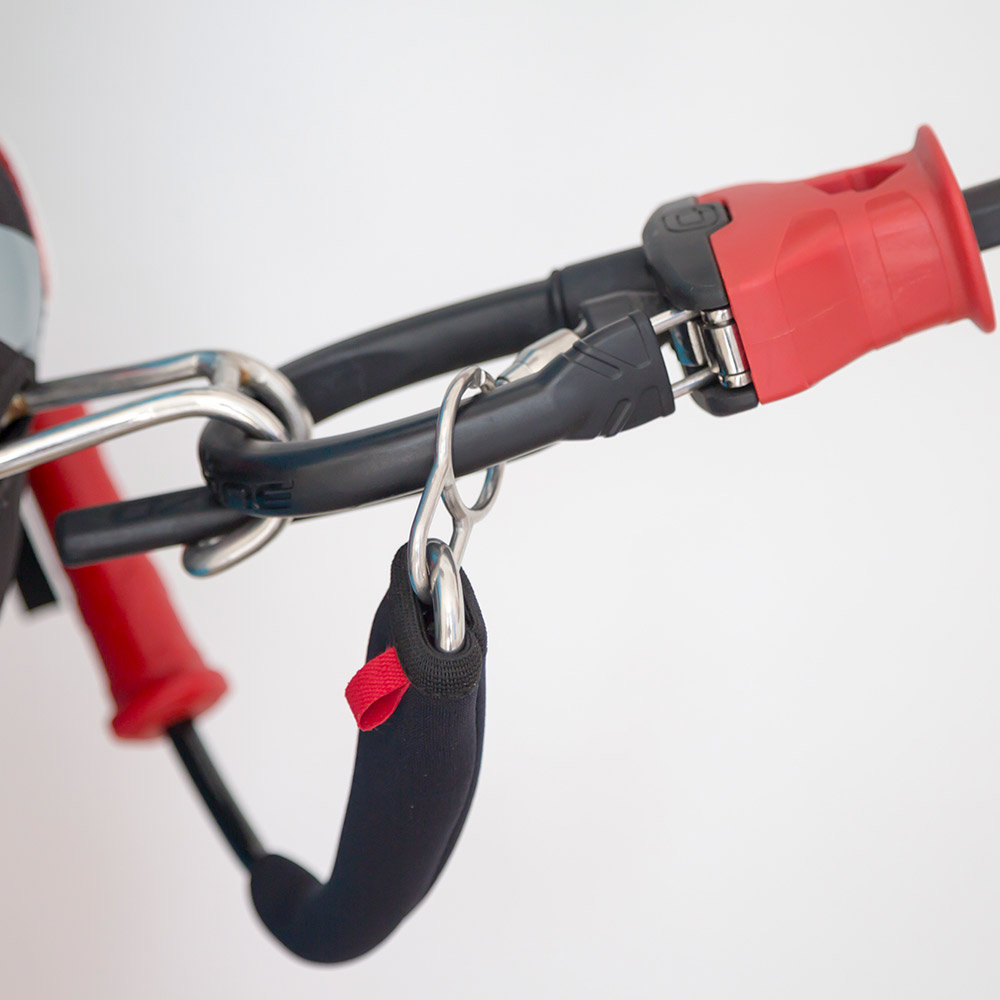
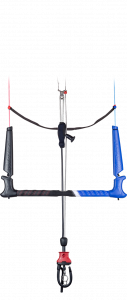
• Always use a Brake Handle when flying a foil kite. This is the handle/line spanned between the back leader lines on the control system. This easy to grab handle makes inflation, self-landing and reverse launch easier.
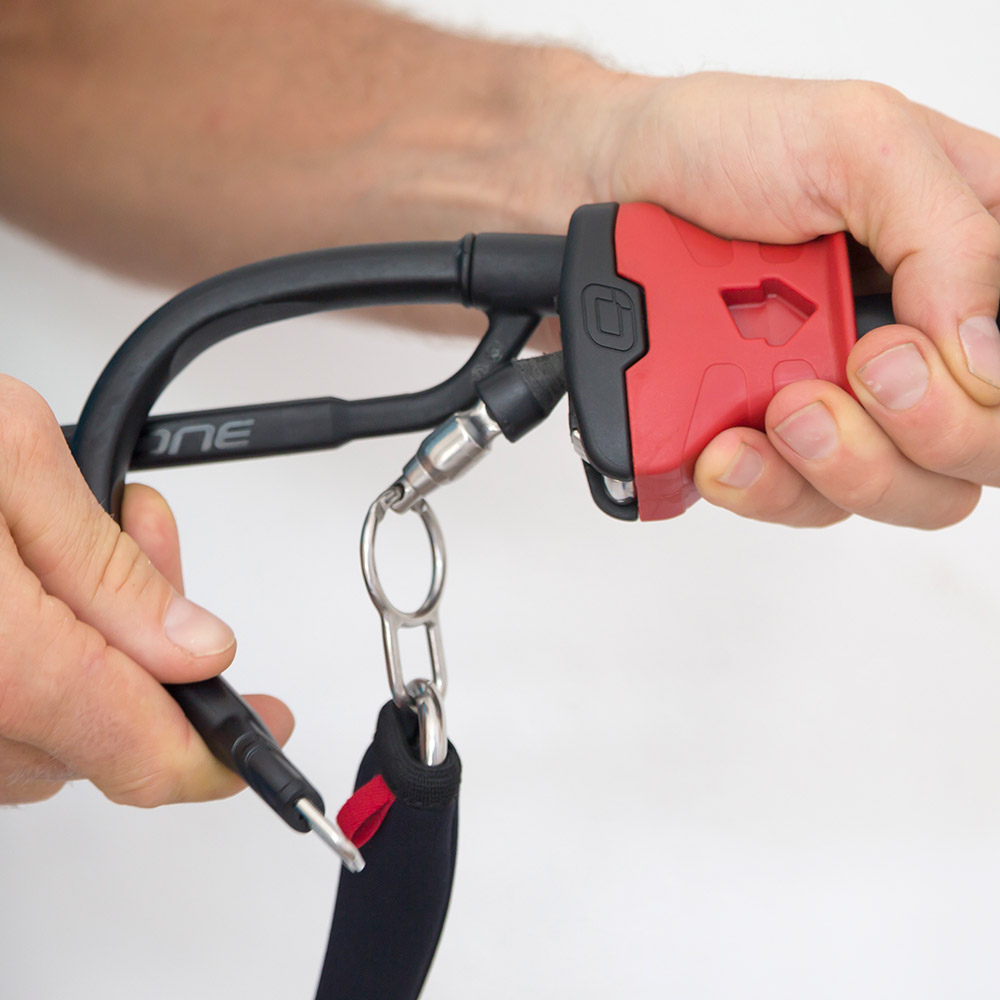
• This kite features a simple yet effective front line flag out release. After releasing the flag out you should check the speed system, bridle lines and your flying lines for twists before restart.
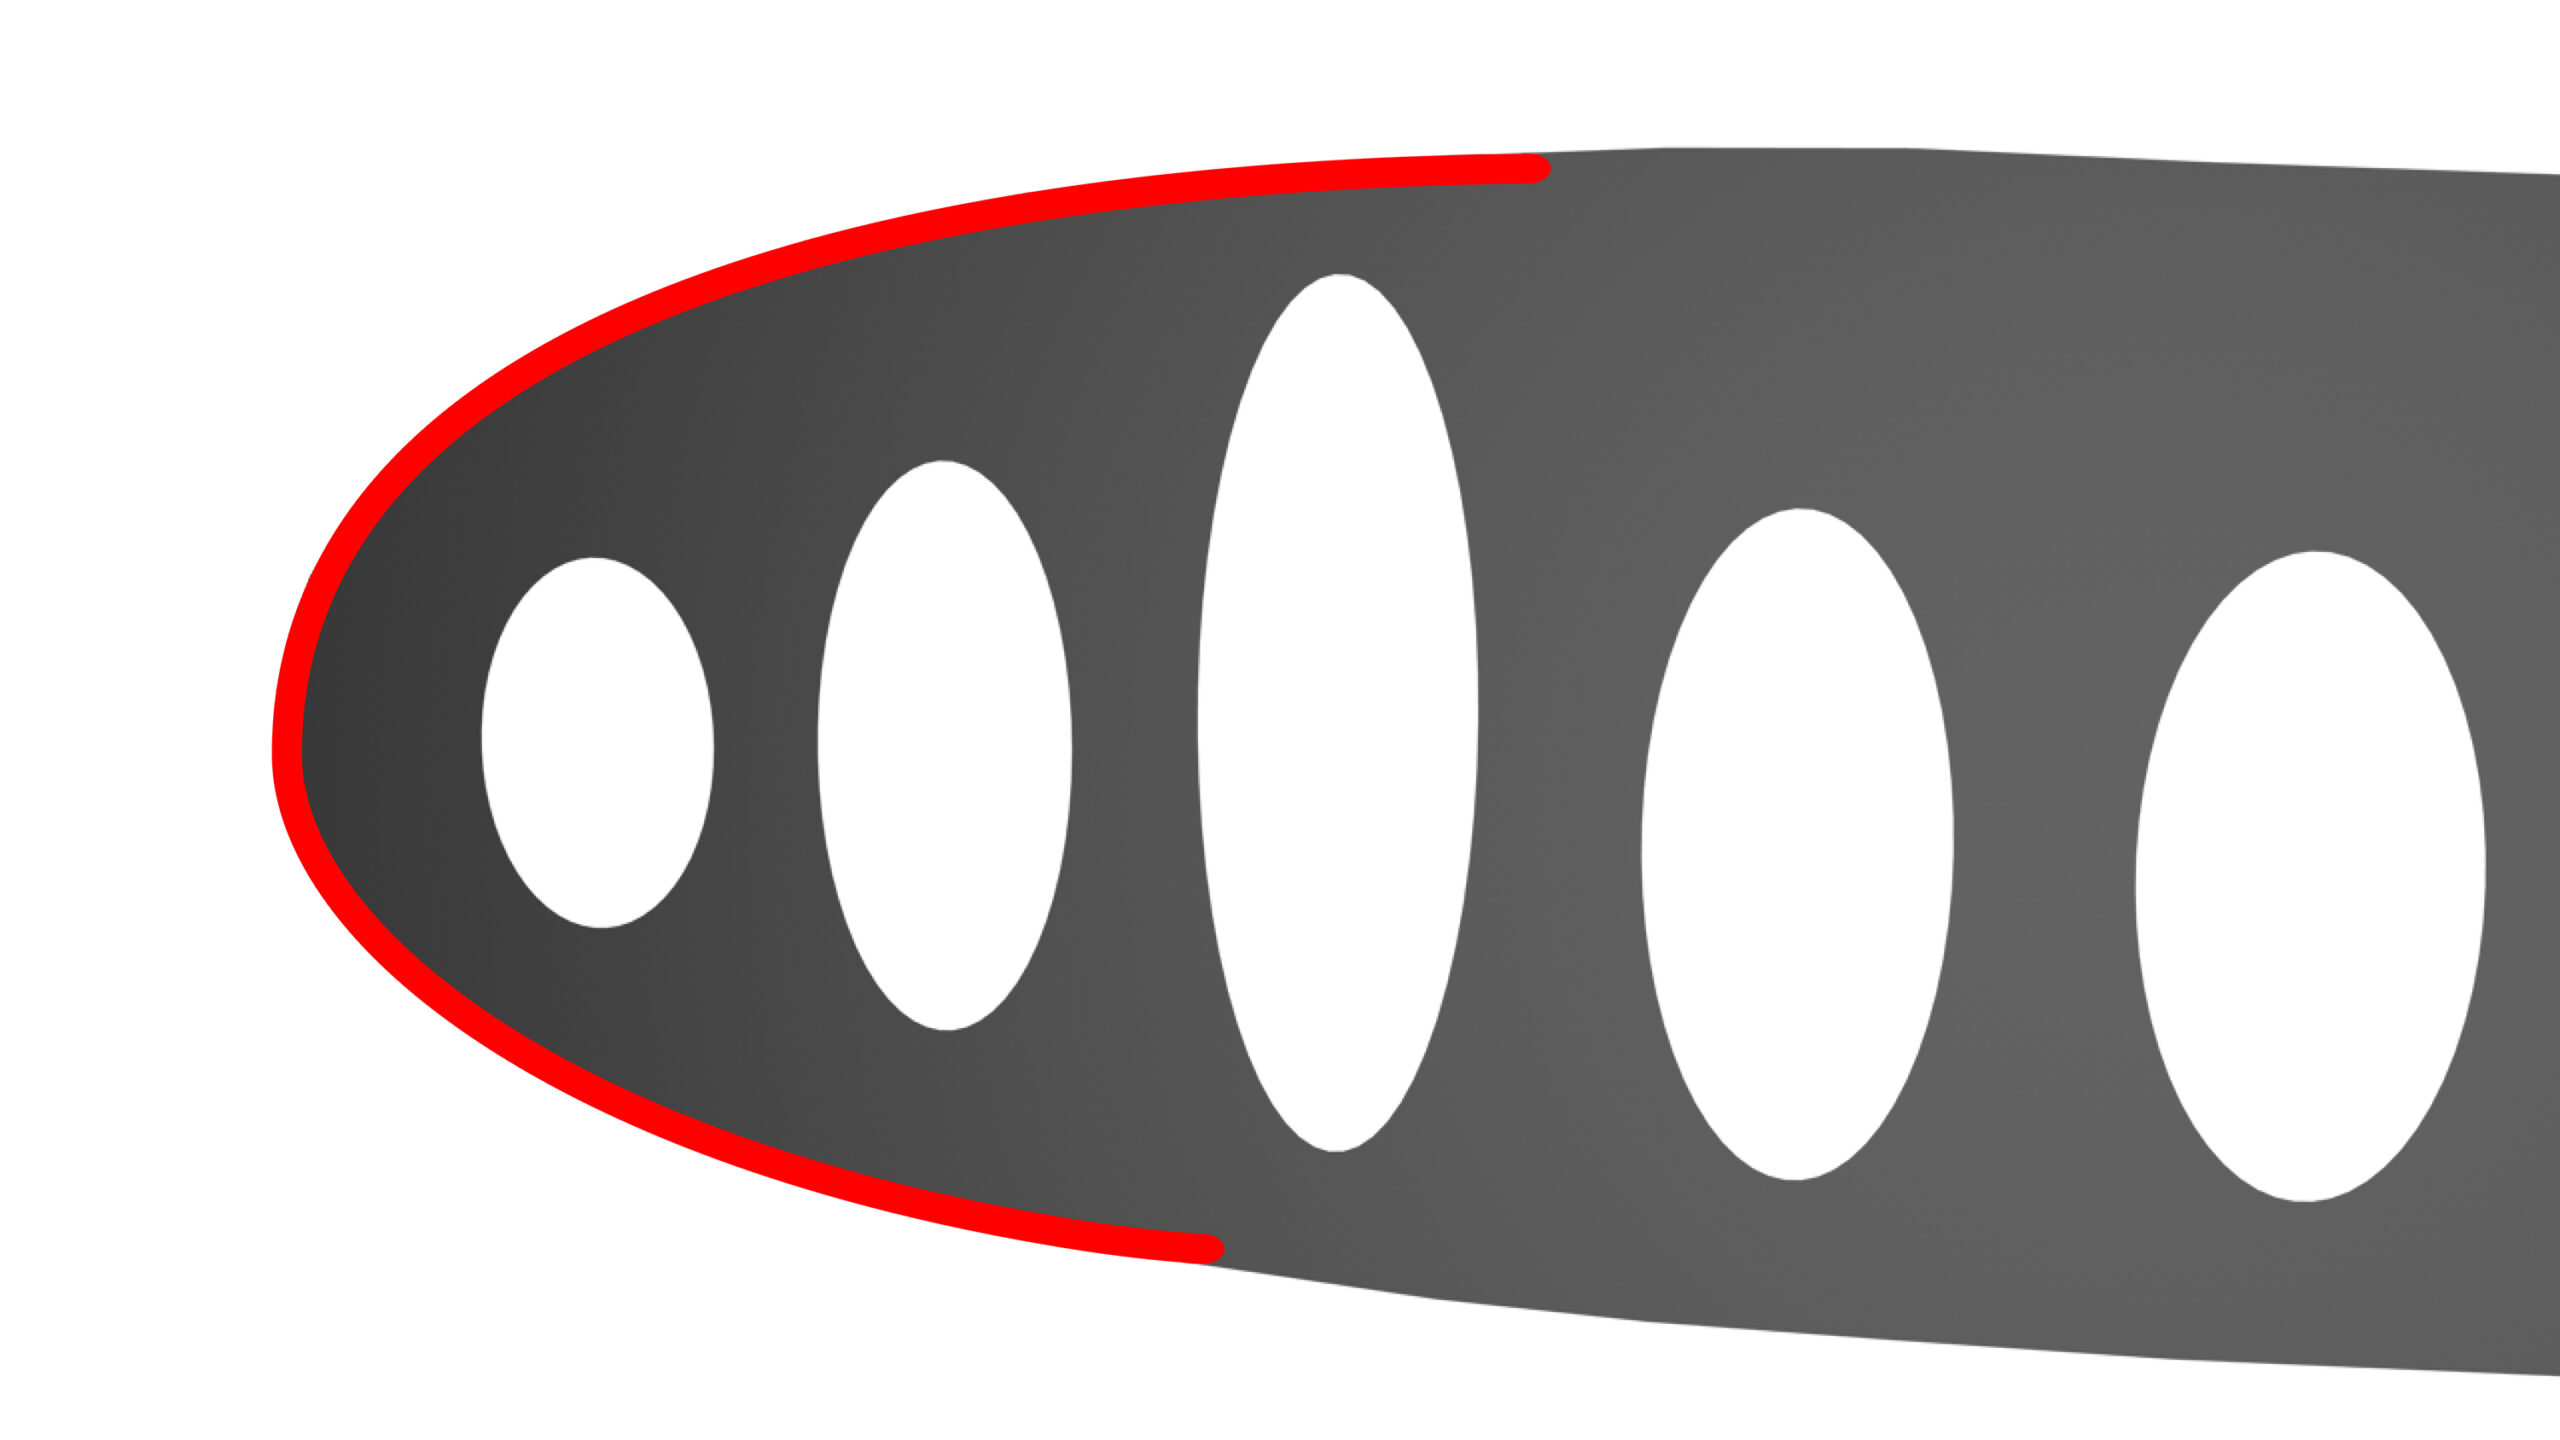
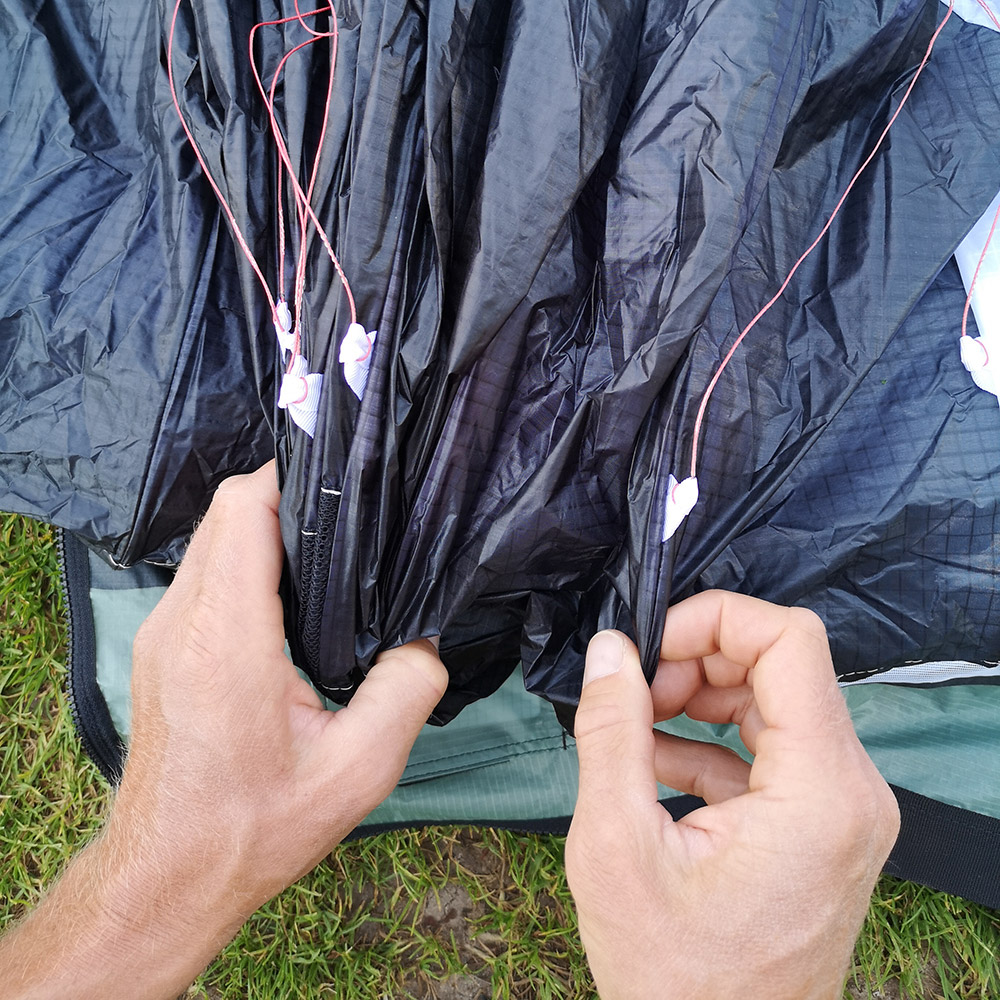
• The R1 V4 must be packed using the concertina method. If the kite is packed and stored using any other method such as rolling this will void the warranty. The Leading Edge plastic battens are a fundamental part of the design and must not be forced out of their given shape otherwise the kite can loose stability and flying characteristics.
See R1 V4 How to Pack video
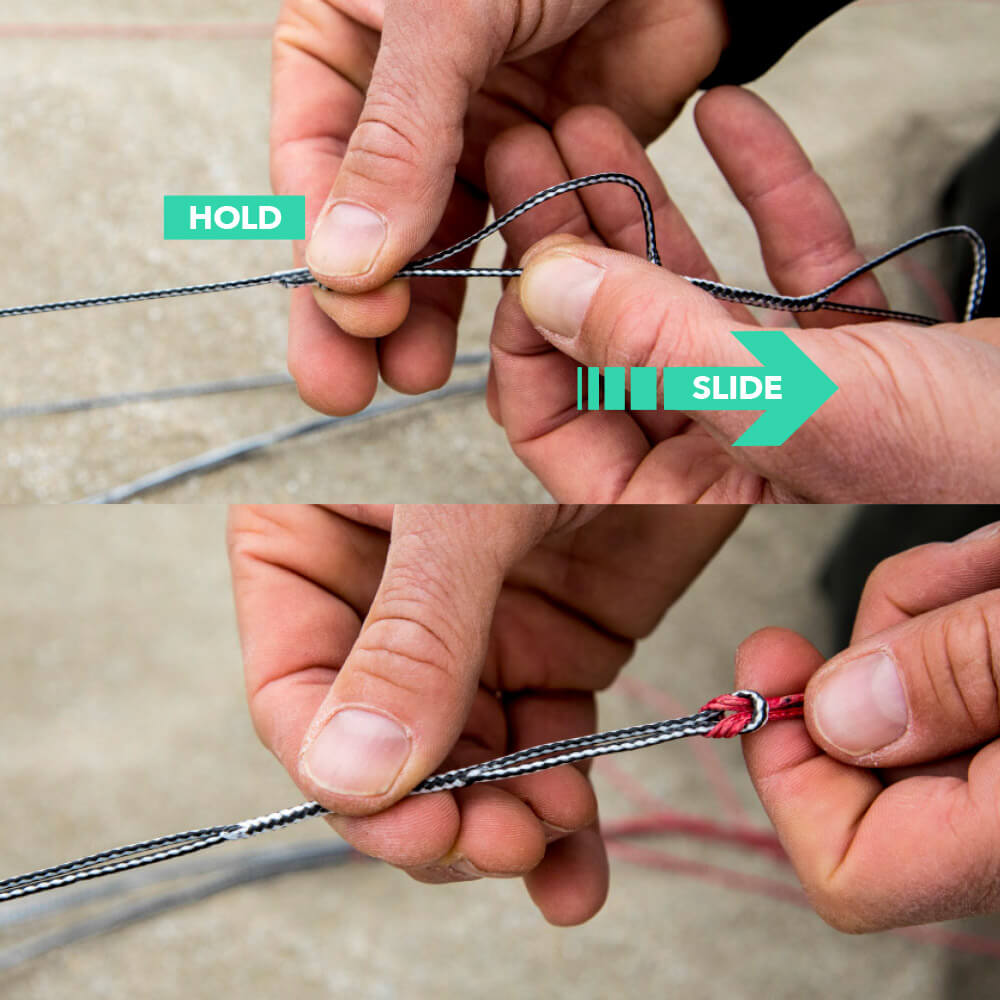
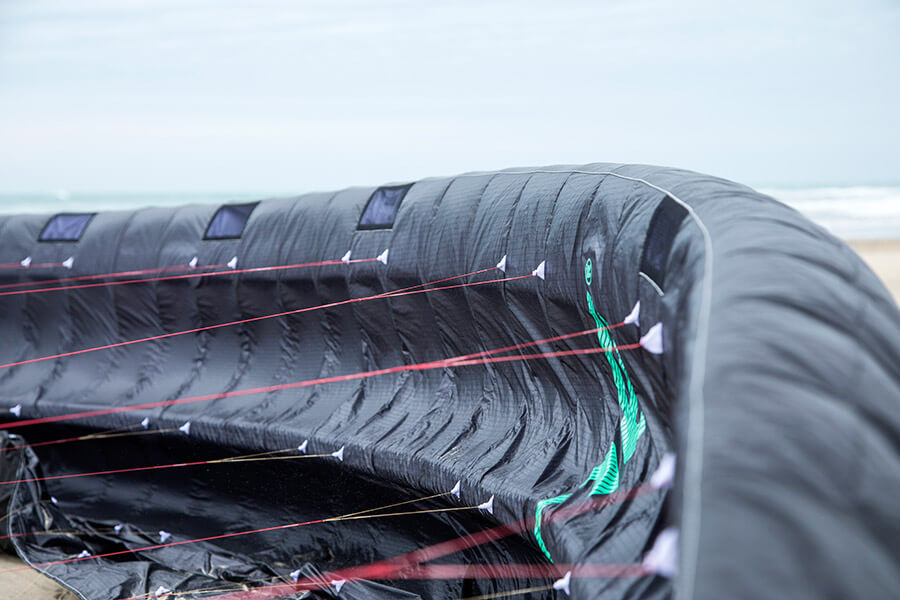
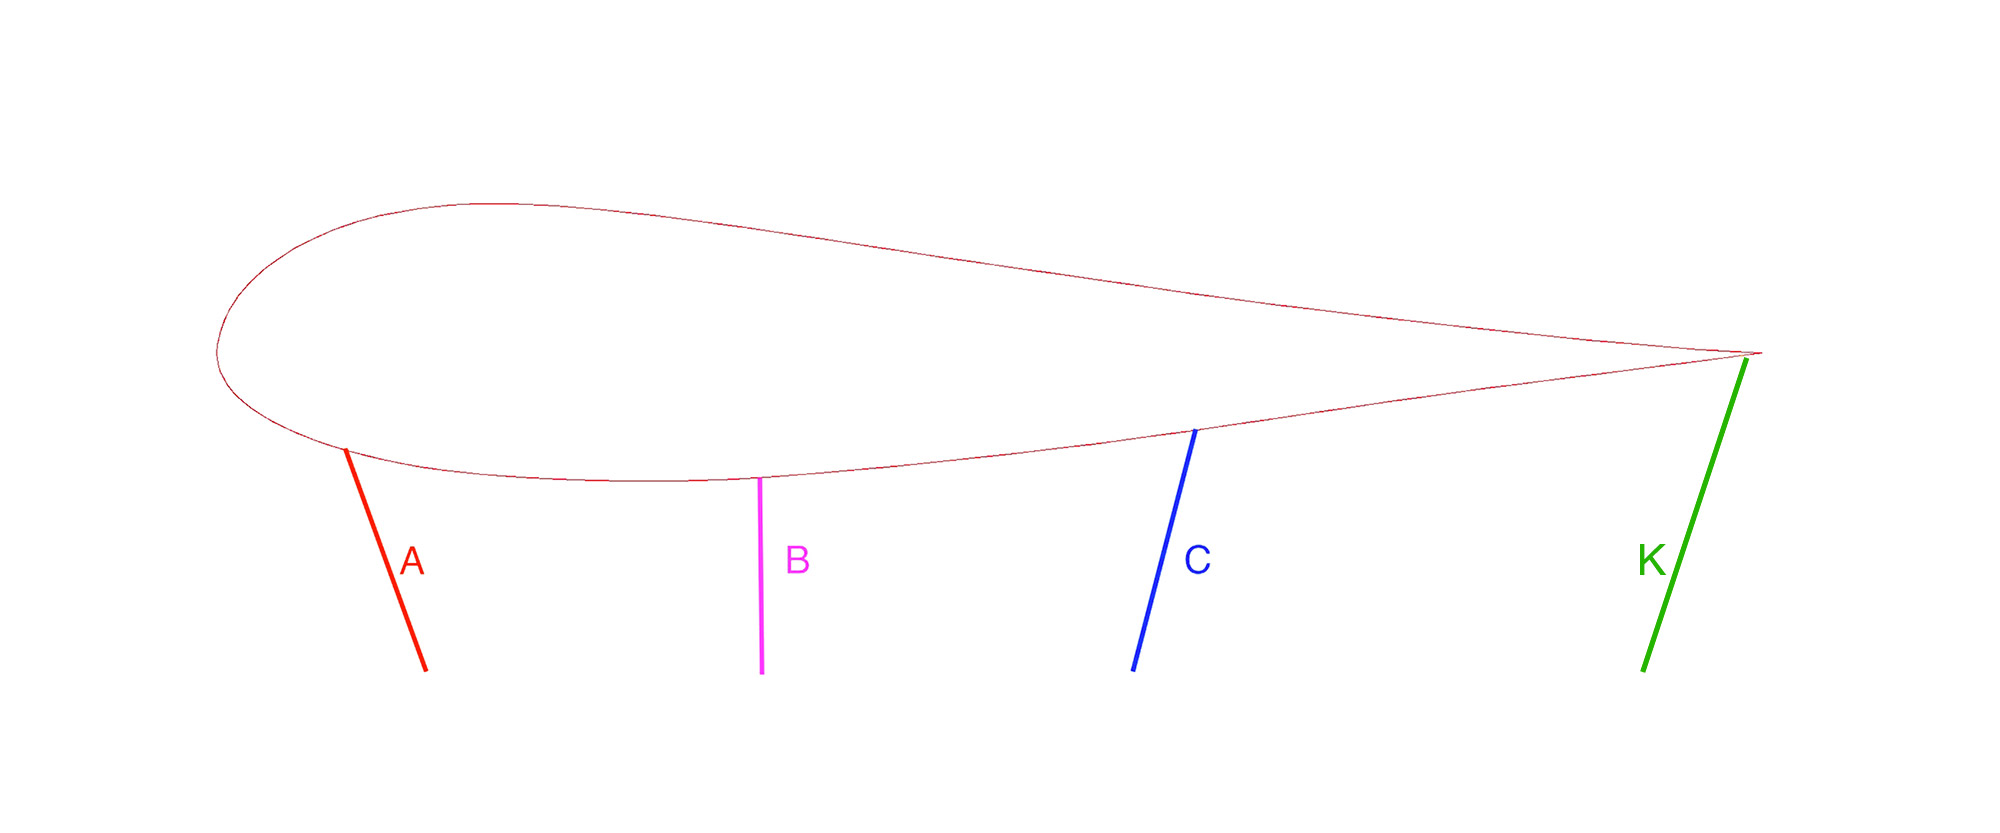
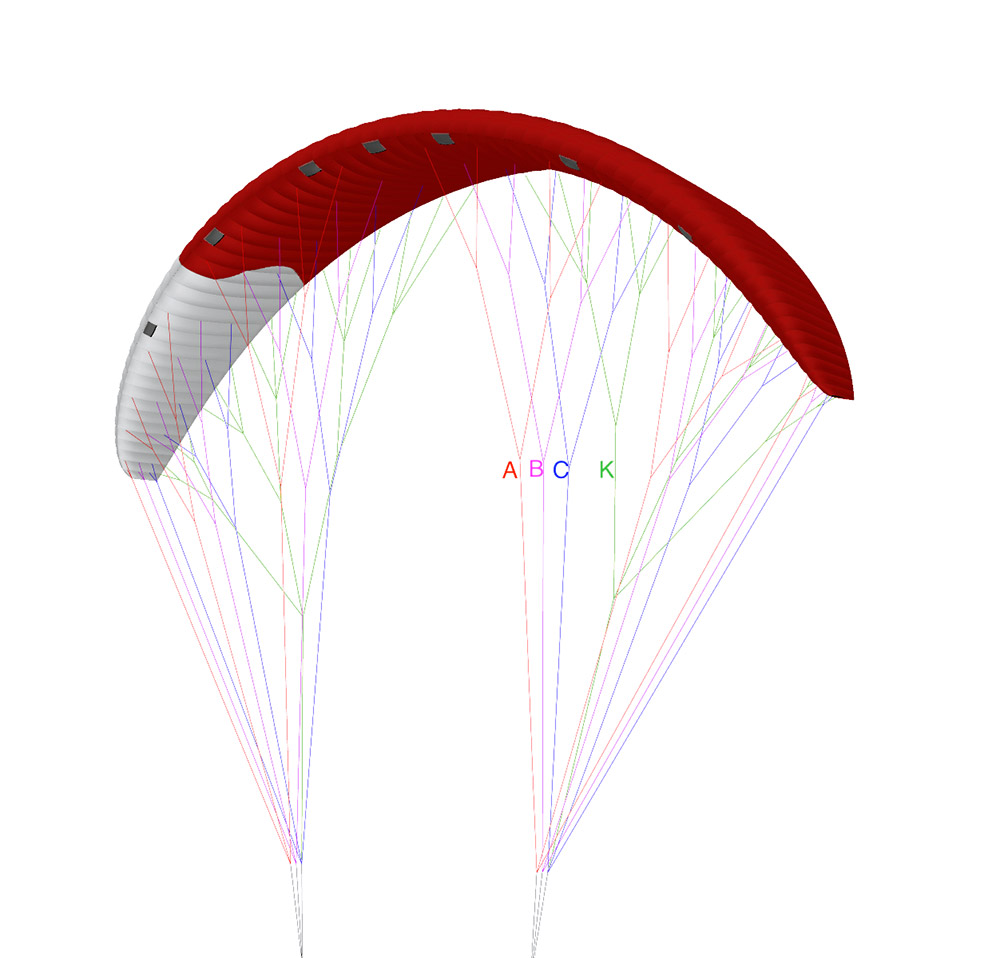
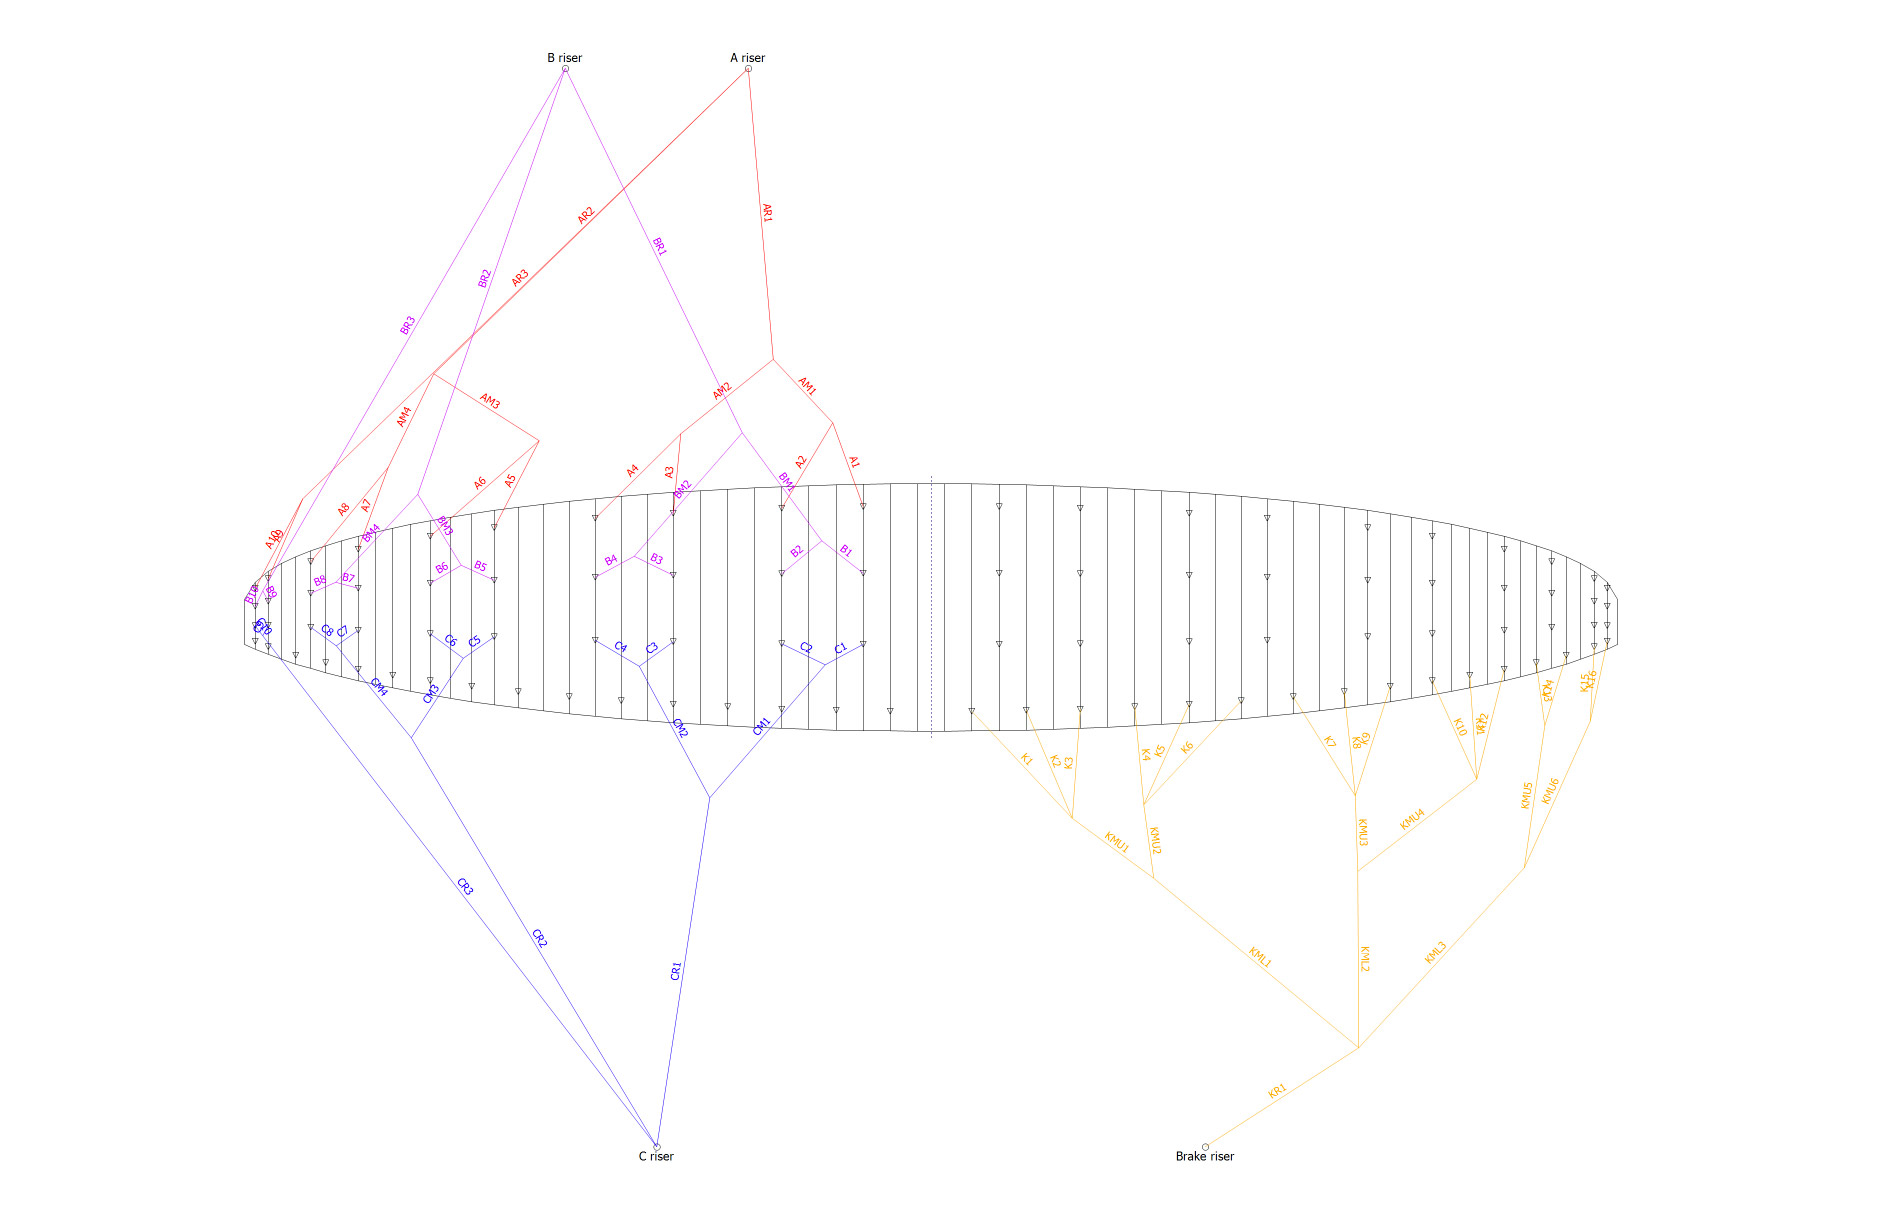
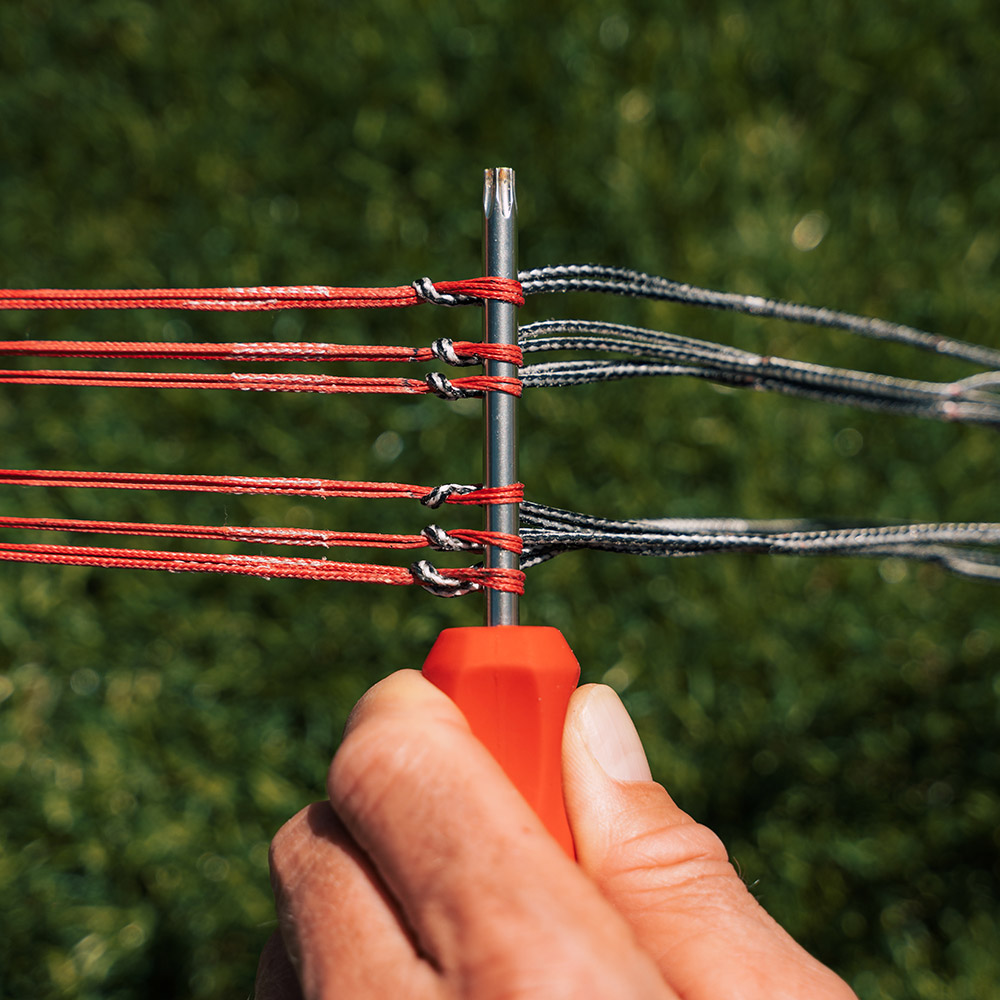
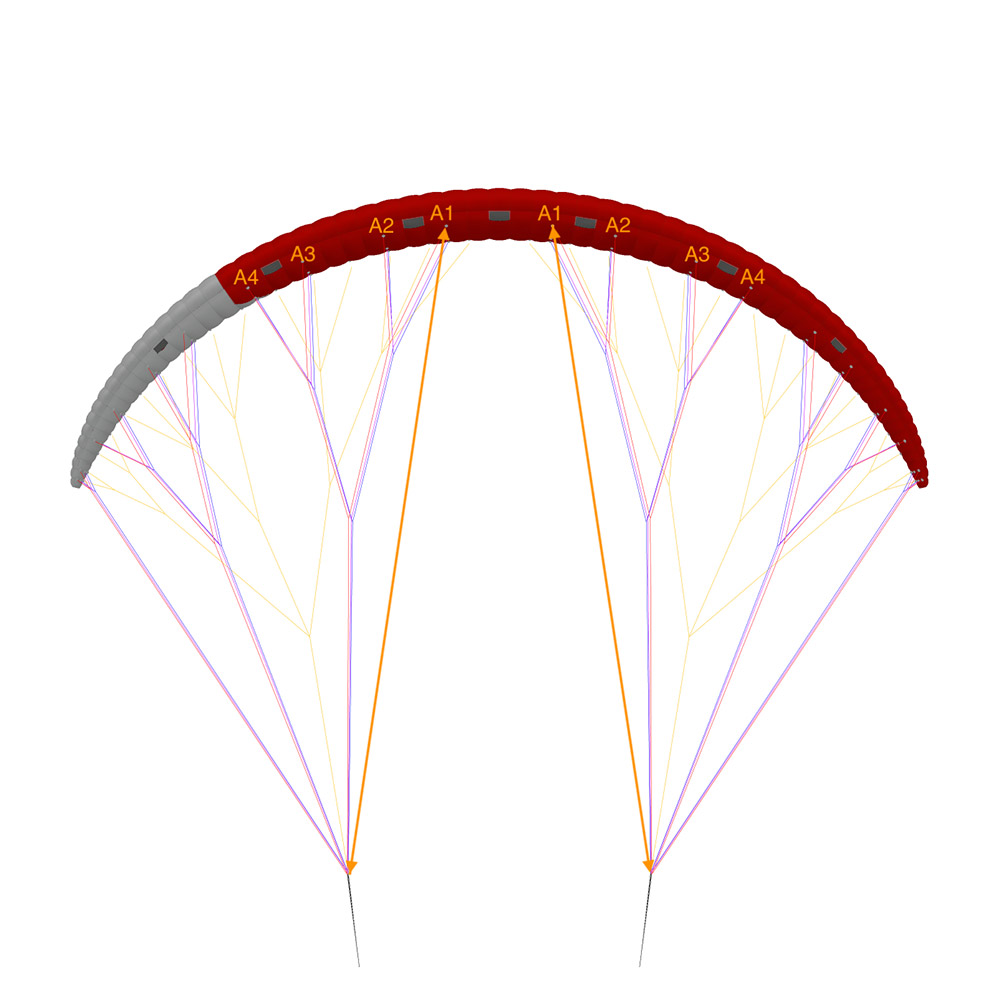
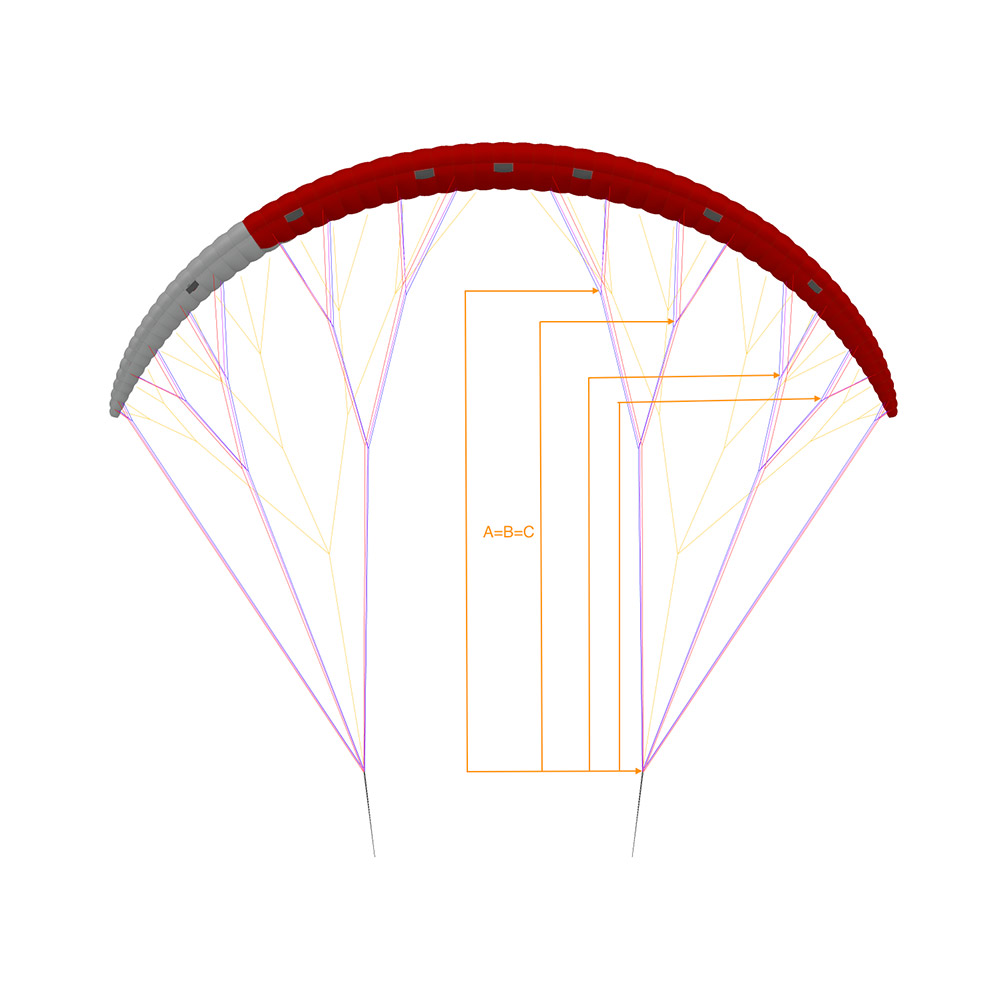
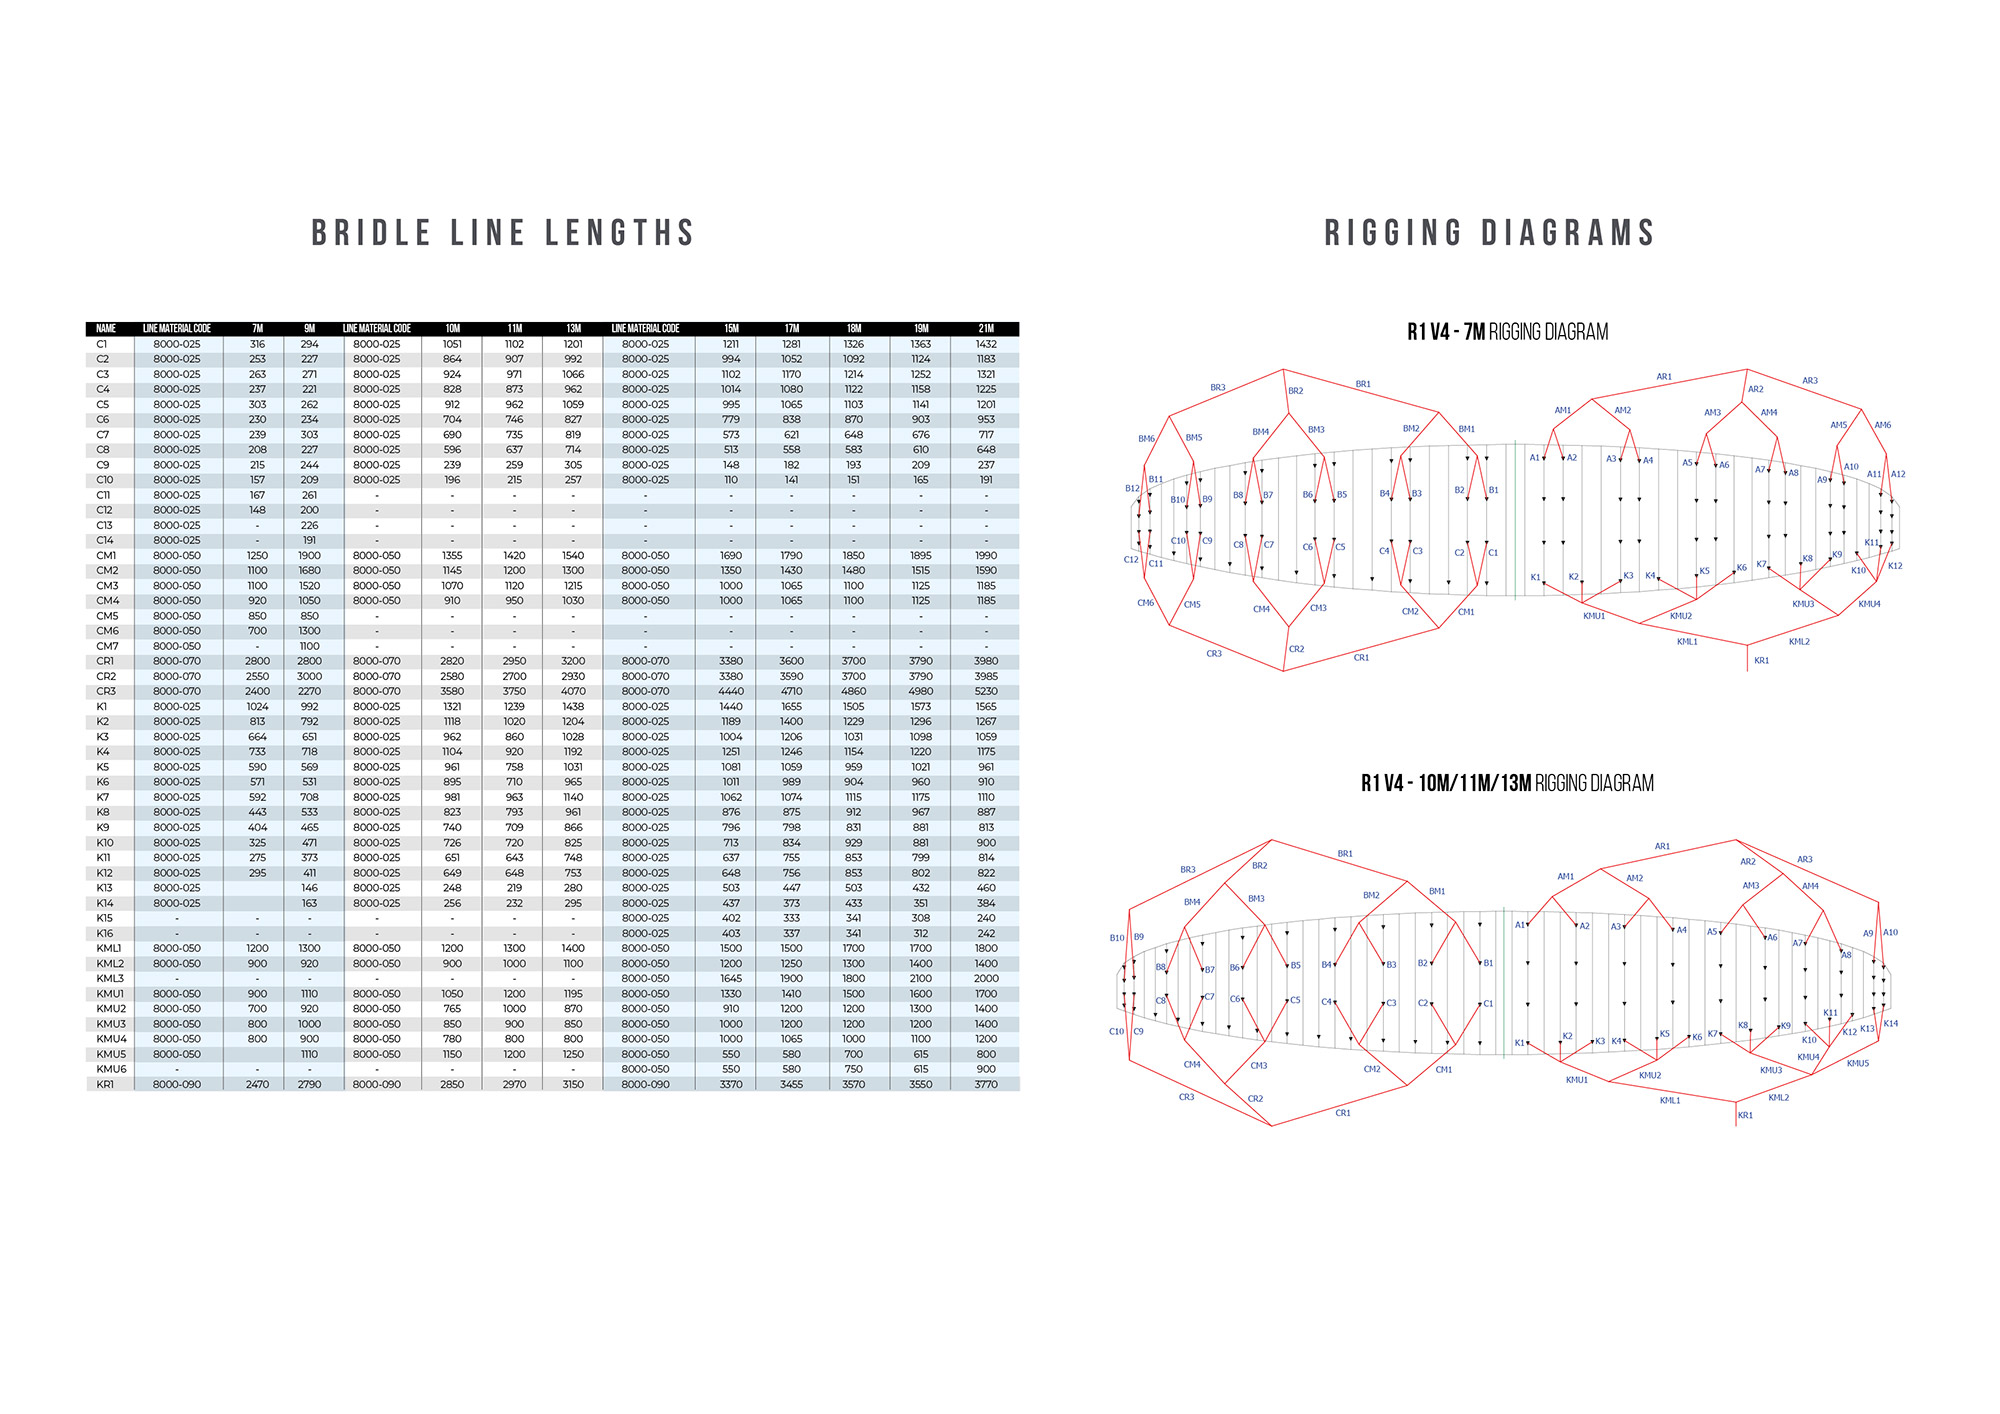
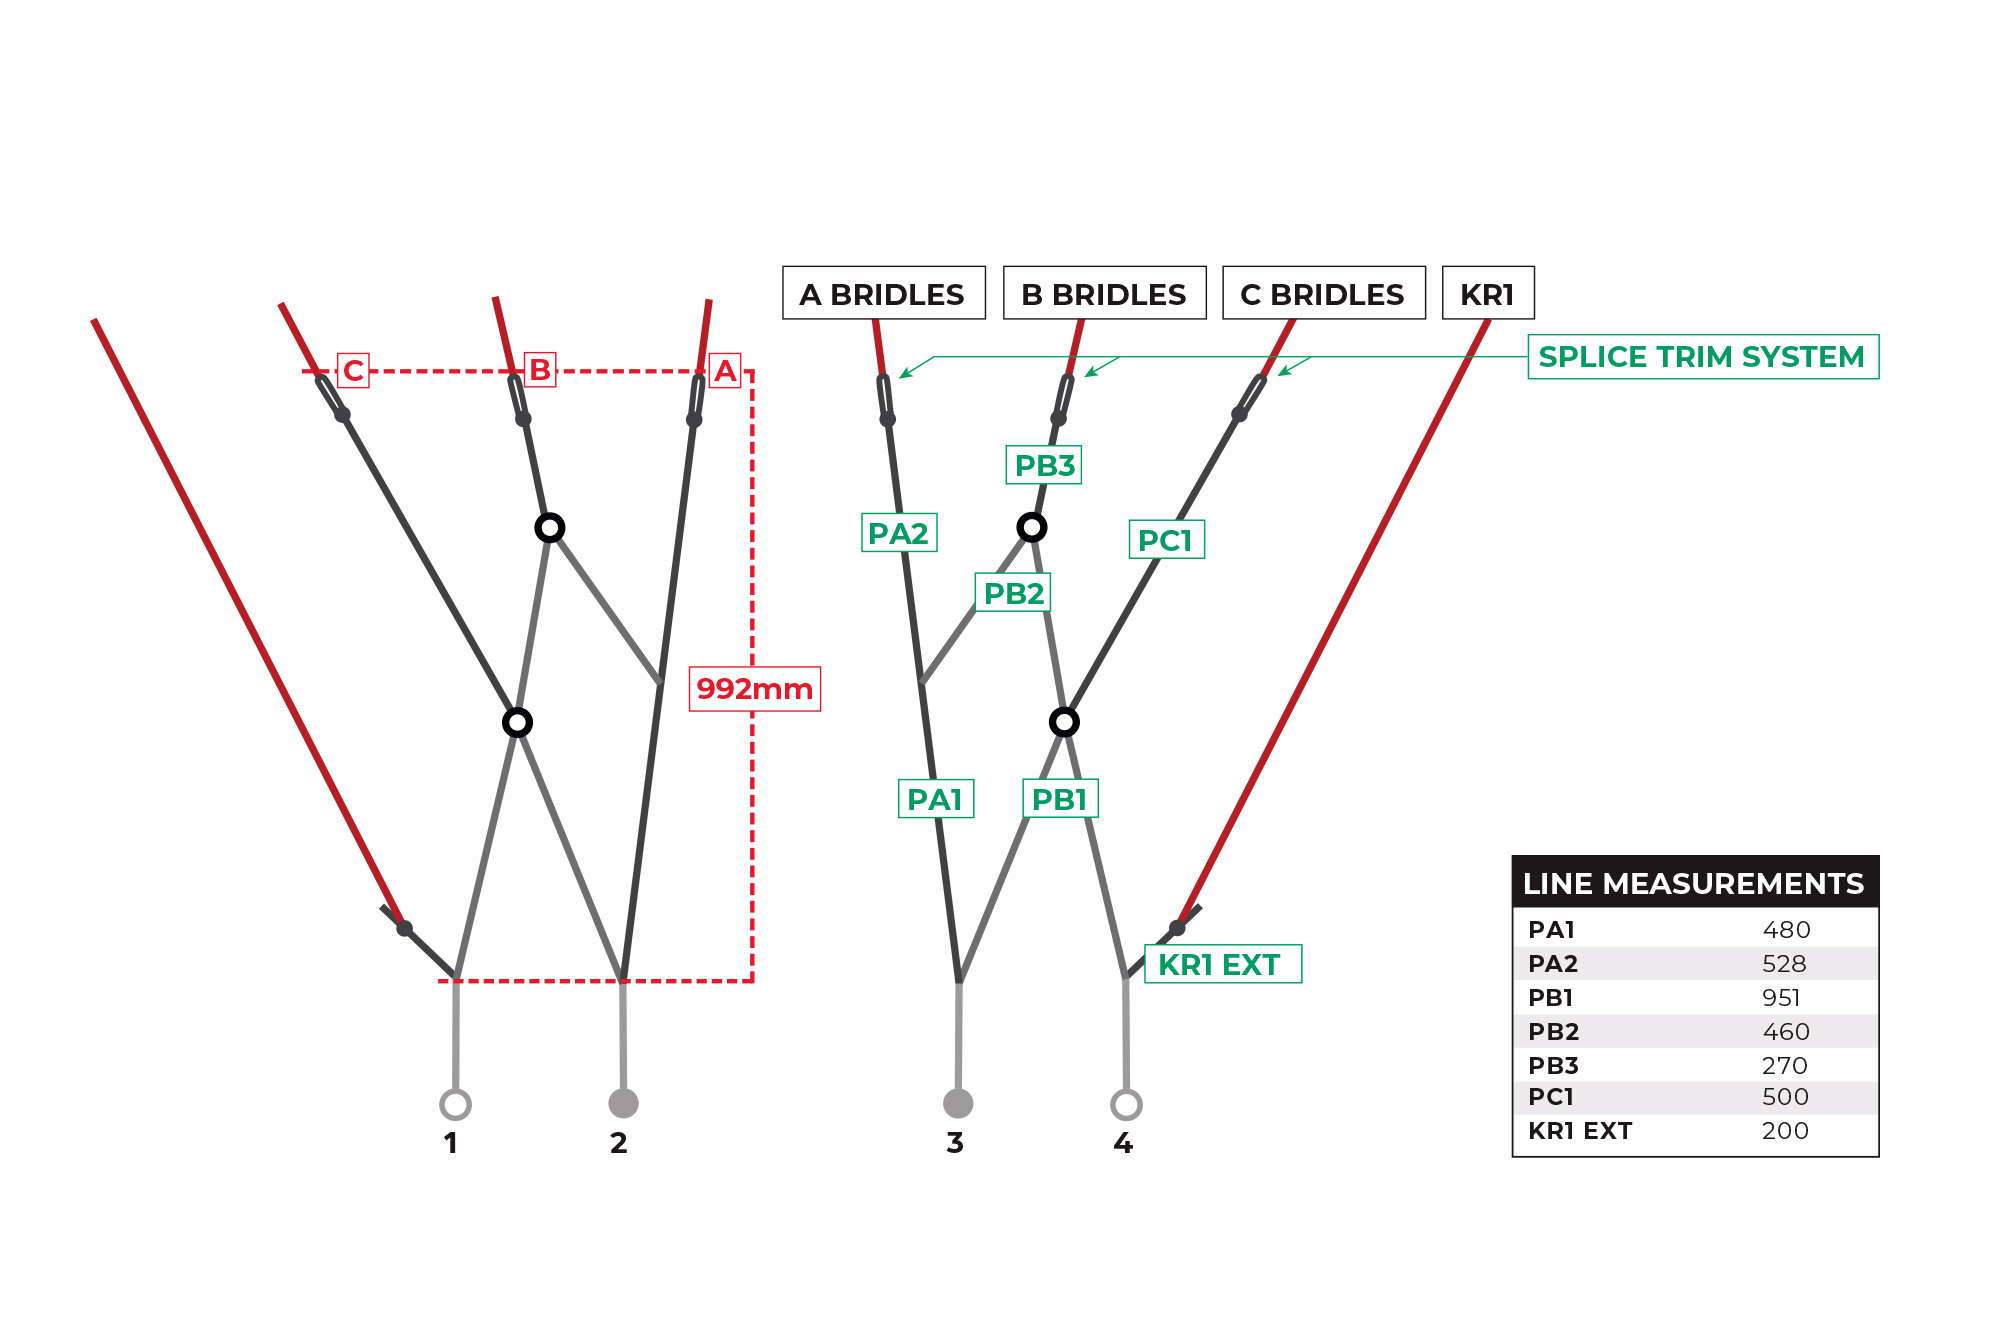
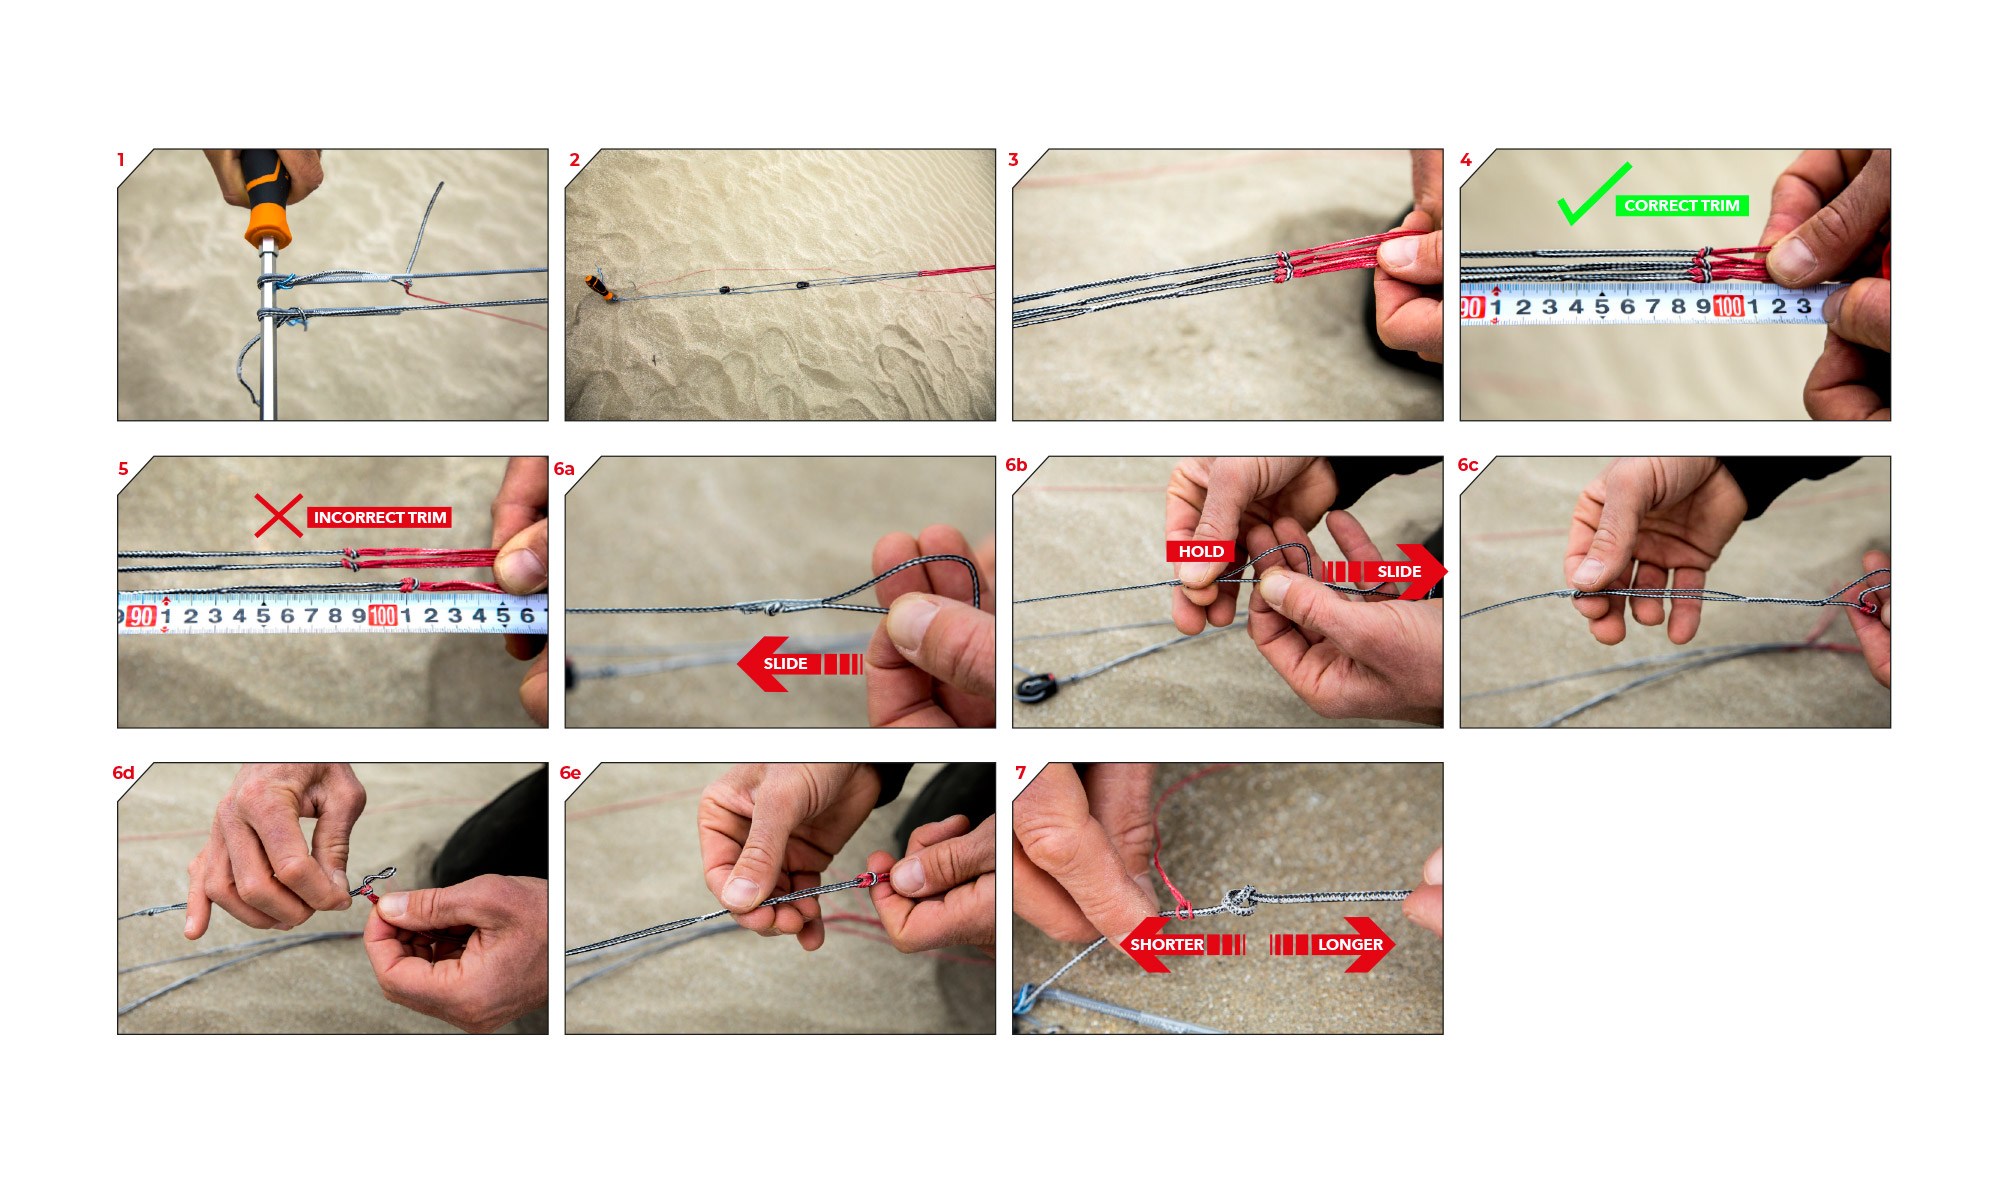
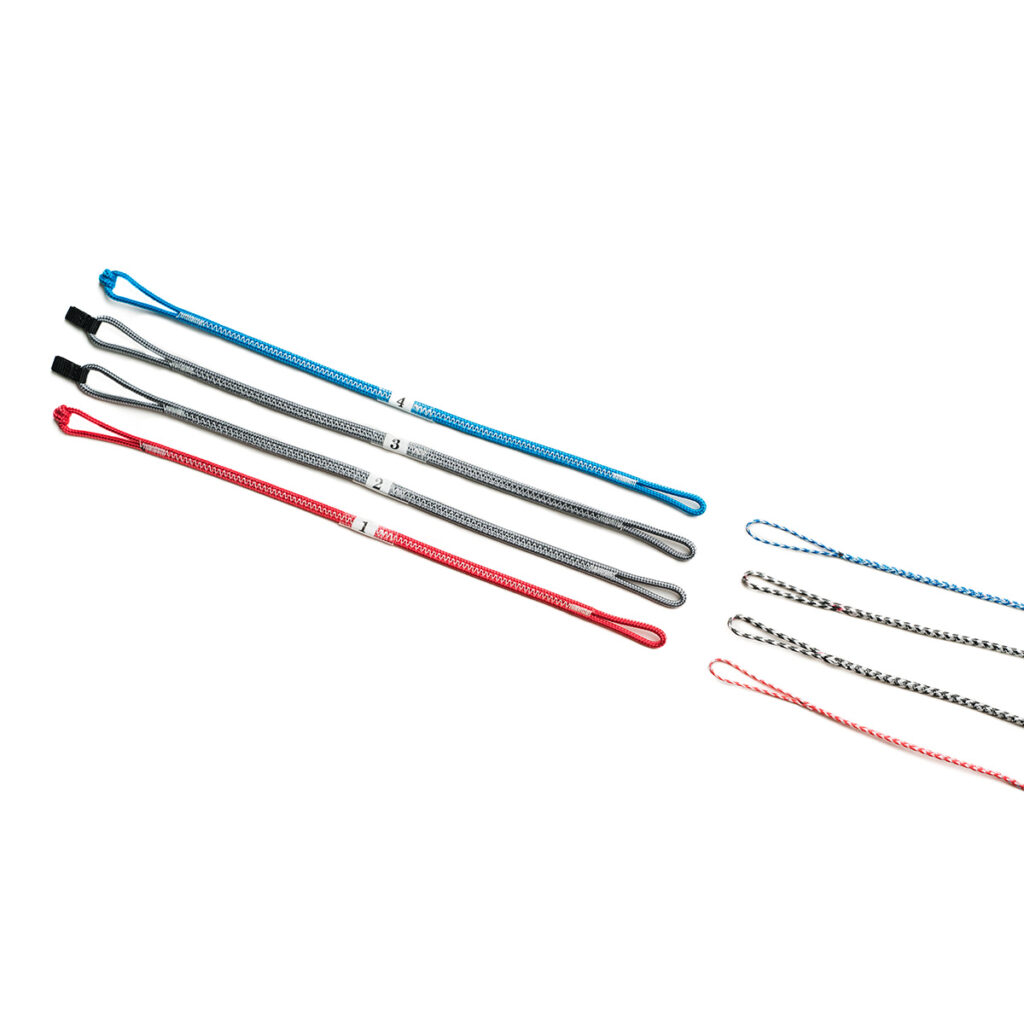
• The Speed System and Bridle lines will require maintenance just like any high performance equipment in racing sports – they must be checked after every 60 hours flying time and maintained in the correct trim or the kite will not perform as designed. Bridle Lines that are worn or not to factory specification (+ or – 15mm) must be replaced. Speed System lines that are worn must be replaced. If the Speed System lines are not worn but are not to factory specifications you must adjust back to factory spec. How To videos and a Bridle Check PDF with all measurements can be found here …
See Speed System & Bridle check pdf


 English